Why Would a Refrigerator Leak? Practical Troubleshooting Guide
An urgent guide to why would a refrigerator leak and how to diagnose common sources—blocked defrost drains, loose water lines, or damaged door seals. Includes step-by-step fixes and safety tips to prevent future leaks.

Most refrigerator leaks stem from a clogged defrost drain, a loose water line, or a damaged door seal. Start with the drain tube and drip pan, then check the ice maker line and door gaskets. If leaks persist, inspect for overfilling and level the unit before calling a professional.
Understanding why would a refrigerator leak
If you’re asking why would a refrigerator leak, you’re not alone. Most leaks come from a handful of common culprits rather than a dramatic failure inside the machine. According to How To Refrigerator, start with the easiest checks: the defrost drain, door gaskets, drip pan, and any water lines connected to an ice maker. By isolating the source, you can often stop the flow without expensive repairs. This section explains the typical patterns you’ll see and why they happen, so you can act quickly and safely.
Common sources of fridge leaks
Leaks can originate from several parts of the appliance. A blocked defrost drain is the most frequent cause; warm water should flow through the drain tube to the pan beneath the unit, not onto the floor. Damaged or loose door seals let humidity and condensate escape, especially if the doors aren’t closing fully. A cracked or loose water line feeding the ice maker can drip slowly. Finally, an overfull drip pan or an incorrect shelf setup can cause condensation to spill into the cabinet and pool under the fridge. Understanding these sources helps you prioritize your checks in the right order.
Safety first: what not to do when a fridge leaks
Always unplug the appliance before inspecting electrical components or water lines. Do not use strong cleaners on metal or plastic finishes near electrical parts. Avoid lifting the fridge by its base; moving it can strain connections. Keep a towel or bucket to catch water and prevent slip hazards. If you smell refrigerant or hear hissing, leave the area and call a professional immediately. Safety comes first when dealing with electrical appliances and cold refrigerants.
Diagnostic approach: a practical flow to identify the source
Adopt a simple, repeatable flow: observe where the water originates, trace back to possible entry points, and test each fix in turn. Start with obvious culprits: ice maker lines, door seals, and the defrost drain. If the leak stops after one fix, you’ve solved the problem; if not, move to the next potential cause. The goal is to isolate the source with minimal disruption and no guesswork.
Step-by-step fix for the most common causes
- Step 1: Clear a clogged defrost drain by flushing with hot water and a flexible pipe cleaner until clear. This often stops unexpected pooling. Tip: run a brief test cycle to confirm the drain is functioning.
- Step 2: Inspect the drip pan under the refrigerator; empty if needed and ensure it sits level so water drains properly. Tip: place a shallow tray beneath during testing to catch any overflow.
- Step 3: Check door seals for cracks or debris. Clean with mild soap and water, then inspect for air gaps when the door is closed. If damaged, replace the gasket or contact a professional. Tip: run your finger along the gasket to feel for gaps.
- Step 4: Inspect water lines feeding the ice maker for kinks, leaks, or loose fittings. Tighten connections and replace any cracked tubing. Tip: disconnect power before handling hoses to avoid shocks.
- Step 5: Re-check the drain path and drip pan after fixes. Refill with a small amount of water and observe if the flow returns to normal. Tip: mark the water level to measure changes.
If the leak persists after these steps, the issue may be more complex and require a professional diagnosis.
Prevention and maintenance tips to avoid leaks in the future
To reduce the chance of leaks reappearing, perform regular preventive checks. Keep the defrost drain clear by flushing it with hot water every few months. Inspect door seals for wear and clean them routinely to maintain an airtight seal. Ensure the fridge is level and not overloaded, which can cause excessive condensation. Finally, check water lines for wear and replace aging hoses before they fail. Small, proactive steps save bigger repairs.
When to call a professional and what to expect
If you have completed the basic checks and the leak continues, it’s time to call a professional. Signs that you should seek help include ongoing water pooling after defrost drain cleaning, refrigerant smell or hissing, or visible damage to water lines or electrical components. A technician will verify refrigerant integrity, test the defrost system, and check for hidden leaks in concealed tubing. Expect a diagnostic visit and a written estimate before any parts are replaced.
Real-world scenarios and practical checklists
In real homes, a common scene is water pooling near the fridge when the defrost drain is blocked. A quick check identifies the clogged drain path, followed by a flush and a pan reposition. Another frequent issue is a door seal that appears intact but leaks air, which can allow humidity to condense and drip. A quick gasket replacement often resolves this without replacing the entire door.
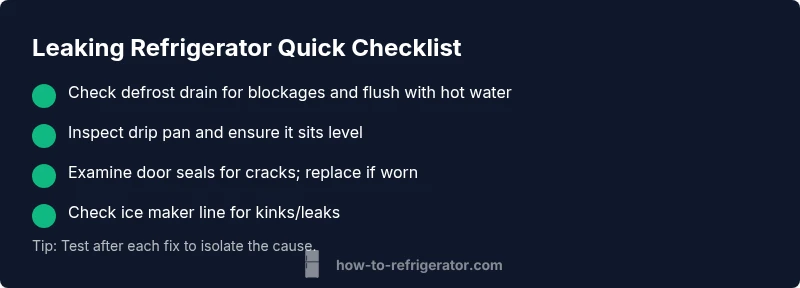
Quick maintenance checklist
- Inspect defrost drain for blockages and flush as needed
- Confirm drip pan is correctly positioned and not full
- Check door seals for wear; replace if necessary
- Inspect ice maker water line for kinks or leaks
- Ensure fridge is level and door closes fully
- Test the unit after 24 hours for persistence of leaks
Steps
Estimated time: 60-90 minutes
- 1
Shut off power and locate leak source
Unplug the fridge and locate where the water is entering the kitchen. Look for a trail of moisture that leads to the drain, drain pan, lines, or door seal. This first step prevents shocks and narrows your focus.
Tip: Always unplug before touching electrical components. - 2
Inspect defrost drain and pan
Access the defrost drain and check for a clog. Flush with hot water and a flexible brush until clear. Inspect the drip pan underneath for fullness or leaks and reposition if needed.
Tip: Keep towels handy to manage water during testing. - 3
Evaluate door seals
Carefully inspect door gaskets for cracks or folds. Clean with mild soap and water, dry completely, and test with a thin piece of paper to see if the seal is airtight.
Tip: If the seal is deteriorated, replacement is often inexpensive and effective. - 4
Check ice maker lines
Trace the water supply line to the ice maker and verify there are no kinks, leaks, or loose fittings. Tighten or replace as needed and ensure the line is properly secured.
Tip: Shut off water at the valve before disconnecting lines. - 5
Retest and monitor
Reconnect power and run the fridge for 24–48 hours, watching for any sign of new leaks. If leakage recurs, proceed to professional assistance.
Tip: Document where the leak originates for the technician.
Diagnosis: Water leaks from the refrigerator onto kitchen floor
Possible Causes
- highClogged defrost drain causing condensation to back up
- mediumLoose or cracked water line connections (drip or ice maker)
- lowMalpositioned drip pan or improper leveling
Fixes
- easyUnclog the defrost drain by flushing with hot water and a flexible pipe cleaner
- easyInspect and tighten or replace water line connections and hose fittings
- easyReposition the drip pan and level the fridge to ensure proper drainage
FAQ
Why is my refrigerator leaking water?
Leaks commonly come from a blocked defrost drain, loose water line, or damaged door seal. Start with those areas and test after each fix. If the leak continues, move to the next suspected source or contact a professional.
Leaks usually come from the defrost drain, water line, or door seal. Test each area step by step and call a pro if it keeps leaking.
Is a leaking fridge dangerous?
A leak is generally not dangerous by itself, but it can cause mold growth or electrical hazards if water contacts components. Unplug the unit and dry the area, then assess the cause or call a technician if unsure.
A leak isn't usually dangerous, but it can lead to mold or electrical risks. Unplug and dry the area, and get professional help if needed.
Can a defective defrost drain cause leaks?
Yes, a clogged or damaged defrost drain commonly causes condensate to pool and leak from the bottom. Clear the drain with hot water and if needed, replace the drain hose.
Definitely. A clogged defrost drain often causes leaks. Clear it and inspect the hose if needed.
Should I use bleach to fix fridge leaks?
Avoid using bleach or harsh cleaners near electrical components. Clean with mild soap and water, then dry thoroughly. Bleach can corrode parts and pose safety risks.
No, avoid bleach around the fridge. Use mild soap and water for cleaning.
When should I call a professional?
If leaks persist after addressing the defrost drain, door seals, and water lines, or if you suspect a refrigerant leak, call a qualified technician for diagnosis and repair.
If leaks keep happening after you try the basic fixes, or you suspect a refrigerant issue, call a pro.
Can overloading cause leaks?
Overloading can increase condensation and stress seals, but it’s less common as a direct leak cause. Ensure proper loading and airflow for best results.
Overloading can worsen condensation and seal wear, but it’s not usually a direct leak cause. Distribute loads evenly.
Watch Video
Top Takeaways
- Identify the source quickly using a safe, methodical flow
- Defrost drain and door seals are the top culprits
- Test fixes one at a time and document results
- Call a professional if leaks persist after basic fixes