Why Your Refrigerator Is Leaking Water (Troubleshooting Guide)
Learn how to diagnose and fix a refrigerator that leaks water. This How To Refrigerator guide covers common causes, a diagnostic flow, step-by-step repairs, safety tips, and prevention to stop leaks for good.

The most likely cause of a refrigerator leaking water is a clogged defrost drain that lets melted ice pool inside or spill onto the floor. Start with a quick fix: unplug the unit, locate the defrost drain behind the back panel or at the bottom, flush with warm water and a flexible wire, and empty the drain pan. If leaks persist, check door seals and the water supply line.
Why why refrigerator leaking water matters
Water leaks are a common fridge issue that can cause damage if ignored. If you’ve been Googling why refrigerator leaking water, this guide helps you diagnose quickly and safely. According to How To Refrigerator, most leaks stem from condensate management or a clogged defrost drain rather than a failing compressor. Understanding how moisture travels through modern fridges helps you identify the source and fix it fast. In this section you’ll learn how leaks present themselves, what tools you need, and a practical plan to restore proper operation without unnecessary costs. The goal is to empower homeowners to act confidently, protect floors and cupboards, and avoid expensive service calls. If you encounter refrigerant lines or electrical components leaking, stop immediately and call a professional. Regular maintenance is the best defense against repeat leaks, so you can enjoy quieter operation and reliable cooling.
Common sources of refrigerator leaks
Leaks can originate from several places, and not every drip means a major repair. The most frequent culprits include a blocked defrost drain, a leaking water line, faulty ice maker connections, or a condensation buildup from warm room temperatures meeting a cold interior. A leaky seal around the door can also cause condensation to form and appear as a leak. In many homes, a pooling pan underneath the unit collects melted water in normal operation; if the pan overfills or has a crack, you’ll see water on the floor. Caps, screws, and trim pieces can hide small gaps that let moisture escape. By understanding where leaks start, you can triage quickly and only move to more advanced fixes if necessary.
The defrost drain: the usual suspect
The defrost drain carries away water that melts during the fridge’s defrost cycle. If this drain becomes clogged with ice or debris, water can back up and escape into the refrigerator interior or onto the floor. Signs of a clogged defrost drain include frost buildup around the evaporator, a pool of water around the base of the fridge, or water seeping from the back panel. Clearing the drain is usually a straightforward step you can perform with warm water, a flexible wire, or a plumbing brush. After clearing, monitor for a few days to confirm the path remains open and the drain pan remains at the correct level. This is one of the most cost-effective fixes you can attempt before calling a professional.
Less obvious culprits: doors, level, and condensate
Condensation can form when a fridge is not level or when door gaskets are worn, letting warm room air seep into the cabinet. Condensation will often appear as water on shelves or dripping from the door seals rather than from the drain. Level the unit by adjusting the front feet and ensuring the door closes firmly with even spacing. Check the door seals for cracks or stiffness; a poor seal can cause extra moisture to accumulate inside. In addition, some models have condensate collectors or small drainage channels that can become blocked by dust or food particles; cleaning these channels helps prevent recurring leaks.
How to diagnose leaks: a practical flow
Approach diagnosing leaks as a step-by-step process. Start by observing where the water is appearing: inside the crisper drawer, under the fridge, or on the floor near the base. Next, check the defrost drain for clear passage; inspect the drain pan for cracks or overflow; and verify that the refrigeration coils are free of frost. If water appears only after the defrost cycle, a clogged drain is likely. If it appears constantly, the door seal or level alignment may be the issue. Finally, inspect the water line if your fridge has a water dispenser or ice maker. A leak here often points to loose fittings or a damaged line.
Prevention and maintenance to avoid future leaks
Preventing leaks starts with regular checks and a few simple habits. Periodically inspect door seals and replace worn gaskets to maintain a tight seal. Clean the defrost drain and its channel every 6–12 months to prevent ice buildup. Keep the drain pan clean and ensure it sits properly under the fridge so moisture can drain away instead of accumulating. Maintain a level appliance to prevent condensate from pooling in unexpected places. Finally, replace hoses or water lines as recommended by the manufacturer and install a shield or tray if you have a high-traffic kitchen where the fridge is frequently bumped. Consistent maintenance minimizes the chance of leaks and extends the life of your unit.
Steps
Estimated time: 60-75 minutes
- 1
Power down and prep safely
Unplug the refrigerator and move items away from the base area. Place towels and a shallow container to catch drips. This step reduces the risk of electric shock and keeps your space clean while you work.
Tip: Always unplug before handling electrical components or input lines. - 2
Identify the likely source of the leak
Check inside for pooling water and look at the back panel near the evaporator for frost buildup. Inspect the drain pan underneath and the water line connections. Identifying the source early saves time and prevents unnecessary part replacements.
Tip: Use a flashlight to view hard-to-see areas and take photos for reference. - 3
Clear the defrost drain
Flush the defrost drain with warm water from the top to clear ice or debris. If needed, insert a flexible wire or a plastic pipe cleaner to dislodge buildup. Rinse until the water runs clear and the path is open.
Tip: Do not force tape or metal objects into the drain; this can damage plastic components. - 4
Inspect the drain pan and tray
Slide out the drain pan and inspect for cracks or holes. Empty any collected water and clean the pan. Reposition the pan securely to ensure it catches moisture correctly.
Tip: Place a towel beneath the pan while you work to catch any remaining drips. - 5
Check seals and level
Examine door gaskets for cracks and ensure the refrigerator sits level. A tilted unit can cause moisture to pool and travel toward the drain. Adjust feet as needed and re-test by closing the door firmly.
Tip: A small adjustment can stop a lot of condensate issues; recheck after a short test run. - 6
Inspect water line and ice maker connections
If you have a water dispenser or ice maker, check the supply line for kinks, cracks, or loose fittings. Tighten or replace as needed. Reconnect, turn the water back on, and monitor for leaks.
Tip: If you are uncomfortable with plumbing, contact a professional to avoid leaks or water damage.
Diagnosis: Water leaking onto floor or pooling inside the fridge
Possible Causes
- highClogged defrost drain
- mediumFridge not level causing condensate overflow
- mediumLeaking water line or ice maker tubing
- lowOverflowing drain pan due to overfill or melted ice
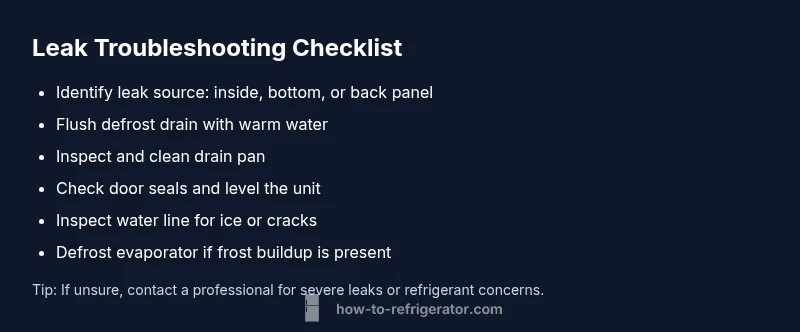
Fixes
- easyUnclog defrost drain with warm water and a flexible wire; flush until clear
- easyLevel the refrigerator using adjustable feet; ensure the unit is stable
- easyInspect water supply line and connections; tighten fittings or replace damaged tubing
- mediumDefrost the evaporator if there is heavy frost buildup
FAQ
Why is water dripping from the bottom of my refrigerator?
Water dripping from the bottom is often caused by a clogged defrost drain or an overflowing drain pan. Check these components first and clear any blockage. If water continues to drip, inspect the door seals for air leaks.
Water dripping from the bottom usually means a clogged defrost drain or an overflowing drain pan; check these areas first.
Could an ice maker cause leaks?
Yes. A loose or cracked water line or bad connection to the ice maker can leak water. Inspect the line for cracks and tighten fittings or replace the line if needed.
An ice maker can leak if the water line is loose or cracked; inspect and tighten or replace the line.
What maintenance prevents leaks?
Regularly clean the defrost drain, inspect door seals, and keep the drain pan clean. Ensure the fridge is level and that water lines are properly connected.
Regular maintenance like cleaning the defrost drain and checking seals helps prevent leaks.
When should I call a professional?
If you detect refrigerant smells, electrical issues, persistent frost buildup, or you feel unsure about handling water lines, contact a professional repair service.
If you smell refrigerant or see electrical issues, call a pro.
Can a leaking fridge cause property damage?
Yes. Prolonged leaks can cause mold and water damage. Mop up promptly and fix the leak to protect floors and cabinets.
Yes, leaks can cause water damage, so fix them quickly and dry the area.
Watch Video
Top Takeaways
- Start with the defrost drain; it’s the most common cause.
- Inspect door seals and level to prevent condensation.
- Flush drains safely with warm water; avoid hot or boiling water.
- If unsure or the leak persists, call a professional for safety.