Why Is My Refrigerator Leaking Water From Underneath? A Step‑by‑Step Troubleshooting Guide
Urgent, practical guide to diagnose why your refrigerator leaks water from underneath. Learn common causes, safe troubleshooting steps, and when to call a pro.

The most common cause is a blocked defrost drain or freezer-side ice buildup directing water to leak under the fridge. Quick fix: unplug the unit, locate the defrost drain, clear the blockage with hot water and a pipe cleaner, and check the drain pan. If the leak persists, inspect the door seals and condensate line.
Quick checks before you dive in
Before you reach for tools, confirm that what you're seeing is water from a drain or condensation and not something more serious like a refrigerant leak or coolant. Clear puddles can form if the freezer defrost drain is blocked, if the condensate line is kinked, or if the drain pan under the fridge is cracked. Start with simple visual checks: Is the puddle near the front, the back, or the bottom edge? Do you notice frost buildup in the freezer? Have you recently moved the fridge or changed the door seal? These clues help narrow the cause quickly and reduce unnecessary disassembly. Remember to unplug the unit before touching any internal parts and keep children and pets away from the work area. This initial scan will help you answer the question: why is my refrigerator leaking water from underneath, and what is the simplest fix to try first?
Common causes of water leaking from underneath
Water pooling under the fridge almost always points to the drainage or condensation path. The most frequent culprit is a blocked defrost drain, especially in frost-prone models; warm water can back up and spill into the drain pan, leaking out the bottom. A damaged or loose drain pan, a kinked condensate hose, or a misaligned drip tray can also redirect water. If the fridge has an ice maker, a leaking supply line or valve can send water down the back or underside. Condensation can occur if the seals around the doors are dirty or cracked, especially when the kitchen is humid. Finally, extreme frost buildup on the evaporator can overwhelm the pan and overflow. Understanding these routes helps you pick the right fix rather than guessing.
How the defrost drain works and why it gets blocked
Most frost-free refrigerators rely on a defrost cycle to melt ice from the evaporator. The meltwater should flow through a narrow defrost drain into a pan under the unit. If the drain is clogged by mineral buildup, ice chunks, or debris, water backs up and escapes along the bottom edge. Slow drainage can also be caused by a misaligned drain tube or a cracked drain nipple. Recognizing the normal drainage path helps you spot deviations quickly and plan an effective fix.
How to locate and clear a blocked defrost drain safely
Begin by unplugging the fridge and pulling it away from the wall to access the back panel. Remove the rear access panel if your model has one, or locate the defrost drain tube near the evaporator inside the freezer compartment. Use warm water, a mild pipe-cleaning brush, or a small flexible wire to dislodge debris. Pour water slowly through the drain to confirm it flows freely into the tray. Wipe away any standing water and recheck for leaks after reassembly. Do not use sharp tools that could puncture the drain tube. If you see persistent blockage or frost buildup, the defrost system may need professional attention. Remember: safety first—kill power and avoid contact with sharp edges.
Inspecting the drain pan and condensate path for leaks
Even when the drain itself is clear, a cracked or displaced drain pan can spill water as it heats up or vibrates during operation. Inspect the pan under the fridge for cracks and ensure it sits evenly. Some models require removing the front grille or toe-kick to access the pan; others expose it from the back. Check that the condensate path from the drain to the pan is unobstructed and that the pan’s mounting is secure. If the pan is damaged, replacement is usually straightforward and inexpensive, but exact part numbers vary by model.
Checking water supply lines, ice maker, and door seals
If your fridge has a water dispenser or ice maker, a loose or leaking supply line can channel water down the back or underneath. Inspect hoses and fittings for cracks, kinks, or loose connections; tighten or replace as needed. Dirty or swollen door seals can cause excess condensation, especially in high-humidity kitchens. Clean seals with warm, soapy water and inspect for cracks; replace if you see any pliable cracks or gaps. Finally, verify that the drip tray under the ice maker is in place and not overflowing. These checks help you address leak sources that aren’t drains.
When to call a professional and prevention tips
If you’ve drained and cleared the defrost path, checked hoses, and still see water pooling underneath, it’s time to contact a professional. Leaks that persist after standard maintenance may indicate a cracked pan, evaporator heater failure, or refrigerant-related issue that requires specialized tools. To prevent future leaks, schedule regular defrost-drain cleanouts, keep door seals clean and undamaged, and avoid overfilling the fridge, which can increase condensation. Regular maintenance reduces the odds of a sudden water leakage and helps protect your kitchen floors.
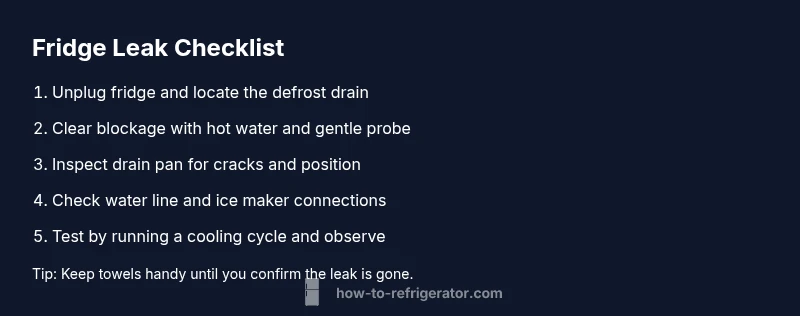
Steps
Estimated time: 30-60 minutes
- 1
Power off and unplug the fridge
Unplug the appliance and move it away from the wall to access the back or bottom components. This reduces risk of shock while you inspect drains, hoses, and the pan. Take photos of connections before you loosen anything for easier reassembly.
Tip: Use a flashlight and take your time to avoid unplugging the wrong cord. - 2
Access and inspect the defrost drain
Locate the defrost drain behind the back panel or inside the freezer cavity. Use hot water and a flexible probe to clear bockages. Refill with warm water to test flow; you should see the water drain into the pan.
Tip: Do not use force; if debris resists, pause and reassess to avoid puncturing the tube. - 3
Inspect the drain pan and hose
Check the pan for cracks and ensure it sits level. Trace the condensate hose path to confirm there are no kinks or disconnections. If you spot a crack, replace the pan; if a hose is damaged, replace with OEM parts.
Tip: Keep a towel handy to catch any residual water. - 4
Check water line and ice maker connections
If your model has an ice maker, inspect the shut-off valve and supply line for leaks or loose fittings. Tighten or replace parts as needed. Run a short ice-making cycle to check for continued leaks.
Tip: Turn off water supply to avoid more leaks during inspection. - 5
Reassemble and test
Secure all panels, plug the fridge back in, and push it back into place. Monitor for a few hours and check for new leaks. If moisture returns, document the symptoms and consider professional service.
Tip: Keep the area dry during first 24 hours to spot new leaks quickly.
Diagnosis: Water pooling underneath refrigerator after regular operation
Possible Causes
- highBlocked or slow defrost drain causing backflow into the drain pan
- mediumDamaged, displaced, or cracked drain pan
- lowLeaking water inlet valve or supply line (for ice maker/water dispenser)
- lowDirty or damaged door seals causing excess condensation
Fixes
- easyUnclog defrost drain with hot water and a narrow probe; verify flow into the pan
- easyInspect drain pan for cracks or misalignment and reseat or replace as needed
- mediumCheck water inlet valve and supply line for leaks and tighten/replace
- easyClean or replace cracked door seals to reduce condensation
FAQ
What causes water to leak from under a fridge?
Water under the fridge is usually from a blocked defrost drain, a faulty drain pan, or a leaking water line related to an ice maker. Condensation due to dirty door seals can also contribute.
Leaks underneath are typically caused by a blocked defrost drain, a faulty drain pan, or a leaking water line.
Is a leak from under the fridge dangerous?
The leak itself is not typically dangerous, but it can cause water damage and mold growth if not addressed promptly. Address promptly and keep area dry.
It's usually not dangerous, but it can cause water damage or mold if ignored.
Should I unplug the fridge to inspect?
Yes. Unplug before inspecting any internal parts or removing panels to reduce the risk of shock and electrical shorts.
Yes, unplug the fridge before inspecting to stay safe.
When should I call a professional?
If you cannot locate or clear the drain, or if you notice refrigerant smells, hissing, or obvious refrigerant leaks, contact a technician. Refrigerant handling requires specialized equipment.
Call a professional if you can't locate the leak source or if you suspect refrigerant issues.
How can I prevent future leaks?
Regularly clear the defrost drain, clean door seals, and ensure the drain pan is intact and properly positioned. Avoid overfilling and keep the area around the fridge dry.
Prevent leaks by cleaning drains and seals regularly and keeping the area dry.
Watch Video
Top Takeaways
- Identify whether the leak is drain-related or from a supply line.
- Clear blockages in the defrost drain before replacing parts.
- Inspect the drain pan and seals; replace damaged components.
- Call a pro if leaks persist after basic maintenance.