Why Is My Refrigerator Leaking Water? Quick Troubleshooting Guide
Urgent guide to fix refrigerator water leaks. Learn common causes, quick checks, step-by-step fixes, and prevention tips to stop puddles and protect your home.

Most leaks come from a blocked defrost drain or a loose water line. Quick steps: 1) locate and clear the defrost drain with warm water; 2) inspect the drain pan for overflow and wipe; 3) check the water inlet valve and tubing for leaks and tighten connections. If it persists, contact a pro.
Common Causes of Water Leaks in Refrigerators
If you recently noticed a puddle on the kitchen floor or dampness around the bottom drawer, the root cause is almost always one of a small handful of issues. According to How To Refrigerator, the most common reason homeowners experience a fridge leak is a blocked defrost drain. When frost builds up in the evaporator coil, water should melt and travel through a narrow drain tube into a drain pan beneath the unit. If that path gets clogged with ice, mineral buildup, or debris, condensate backs up and drips out onto the floor or into the crisper.
Another frequent culprit is a loose or cracked water line connected to the ice maker or water dispenser. A small leak here may not always be obvious, but over time it can create a steady drip or a puddle at the fridge’s base. In some cases, a cracked drain pan or a misaligned drain pan can overflow when the fridge runs, especially if the pan sits too high or is damaged.
Beyond these, doors that don’t seal properly can cause excess condensation, especially in humid conditions. Warped or dirty door gaskets permit warm room air to enter when the door is closed, triggering frost and excess meltwater. Finally, a failed defrost heater or thermostat can lead to abnormal frosting, which eventually manifests as water leaks.
At this stage, you should observe whether the water is coming from the back of the unit, under the crisper drawer, or toward the doors. The location often points to the likely cause: back-of-unit leaks point to defrost drain or pan issues; door-leak condensation tends to appear on doors or near the gasket. In any case, address safety first, unplug if you need to move the fridge, and begin with the simplest checks before dismantling components. The How To Refrigerator team emphasizes systematic diagnosis to avoid unnecessary parts replacement.
This guide uses a practical, homeowner-friendly approach to narrow down the culprit quickly and safely. Because leaks can indicate more than one issue, you’ll benefit from following a logical flow and documenting what you find as you go. The goal is to stop water damage and restore proper cooling without replacing parts you don’t need. According to How To Refrigerator analysis, 2026 shows most leaks stem from drainage or inlet issues, so starting there saves time and money.
Symptoms and Signs to Look For
Water leaks can show up in several ways. A puddle on the floor or a damp spot under the fridge is the most obvious sign, but you may also notice water around the vegetable drawer or frost buildup on the back wall. If your ice maker is producing smaller ice or if you hear a constant dripping sound, those are additional clues. Condensation on door gaskets, a slurry of water around the freezer seal, or an unexpectedly milky water line are other indicators that a leak is present. Timely recognition matters because prolonged moisture can cause mold, affect inside humidity, and shorten appliance life. In the early stages, track the source: is the water coming from the back, from the bottom front, or from the ice/water dispenser? Each location narrows the possible causes and speeds up the fix. The How To Refrigerator team notes that early detection dramatically reduces the risk of water damage and costly repairs.
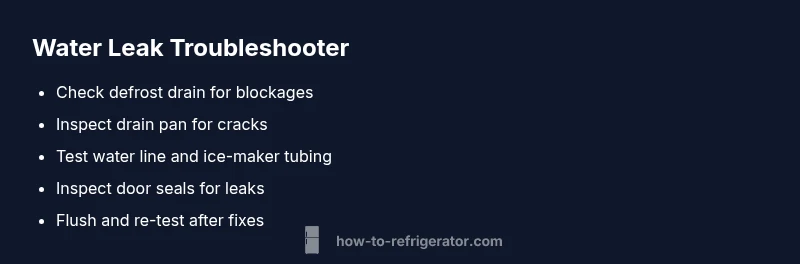
Quick Diagnostic Quick-Check (at a glance)
- Check the defrost drain: is there visible ice or a plugged opening? A blocked drain is the top offender.
- Inspect the drain pan under the fridge for cracks or overflow.
- Inspect the water inlet valve at the back or the line feeding the ice maker for leaks or loose connections.
- Look at the door gaskets for gaps or tears; clean and reseal if needed.
- Check for frost buildup on coils behind the rear panel; excessive frost can lead to abnormal melting.
If you identify a likely cause but aren’t sure how to fix it, it’s time to consult the full diagnostic flow below and which solutions apply to your model. Remember to unplug or power down before poking around to avoid shocks.
How to Diagnose the Defrost Drain and Drain Pan
Many leaks originate from the condensate drain that carries melted frost to the pan beneath the refrigerator. A blocked drain forces water to spill into the refrigerator interior or out the front. Start by locating the drain tube, usually near the back or bottom of the unit, and flush it with warm water. If the water won’t drain, look for ice plug, ice buildup, or mineral deposits. Use a flexible brush or pipe cleaner to clear debris if needed. After clearing, pour a small amount of warm water into the drain to confirm flow.
Next, inspect the drain pan under the fridge. If you see cracks, chips, or a pan that sits too high, replace or reposition it. A pan that’s prematurely full indicates ongoing drainage issues and may require correcting the pan’s level. Clean the pan carefully and dry it before replacing. Finally, ensure the drain tube is connected securely to the pan and that there are no kinks in the line.
Diagnosing Other Causes (condensation, leaks at water line, door seals)
If the defrost drain checks out, turn to the other likely culprits. Condensation occurs when warm room air enters the fridge due to a gasket leak or poor seal. Clean the door gaskets with mild soap and water, then inspect for tears or deformities. If the seal is damaged, consider replacing the gasket or resealing with silicone.
Next, inspect the water line and shut-off valve for the ice maker. A loose connector or a small crack in the tubing can drip water into the base or onto the floor. Tighten connections and replace damaged tubing as needed. If you find a leaking water line behind the fridge, consider turning off the water supply at the valve and replacing the line or valve if the leak persists.
Safety, Warnings, and When to Call a Pro
Safety should be your priority. Unplug the fridge before reaching behind it, and never work with electrical components around standing water. If you smell burning plastic or hear buzzing, stop and unplug immediately. Do not run the fridge with a damaged power cord or damaged plug. Some leaks, such as a cracked drain pan or a corroded water inlet valve, require professional replacement. If you’re unsure or the leak persists after basic checks, contact a certified appliance technician. The How To Refrigerator team recommends scheduling a service call if: you see refrigerant signs, you’re unsure of the correct valve sizes, or you’re dealing with a persistent leak that won’t stop after clearing the drain.
Prevention Tips to Avoid Future Leaks
Proactive maintenance reduces leaks and extends fridge life. Clean the condenser coils at least twice a year to improve efficiency and reduce moisture buildup. Inspect door gaskets regularly for cracks and clean the seals to maintain a tight seal. Use a shallow pan under the drain pan to catch occasional overflow and keep the area dry. Don’t ignore frost buildup: if you notice frequent icing on the back wall, it could signal a blocked defrost system that needs attention. Finally, ensure the water line connections are tight after any service or ice maker upgrade. With these habits, you’ll minimize moisture problems and reduce the chance of leaks in the future.
Quick Recap: What to do if you find water leaks
- Start with the defrost drain and drain pan inspection; this covers the most frequent leaks.
- Check the water inlet valve and tubing for leaks or loose connections.
- Verify door seals are intact and clean; condensation often mimics leaks.
- If the leak continues after basic checks, escalate to professional help without delay to prevent water damage and ensure safe operation.
Steps
Estimated time: 60-90 minutes
- 1
Power down and prepare
Unplug the refrigerator and move it enough to access the back and bottom. Have towels ready for spills and a shallow tray for the drain pan. This initial step protects you and reduces mess as you inspect components. Tip: Use a label or photo to record the original positions of any wires or hoses before disconnecting.
Tip: Always unplug first; safety saves time and prevents shocks. - 2
Locate drain and pan
Find the defrost drain tube and the drain pan beneath the unit. Check for visible signs of blockage, cracks, or misalignment. A simple visual check often reveals the root cause before you proceed with flushing or replacement.
Tip: Take a quick photo of connections to guide reassembly. - 3
Flush the defrost drain
Flush the drain with warm (not boiling) water. Use a flexible brush or pipe cleaner to clear any ice or debris. Re-test by pouring a little water into the drain to confirm free flow into the pan.
Tip: Do not use chemical cleaners; they can damage the tub and drain. - 4
Inspect drain pan and connections
Inspect the pan for cracks or warped positioning. Realign or replace as needed. Ensure the drain tube is firmly connected and free of kinks. A properly seated pan prevents overflow when the fridge cycles.
Tip: If the pan is damaged, replace with the correct size and shape for your model. - 5
Check water line and ice-maker tubing
Inspect the water inlet valve and tubing for leaks or loose connections. Tighten fittings and replace damaged tubing. If you find a leak behind the fridge, shut off the water at the valve and consider professional service.
Tip: Only use manufacturer-approved parts to avoid compatibility issues. - 6
Test and monitor
Reconnect power and run the fridge for several hours while observing the base, pan area, and dispenser. If moisture returns, revisit the drain path and seals. Document findings for your records or for a technician.
Tip: Keep a log of leaks and fixes for future reference.
Diagnosis: Water pooling inside fridge or dripping from bottom/around base
Possible Causes
- highBlocked defrost drain causing condensate to back up
- mediumCracked or misaligned drain pan
- mediumLeaking or loose water inlet valve or tubing
- lowDoor gaskets not sealing properly causing condensation
Fixes
- easyUnclog defrost drain by flushing with warm water and clearing debris; reposition or replace drain pan if damaged
- easyInspect and replace cracked drain pan or reseat it correctly
- easyTighten/leak-test water inlet valve and tubing; replace if worn or damaged
- mediumReplace damaged door gaskets or reseal with silicone if necessary
FAQ
Why is my refrigerator leaking water?
Most leaks are caused by a blocked defrost drain, a damaged drain pan, or a loose water line. Start with the drain and check the pan.
Leaks are usually from the defrost drain or water line; start there and check the pan.
Is water leaking from the freezer normal?
No, leaks are typically not normal. Freeze-related frost buildup can melt and appear as a leak if the drainage path is blocked.
Leaks aren’t normal; frost issues or drainage blockages are usually to blame.
Can I fix a leak myself without tools?
Yes, many fixes start with simple checks like defrost drain flushing and drain pan inspection. More advanced parts replacement may require tools and expertise.
Some fixes you can do at home, but bigger repairs may need a pro.
When should I replace the drain pan?
Replace the drain pan if it’s cracked, warped, or not seating properly. A damaged pan can cause ongoing leaks and drainage issues.
If the pan is cracked or warped, replace it to stop leaks.
Do all leaks require a professional?
Not all leaks require a pro. Start with basic checks; if the leak persists after draining, sealing, and tightening, call a technician.
Some leaks you can fix yourself; persistent leaks should be handled by a pro.
Watch Video
Top Takeaways
- Diagnose drains first to stop leaks quickly.
- Inspect water line and dispenser connections.
- Test fixes and monitor for recurrence.
- Use proper door seals to reduce condensation.
- Call a pro if leaks persist.