Why Is My Refrigerator Leaking? A Homeowner’s Troubleshooting Guide
Learn practical steps to diagnose and fix refrigerator leaks quickly. Our expert guide covers common causes—from blocked defrost drains to door seals—safely and efficiently for homeowners.

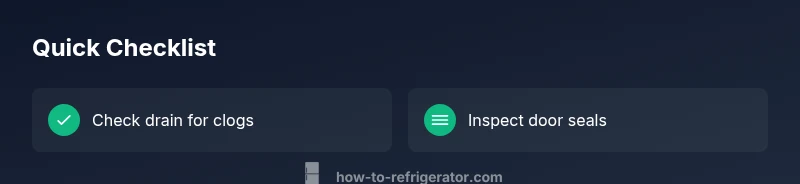
Most refrigerator leaks come from a blocked defrost drain, a faulty door seal, or a loose water line. Start by inspecting the defrost drain for clogs, then check the door gaskets for gaps, and finally verify the water supply line and ice maker connections. If you see ice or pooling, act quickly and unplug before diagnosing further.
Why a Refrigerator Leaks
According to How To Refrigerator, most refrigerator leaks are not caused by a failing compressor but by simpler issues like a clogged defrost drain or worn door seals. Pooling water on the floor around the unit typically originates from the defrost drain backing up or from warm room air condensing inside the cold compartments. In many homes the leak starts small and grows with time, turning a minor annoyance into a bigger repair if ignored. By understanding the common failure points, you can target your checks without unnecessary disassembly. This guide emphasizes practical, safe steps you can take as a homeowner while knowing when to call a professional. The goal is to stop the leak, protect food safety, and prevent water damage to floors and cabinetry, while keeping energy use and operating costs in check.
The most frequent culprits are visible and solvable: a blocked defrost drain that backs up into the drain pan, a door seal that’s worn or dirty, or a loose water line that feeds the ice maker. If you notice water pooling at the front grille or near the bottom kick plate, start your diagnosis there. If you hear running water or notice a continuous drip, document the pattern so you can explain it clearly to a repair technician if needed. Remember, the How To Refrigerator team advocates safety first—unplug the unit when you’re reaching behind panels or inspecting electrical components.
Common Causes at a Glance
- Blocked defrost drain: A clogged or frozen defrost drain in the freezer can cause water to overflow into the refrigerator or onto the floor. Clear the drain to restore normal flow.
- Damaged or dirty door seals: Worn gaskets allow humid air to draft in, leading to condensation and leaks around the door perimeter. Cleaning or replacing the gasket can seal the enclosure.
- Faulty or loose water inlet line: The water line that feeds the ice maker or water dispenser can loosen or develop leaks at connections. Tightening or replacing fittings stops drips.
- Drip pan or drainage pan issues: If the drain pan isn’t positioned properly or has cracks, water can overflow and appear as a leak on the floor.
- Ice maker issues: A malfunctioning ice maker can leak through supply lines or fill cups, especially if the fill valve is overfilling.
Each of these causes is common enough that a homeowner can address them with basic tools and careful safety practices. If you identify a more serious problem, such as refrigerant exposure or a damaged compressor, stop and call a licensed technician.
How to Inspect Safely
Safety comes first when inspecting a leaking refrigerator. Start by unplugging the unit and moving it away from the wall so you can access the back and bottom panels. If you must work near the power outlet or water lines, switch off the circuit breaker to eliminate the risk of shock. Wear gloves to protect your hands from sharp edges and dust. Use a flashlight to inspect the back of the freezer, the drain hole, and the drain pan beneath the fridge. Look for signs of ice buildup around the defrost drain or visible cracks in hoses and fittings. Keep towels or a small bucket handy to manage any drips as you work. Finally, after you identify a likely source, recheck that area with the unit unplugged to confirm the leak’s origin before attempting a fix.
Diagnostic Scenarios and Quick Checks
- Scenario A: Water pooling on the floor near the front of the fridge usually points to a door seal issue or a misaligned ice maker line. Inspect the door gaskets for visible gaps, tears, or stiffness. Run your finger along the seal to detect air leaks and test the door closing behavior.
- Scenario B: Water found inside the crisper or on shelves with little to no pooling suggests a blocked defrost drain or a condensation issue. Check the drain hole in the back wall of the freezer and clear any ice build-up. If you see frost on the back panel, the defrost cycle may be failing.
- Scenario C: Water dripping from the back or underneath the unit can indicate a loose water line or overflow from the drain pan. Verify all fittings at the water inlet valve, ice maker line, and tubing; tighten connections if they feel loose.
- Scenario D: Ice accumulation in the freezer with a wet interior indicates a malfunctioning defrost heater or timer. While some frost is normal, persistent icing warrants professional diagnosis to avoid frozen connections and electrical hazards.
If you notice a consistent leak after these checks, it’s safer to schedule a service call rather than continuing to test fragile components. The goal is to identify whether the fix is a quick adjustment you can perform or a replacement part that requires professional installation.
Prevention Tips and Maintenance
Preventing leaks starts with regular maintenance. Clean door seals every few months with mild soap and warm water to remove dust and food residue that can compromise the seal. Periodically inspect the defrost drain for signs of ice buildup and flush the line with warm water to prevent clogs. If your refrigerator has an ice maker or water dispenser, test the water line connections for stiffness or looseness and replace worn fittings before leaks appear. Keep the space around the unit dry and free of clutter so you can notice leaks early. Finally, track any changes in performance—rattles, unusual noises, or changes in temperature can be early warning signs that a leak is developing.
Prevention and Maintenance Expanded
Routine care is your best defense against leaks. Schedule a quarterly check for door seals, defrost drain, and the ice maker supply line. When replacing or reseating a door seal, ensure it sits evenly along the full length of the door. If the defrost drain shows any ice buildup, remove it gently and flush the line with hot water. Monitor the drain pan for cracks and replace it if needed. Keep the freezer temperature steady and avoid placing hot foods directly inside, which can cause condensation. For any persistent or unusual leaks, contact a professional promptly to avoid damage to floors and cabinetry.
Steps
Estimated time: 30-60 minutes
- 1
Power down and prep the area
Unplug the refrigerator and pull it away from the wall to access the back and bottom panels. Have towels ready to catch any residual water. If there is a water line to the ice maker, shut off the main supply valve to avoid further leaks during inspection.
Tip: Use a flashlight and a container to catch drips; safety first. - 2
Inspect for obvious leaks and drain blockages
Check the defrost drain for ice buildup or clogs and look for damp spots around the drain pan. Clear any obstructions gently with a pipe cleaner or flexible brush. Verify that the drain pan is correctly positioned under the condenser and not sitting higher than the outlet.
Tip: Avoid using metal tools that could scratch plastic components. - 3
Examine door seals and gaskets
Close the door on a dollar bill or piece of paper; if you can pull it out easily, the seal is worn. Clean the gasket with mild soap and water, then inspect for cracks or tears. If the seal is suspect, plan a gasket replacement or professional service.
Tip: Replacing a door gasket is a common DIY task with the right part. - 4
Check water line and ice maker connections
Inspect the tubing and fittings at the water inlet valve and behind the ice maker. Tighten loose connections and replace damaged tubing. Reconnect the water supply only after you have verified there are no leaks.
Tip: Waterline problems are a frequent source of under-unit leaks; take your time here. - 5
Test after fixes and monitor
Plug the fridge back in and observe for at least 24 hours. Check the drain pan, the door seals, and the ice maker area for any signs of moisture. If a leak returns, recheck each area or call a professional for a precise diagnosis.
Tip: Document the time and area of any moisture for reference. - 6
Schedule professional help when needed
If the leak persists after you’ve addressed drain, seals, and lines, or if you notice refrigerant smells, unusual noises, or a hot compressor, contact a qualified technician. Do not attempt refrigerant-related repairs yourself.
Tip: Professional service may save cost and prevent safety hazards.
Diagnosis: Water pooling on the kitchen floor near the refrigerator
Possible Causes
- highBlocked defrost drain causing overflow
- mediumLoose or damaged water inlet valve/connections
- mediumWorn or dirty door seals allowing warm air intrusion
- lowCracked or misaligned drain pan leading to overflow
Fixes
- easyUnblock the defrost drain with warm water, a flexible brush, and flush to restore flow; dry area and monitor for reoccurrence
- mediumTighten connections or replace the water inlet valve if leaks persist; test with a tray to observe any drips
- easyClean or replace door seals; ensure a tight seal when the door is closed; test by closing a sheet of paper in the door seam
- easyInspect the drain pan; reseat or replace if cracked or warped; align so it drains properly into the drain outlet
FAQ
What is the most common cause of refrigerator leaks?
The most common causes are a blocked defrost drain, worn door seals, or a loose water line. These issues are typically straightforward to diagnose and fix for a handy homeowner, though some repairs may require professional service.
Most leaks come from a clogged drain, door seals, or a loose water line. These are usually fixable by homeowners, though some tasks may need a technician.
Can I fix a leaking refrigerator myself?
Yes, many leaks stem from simple issues like drains and seals that you can address with basic tools. Always unplug the unit first and work carefully. If you encounter refrigerant or compressor concerns, call a professional.
Yes, many leaks you can fix yourself—start with drains and seals, but don’t attempt refrigerant work.
Is a leaking fridge dangerous?
Leakage from a fridge is usually not dangerous in itself, but water on electrical components can create shock risks and mold growth. Address leaks promptly and ensure proper drainage and ventilation.
Leaks aren’t typically dangerous, but standing water near electrical parts can be risky—address leaks quickly.
Why is there water under my fridge but not inside it?
Water under the fridge commonly signals a faulty defrost drain or a misaligned drain pan. Check the drain path and pan position, then inspect the back for drips from supply lines.
Water underneath usually points to the drain or pan issue—check those areas first.
How long should I test a fix after repairing a drain?
Test the fix for at least 24 hours, watching for new leaks around the drain, seals, and connections. If moisture returns, re-check all suspected areas or seek professional help.
Test for a full day after the fix; if leaks come back, re-check or call a pro.
When should I call a professional for a fridge leak?
Call a professional if the leak persists after basic checks, or if you detect refrigerant smells, frost around the compressor, or hear unusual noises. Some issues require specialized tools and safe handling.
Call a pro if leaks persist or you notice refrigerant smells or odd noises.
Can a damaged door seal cause leaks even if the door closes tightly?
Yes. A damaged or warped door seal can allow humid air to enter, causing condensation and intermittent leaks. Inspect and replace the gasket if you see cracks or gaps.
Even a tight door can leak if the seal is damaged—inspect and replace if needed.
Watch Video
Top Takeaways
- Start with the defrost drain and door seals.
- Unplug before inspecting electrical components.
- Tighten or replace damaged water lines as needed.
- Monitor for 24 hours to confirm a fix.