Why Do Refrigerators Leak Water? Urgent Troubleshooting Guide
Discover why refrigerators leak water and how to diagnose, fix, and prevent leaks fast. A practical, safety-focused guide from How To Refrigerator for homeowners troubleshooting appliance issues.

Most fridge leaks start from a clogged defrost drain that lets water pool into the food compartment or spill onto the floor. Begin with a safety check, unplug the unit, and inspect the defrost drain, drain pan, and water supply lines. If this doesn't fix it, continue with the diagnostic flow outlined below.
Why this happens and what homeowners should do
If you’re wondering why do refrigerators leak water, the most common cause is a blocked defrost drain. When the drain line is clogged, water cannot exit the freezer and instead gathers inside the fridge or leaks onto the floor. According to How To Refrigerator, quick checks can stop many leaks before they escalate. Start with safety: unplug the unit, move any perishables away, and wipe up accessible spills. Then inspect the freezer back panel for frost buildup, look for a visible drain tube, and feel along the drain pan area for water pooling or a musty smell. Many leaks are temporary and related to seasonal temperature fluctuations; however, repeated pooling requires a fix. Regular checks, such as ensuring the unit is level and the door seals are intact, help prevent new leaks. The goal is to establish a simple, repeatable routine so every homeowner can act quickly when a leak appears.
Common causes of fridge water leaks
Leaks can show up in several places, but most issues fall into a few reliable categories. A clogged defrost drain is the top culprit, especially if water appears inside the fridge or under the vegetable crisper. Another frequent source is a leaking water line or ice-maker supply line, which can drip or spray behind the rear panel. Condensation due to sudden temperature changes, a misaligned door gasket, or an overflowing drip pan can also produce puddles. How To Refrigerator analysis shows that many leaks start with poor drainage or faulty components rather than a single dramatic failure. Keep an eye on frost buildup in the freezer, unusual ice production, or water on the floor near the fridge. Briefly running through these causes helps you decide which area to inspect first and reduces the guesswork during a stressed repair moment. Remember: safety first; never poke at electrical components with metal tools.
How to diagnose leaks: a practical workflow
A practical approach to diagnosing leaks is to map symptoms to likely causes and then verify with targeted steps. Start by checking for frost or ice buildup in the freezer, which points to a blocked defrost drain. If you notice water pooling on the fridge floor but not inside the freezer, look at the drain pan and the rear drainage path. If water leaks from the water dispenser or ice-maker area, inspect lines and fittings for cracks or loose connections. This workflow aligns with a safe, progressive diagnostic path and helps you avoid unnecessary disassembly. This method reduces the risk of electrical shock and collateral damage. As you work, document what you observe and test after each fix. If none of these steps resolve the leak, move to professional help rather than forcing components to admit failure. The How To Refrigerator team emphasizes methodical testing over guesswork.
Step-by-step: fix the defrost drain clog (the most common fix)
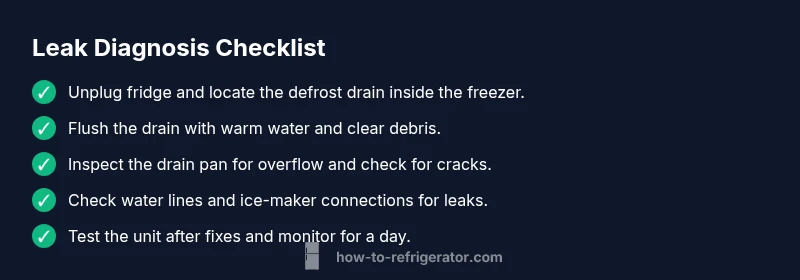
- Safety first: unplug the refrigerator and remove nearby items. 2) Locate the defrost drain inside the freezer, usually near the rear wall. 3) Remove any visible frost and use warm water to flush the drain with a turkey-baster or siphon bottle. 4) If water won’t pass, use a flexible pipe cleaner or a soft bottle brush to loosen debris; flush again. 5) Check the drain pan underneath the fridge for standing water; empty and dry if needed. 6) Reconnect power and monitor for leaks over the next 24–48 hours. Tip: Keep a towel handy near the floor during testing to catch any residual drips. If the leak persists after this fix, proceed to step-by-step checks for water lines and door seals.
Prevention and maintenance tips to stop leaks from returning
To minimize future leaks, incorporate a small maintenance routine. Clean the defrost drain and pan when you notice frost or condensation, inspect door gaskets for cracks, and keep the fridge level to prevent pooling of condensate. Use the right amount of food in the shelves; overfilling can block air flow and cause condensation. Periodically check the water line and ice-maker connections for tightness and any corrosion. Finally, place the fridge away from heat sources or direct sunlight and maintain ambient room temperature for steady operation.
When to call a professional
If you see visible refrigerant signs, persistent pooling after the defrost drain fix, or hissing/bubbling noises near the compressor, stop DIY work and contact a qualified technician. A professional can diagnose refrigerant leaks, replace evaporator components, and verify the refrigerant charge. While many leaks are manageable at home, refrigerant work requires certification in most regions. The How To Refrigerator team recommends safety-first and timely expert intervention when uncertain.
Steps
Estimated time: 40-60 minutes
- 1
Power down and prepare
Unplug the fridge and move items away from the area. Gather towels and a shallow tray to catch drips. This minimizes risk while you work.
Tip: Use a flashlight to locate the drain and avoid missing the path. - 2
Find the defrost drain
Open the freezer and look for the drain hole at the back wall. If frost blocks the entrance, defrost briefly with ambient heat or a gentle warm cloth.
Tip: Do not insert sharp objects that could puncture lines. - 3
Clear the clog
Flush the drain with warm water using a turkey-baster. If debris remains, gently loosen with a flexible brush or pipe cleaner and flush again.
Tip: Avoid hot water that could crack plastic components. - 4
Check the drain pan
Inspect the pan under the fridge for standing water or cracks. Wipe dry and reposition the pan if it shifted.
Tip: Ensure the pan sits evenly to prevent overflow. - 5
Inspect water line and ice-maker
Look for leaks at connections behind the rear panel or under the sink area where the line runs. Tighten fittings or replace damaged tubing as needed.
Tip: Power off and depressurize lines before handling fittings. - 6
Test and confirm
Plug the unit back in and monitor for 24–48 hours. Note any continued dampness or new pooling and adjust as needed.
Tip: Keep a dedicated eye on the floor area during the first use after the fix.
Diagnosis: Water pooling inside fridge or under unit
Possible Causes
- highClogged or frozen defrost drain
- mediumLeaking water line or ice-maker supply line
- lowOverfilled drip pan or improper fridge tilt
Fixes
- easyUnblock defrost drain with warm water and a flexible tool; inspect and dry the drain pan; ensure unit is level
- mediumInspect water line and ice-maker connections for leaks; tighten fittings or replace damaged tubing
- easyPosition the drain pan correctly and level the refrigerator; adjust feet if needed
FAQ
What is the most common cause of water leaks in a refrigerator?
A clogged defrost drain is the usual culprit. Clear the drain and inspect the pan; test for leaks after the fix. If the problem persists, proceed with the diagnostic flow.
The most common cause is a clogged defrost drain. Clear it, check the pan, and test again; if it persists, continue with the steps.
Is it safe to use a hair dryer to melt ice in the defrost drain?
No. Do not use heat near electrical components. Use warm water or a gentle defrost method instead, and unplug the unit before attempting any fix.
No—avoid heat near electrical parts. Use warm water and unplug the fridge before fixing.
Can a refrigerator leak refrigerant?
Refrigerant leaks are serious and require a licensed technician. Signs include oily spots on coils, poor cooling, and a hissing sound.
Yes, refrigerant leaks are serious and need a pro. Look for oily spots and poor cooling as signs.
How should I maintain the defrost drain to prevent future leaks?
Regularly inspect and clear the defrost drain during maintenance, and keep the area around the drain clean to prevent clogs.
Keep the drain clean and check it during routine maintenance to prevent clogs.
What if water leaks from the door seals?
Inspect door seals for cracks or gaps, clean the seals, and replace damaged gaskets to restore a proper seal.
Check and replace damaged door seals to stop leaks.
When should I call a professional for a leak?
If leaks persist after clearing the defrost drain, or you suspect refrigerant issues, contact a qualified technician promptly.
Call a professional if leaks persist after trying the fix or you suspect refrigerant problems.
Watch Video
Top Takeaways
- Inspect defrost drain first to stop leaks
- Unplug before any DIY work
- Check door seals and level the unit regularly
- Call a pro if you suspect refrigerant issues