Why Your Refrigerator Leaks Water on the Floor: A Step-by-Step Troubleshooting Guide
A homeowner-friendly guide to diagnosing and fixing leaks around your refrigerator, covering defrost drains, door seals, ice-maker lines, and preventive maintenance.

Most refrigerator leaks come from a clogged defrost drain or a blocked drainage path. Quick fixes: unplug the fridge, clear the defrost drain, and dry the area thoroughly. If water continues, inspect the door gaskets and the ice-maker water line. If the leak persists after these checks, professional service is advised to prevent further damage.
Understanding why refrigerator leaking water on floor
Water pooling around your fridge can be alarming. Understanding why refrigerator leaking water on floor starts with recognizing the most common failure modes. The defrost drain is supposed to carry melted ice away from the freezer to the drain pan, but a blockage or freezing can back up water into the fridge and spill onto the floor. The How To Refrigerator team notes that this is the most frequent culprit for leaks in residential setups. A damaged door gasket or hinge seal can let humid air enter, condensing as water inside or around the unit. Finally, leaks may originate from the ice-maker or water-dispenser line if it is loose, kinked, or cracked. By considering these scenarios, you can triage safely before pulling the appliance out for a closer look.
Safety first: unplug, protect, and plan
Before you touch any components, unplug the refrigerator to avoid electrical shock. Move the unit away from the wall to access the back and bottom drainage areas, and place towels or a shallow tray to catch residual water. Wear gloves if you have cold frost or sharp edges. The goal is to prevent slip hazards and reduce the risk of damaging electrical components. If you smell burning plastic or notice buzzing, stop and call a service tech immediately. In urgent cases, do not proceed; water and electricity are a dangerous combination.
Check and clear the defrost drain and pan
The defrost drain is typically located at the back of the freezer compartment. A blockage can cause water to overflow and drip onto the floor. Start by locating the drain tube and inspecting for frost or ice accumulation. Use a turkey baster or syringe to flush warm, not boiling, water through the tube. If you see standing water in the drain or hear gurgling, the blockage is likely cleared. Remove the drain pan and ensure it sits securely in its slot; a misaligned pan can spill water when the compressor cycles. After clearing, plug in the unit and run a short cooldown cycle to verify the leak is gone.
Inspect the door seals and interior humidity
A loose or cracked door gasket can draw in moist air that condenses on cold surfaces, resulting in water on the floor. Inspect seals for cracks, tears, or stiff spots. Replace damaged gaskets and ensure a snug seal by wiping the surface and re-seating the doors. Also verify the interior humidity is appropriate for your climate and the fridge's temperature setting is not too cold, which can cause excess condensation. If you notice frost buildup along the gaskets or interior walls, it can indicate a sealing problem.
Check the ice-maker line and water connection
If your model has an ice maker or water dispenser, leaks can stem from a loose coupling, kinked hose, or cracked tubing. Inspect the supply line where it enters the back of the fridge and along the length of the connection to the ice maker. Tighten fittings carefully and replace any damaged hoses with manufacturer-approved parts. Ensure the line is properly routed to avoid sharp bends; a kinked line can cause high-pressure leaks that drip water onto the floor. After resecuring, run an ice-making cycle and observe for any drips.
Does the fridge sit level? drainage and pan alignment matter
A tilted refrigerator can misalign the drain pan, leading to overflow or improper drainage. Use a spirit level to check the front-to-back and side-to-side balance; adjust the front feet as needed. A level unit helps the defrost drain drain properly and prevents water from pooling under the unit. Make sure the drain pan is seated at the bottom of the cabinet and that air flow around the condenser is not blocked by items in front of the grille. Small changes can prevent future leaks.
Diagnostic flow: symptom to solution at a glance
Start with the symptom: water on the floor near the refrigerator. If the defrost drain shows ice blockage or frost, the diagnosis is a drain issue; fix by clearing the drain and rechecking. If the seals look compromised or evidence of warm air intrusion exists, address door gaskets and humidity controls. For ice maker leaks, inspect the water line and fittings. If none of these solve the problem, alternative causes may include a cracked drain pan, a failed icemaker, or a refrigerant issue—these require professional assessment.
Quick prevention: routine maintenance to avoid future leaks
To minimize leaks, clean the coils (if accessible) and ensure proper airflow; keep the area around the fridge dry and free of clutter. Regularly check the defrost drain for clogs, monitor door seals, and replace them promptly when wear is evident. Use bottled water if you suspect line issues, and schedule professional maintenance if you notice recurring leaks or unusual noises. A proactive approach keeps leaks from becoming costly repairs.
When to call a professional (and what to expect)
If you cannot identify a clear cause after the basic checks, or if you see refrigerant odors, hissing noises, or the unit fails to stabilize after the defrost cycle, it’s time to contact a qualified technician. A professional will diagnose the drainage system, inspect refrigerant lines, and verify proper cooling performance. Have model information and recent maintenance history ready to speed up the visit. Early intervention saves water damage and prevents mold growth.
Steps
Estimated time: 30-60 minutes
- 1
Power down and prep the area
Unplug the fridge and move it away from the wall. Place towels, a shallow tray, or a basin to catch water. Check for exposed wiring before you begin any inspections.
Tip: Keep a flashlight handy to see behind the unit. - 2
Remove surface moisture and inspect the drain path
Wipe the area dry, then locate the defrost drain at the back of the freezer. Look for frost or ice buildup around the drain tube. This helps confirm whether a blockage is the issue.
Tip: Do not use hot water directly on electrical components. - 3
Clear the defrost drain
Flush the drain with warm (not boiling) water using a turkey baster or syringe. Repeat until water flows freely. Reinstall the drain pan and ensure it sits securely.
Tip: If you see standing water, there may be a more serious blockage. - 4
Check door seals and interior conditions
Inspect door gaskets for cracks or stiffness. Clean the gasket surfaces and reseal the doors. Verify the interior temperature setting isn't overcooling.
Tip: A simple door seal cleaning can improve seal performance. - 5
Inspect ice-maker and water line
Look for kinks or leaks along the water line and at the connection points. Tighten fittings if needed and replace any damaged tubing.
Tip: Only use manufacturer-approved parts. - 6
Level the fridge and verify pan position
Use a level to check front-to-back and side-to-side orientation. Adjust feet as needed and ensure the drain pan is properly located.
Tip: A level fridge drains more reliably and reduces future leaks. - 7
Test run and monitor
Plug in the unit and run a normal cycle. Watch for leaks during and after defrost and cooling cycles. Keep an eye on the area for 24 hours.
Tip: Take photos if you replace any parts for your records.
Diagnosis: Water pooling on floor around refrigerator
Possible Causes
- highClogged defrost drain causing backflow to the drain pan
- mediumDamaged or loose door gasket allowing humid air inside
- mediumLeaking water supply line or ice maker connection
- lowCracked or misaligned drain pan leading to overflow
Fixes
- easyUnclog defrost drain and reseat drain pan; ensure proper drainage path
- easyReplace or reseat door gaskets to restore a tight seal
- mediumInspect and tighten/replace water supply lines and ice maker fittings
- mediumReplace cracked drain pan and relevel fridge if needed
FAQ
What is the most common cause of water leaking from a fridge?
The defrost drain blockage is the most frequent culprit and can cause water to spill onto the floor. Clearing the drain usually resolves the leak.
The most common cause is a blocked defrost drain, and clearing it often fixes the leak.
Can a leaking fridge be dangerous?
Water near electricity can pose shock hazards. Unplug the appliance if you suspect a leak and call a professional if you cannot identify the source safely.
Yes, water near electricity can be dangerous; unplug and seek help if needed.
How do I test if the defrost drain is blocked?
Look for frost near the drain and flow a small amount of warm water through the tube with a syringe to see if it clears. If water backs up, the drain is blocked.
Check for frost and flush the drain with warm water to test if it's blocked.
Is it safe to use a hair dryer to dry the area?
No. Avoid using a hair dryer or any heat device near electrical components and water.
No—don’t use a hair dryer near water or electrical parts.
When should I replace the door seals?
Replace seals if you see cracks, tears, stiffness, or gaps that prevent a tight seal. Proper sealing reduces condensation.
Replace damaged door seals to prevent leaks.
Watch Video
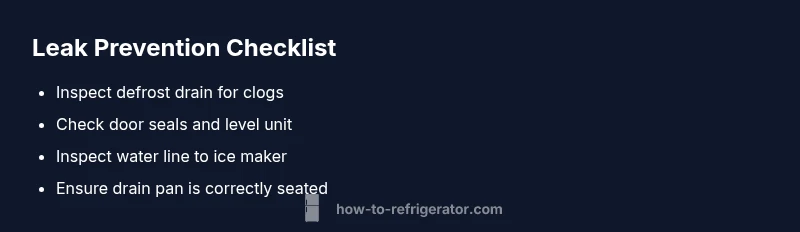
Top Takeaways
- Identify the defrost drain first.
- Inspect door seals for condensation sources.
- Check water lines and ice-maker connections.
- Level the fridge to ensure proper drainage.
- Call a professional if leaks persist after checks.