Why Is Your Refrigerator Not Cold Enough? Quick Fix Guide
Discover practical, safe steps to diagnose why your refrigerator isn't cold enough. This homeowner-friendly guide covers quick checks, common causes, and when to call a professional to prevent spoilage and save energy.

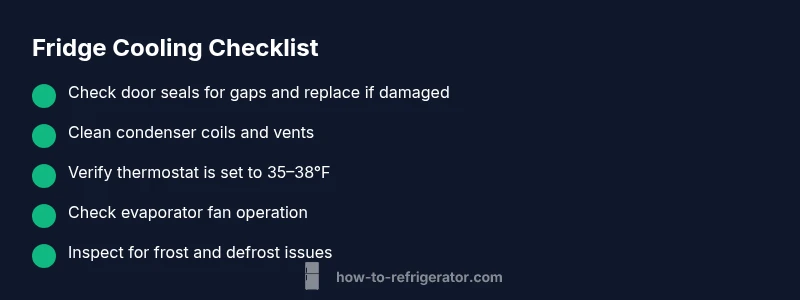
Most likely, your fridge isn’t cold due to a dirty condenser coil, a worn door seal, or an incorrect temperature setting. Quick fixes: clean the coils, replace or reseal the door gasket, and set the thermostat to 35–38°F (1.7–3.3°C). If cooling still fails, inspect the evaporator fan and defrost system for faults.
Why the problem happens and how homeowners think about it
When you ask, "why is refrigerator not cold enough", you're usually dealing with airflow, heat exchange, or temperature control. Most modern fridges rely on a simple chain: set point, sensor, compressor, condenser coils, evaporator, and fan. Any weak link can reduce cooling. The good news is that many issues are safe to inspect and fix by homeowners if you follow steps carefully. Early detection saves food and energy, and it often avoids pricey repairs. Through this guide, you’ll learn why this occurs, what to check first, and how to proceed without compromising safety. This article uses homeowner-friendly language and practical steps to make troubleshooting straightforward.
Quick checks you can safely perform
Before you begin with tools, unplug the unit to avoid electrical hazards, then move perishables to a backup cooler if needed. Start with the simplest checks: verify the door is closing tightly with no gaps, confirm the thermostat is set to a safe range (35–38°F / 1.7–3.3°C), and inspect the condenser coils at the back or beneath the fridge. Dust and pet hair reduce heat dissipation in seconds. If you’re unsure, consult the label on your model for the recommended temperature range. Clean coils gently with a brush or vacuum, ensuring no foil or metal pieces touch electrical components. Finally, check the air vents inside the fridge and freezer for obstructions that block airflow.
Common causes and how to diagnose them
A fridge that isn’t cold enough often comes down to airflow, seals, and sensors. A failed or loose door gasket lets warm air seep in, causing the compressor to run longer without achieving target temperature. Dirty condenser coils reduce heat exchange, forcing the system to work harder. The thermostat or control board could be mis-set or malfunctioning. Ice buildup on the evaporator from a stuck defrost cycle can block airflow. Listen for the evaporator fan; if it’s quiet or not turning, airflow to shelves is compromised. If you notice frost or frost on the back wall, defrost issues may be involved. Finally, refrigerant leaks or a failing compressor are serious and require a professional.
How to test each potential cause (diagnostic flow)
Follow a logical sequence to avoid unnecessary steps: start with the easiest checks (doors, seals, temperature setting), then move to airflow and frost, and finally test the fan. If you detect frost on the evaporator or hear a buzzing/humming noise from the compressor, treat it as a sign of deeper problems. For each potential cause, compare symptoms with the observed behavior and decide on a remedy. If you can’t confirm the root cause with simple tests, proceed to the diagnostic flow below.
Step-by-step troubleshooting pathway (practical fixes)
- Safety first: unplug the fridge and remove perishables from any affected compartments. 2) Clean condenser coils: unplug, vacuum or brush away dust, and re-plug. 3) Check door seals: inspect for cracks; clean gasket edges and perform a leak test with a dollar bill. 4) Verify thermostat settings: adjust to 35–38°F (1.7–3.3°C) and monitor for 24–48 hours to evaluate cooling. 5) Inspect evaporator fan: listen for airflow; if you hear muted or no fan, there may be a blockage or motor failure. 6) Defrost system: if you see frost buildup, run a manual defrost or call a pro if the issue recurs. 7) If cooling still fails, schedule a professional inspection for refrigerant or compressor issues.
Safety, maintenance, and when to call a pro
Never attempt refrigerant work yourself; it’s hazardous and usually requires licensed technicians. Regular maintenance, including coil cleaning every 6–12 months and door seal inspections, reduces failure risk. Keep the unit away from heat sources and avoid overfilling shelves to maintain airflow. If you notice warm spots, persistent frost, or strange noises after basic fixes, a pro should assess the system.
Safety notes and next steps
If you’re unsure about any step, stop and seek help. Use a flashlight to inspect coils, avoid using metal tools near wiring, and never ignore a buzzing or sizzling sound that suggests electrical fault. Document symptoms, temperature readings, and the date you observed changes to share with a technician. Regular preventative maintenance pays off by extending the life of your fridge.
Steps
Estimated time: 60-90 minutes (plus 24-48 hour test period)
- 1
Power down and organize food
Unplug the unit and remove perishable items to a safe temporary space. This prevents electrical hazards and gives you room to work. Label items if needed and set a timer for replacements.
Tip: Have a small cooler ready for perishables. - 2
Check door seals and temperature
Inspect the door gasket for cracks or gaps. Clean the seal with mild soap and water. Verify the thermostat is set to 35–38°F (1.7–3.3°C) and leave the door closed for at least 24 hours to evaluate cooling.
Tip: Run your hand around the door edge to feel for leaks. - 3
Inspect condenser coils
Locate the coils (back or beneath the unit). Vacuum or brush away dust and debris. Do not damage the fins; reassemble and plug back in to test cooling after 1–2 days.
Tip: Do this step outside or in a well-ventilated area. - 4
Test airflow and frost
Open the fridge and freezer briefly to observe airflow; listen for the evaporator fan. If you notice frost along the back wall, there may be a defrost issue; note when frost appears.
Tip: Avoid leaving doors open for long periods. - 5
Reset settings and test again
After coil cleaning and seal checks, re-set the thermostat to 35–38°F and monitor for 24–48 hours. If temps stay high, proceed to professional inspection.
Tip: Keep a thermometer in the fridge for accuracy. - 6
Consider professional help for major components
If temperatures don’t drop after basic steps, or you hear unusual noises or observe refrigerant signs, contact a licensed technician for refrigerant or compressor assessment.
Tip: Document symptoms and dates for the technician.
Diagnosis: Fridge not cooling to the set temperature
Possible Causes
- highDirty condenser coils restricting heat transfer
- highFaulty or mis-sealed door gasket
- mediumIncorrect thermostat setting or faulty sensor
- lowDefrost system failure causing ice build-up
- lowEvaporator fan not running or obstructed
- lowRefrigerant leak or compressor problem
Fixes
- easyClean condenser coils and vents; re-test after 24 hours
- easyReplace or reseal door gasket; retest
- easyReset thermostat to 35-38°F (1.7-3.3°C); monitor 24-48h
- mediumRun defrost cycle or inspect defrost components; repair if frost persists
- mediumInspect/replace evaporator fan as needed
- hardRepair refrigerant leak or compressor (professional only)
FAQ
What is the first thing I should check if my refrigerator isn't cooling?
Begin with safety: unplug the unit and check door seals, temperature settings, and coil cleanliness. These quick checks cover most home troubleshooting scenarios without special tools.
First, unplug the fridge and inspect the door seals and thermostat; clean the condenser coils if needed. These steps solve most home cooling issues.
How often should condenser coils be cleaned?
Clean coils every 6 to 12 months or whenever you notice dust buildup. Clean coils improve heat exchange and reduce energy use.
Clean the coils every 6 to 12 months to keep cooling efficient.
Can a fridge run but still be not cooling properly?
Yes. It can run due to the compressor, but if airflow is blocked or defrost issues exist, cooling won’t meet the set temperature. Identify airflow and frost problems first.
Yes. It can run but not cool if airflow is blocked or the defrost system is failing.
When should I call a professional?
If basic checks don’t restore cooling, if you hear unusual noises, or see signs of a refrigerant leak, contact a licensed technician. Refrigerant work requires specialized tools and training.
Call a professional if basic fixes fail or you suspect a refrigerant leak.
Is a faulty door seal the likely cause?
A bad door seal is a common culprit. Inspect for cracks and replace if compromised to prevent warm air from entering the fridge.
Yes, a damaged door seal is a frequent cause that prevents proper cooling.
How long does a defrost timer last?
Defrost timer life varies by model but typically lasts many years. If you see ice buildup and cycling issues, consider a timer test or replacement by a pro.
Defrost timers last years, but frost and cycling problems can signal a failure needing replacement.
Watch Video
Top Takeaways
- Start with safety: unplug and relocate food when troubleshooting.
- Clean condenser coils and check door seals as primary fixes.
- Test thermostat and observe airflow before escalating to professional help.
- If in doubt, don't attempt refrigerant or compressor work; call a pro.