Urgent Troubleshooting: Refrigerator is Not Cold
Fast, actionable steps for homeowners when a refrigerator is not cold. Diagnose causes, perform safe fixes, and prevent future cooling issues with expert guidance from How To Refrigerator.

Most often, a refrigerator is not cold due to a door seal leak, dirty condenser coils, a failed defrost system, or a malfunctioning compressor. Start with simple checks: ensure the door gaskets seal tightly, clear the condenser coils, and verify the thermostat setting. If these steps don't restore cooling, proceed through the diagnostic flow for deeper fixes.
Understanding Why Your Refrigerator Isn't Cold
When a fridge stops cooling, it can spoil perishable food quickly. The term refrigerator is not cold often means the cooling cycle is interrupted or airflow is restricted. According to How To Refrigerator, most issues stem from simple, fixable causes such as a poor door seal, dirty condenser coils, or an off thermostat. This guide helps homeowners identify the root causeSafely and efficiently, so you can restore cooling fast. By following a structured approach, you minimize food waste and avoid unnecessary service calls. Remember: safety first, especially when inspecting electrical components.
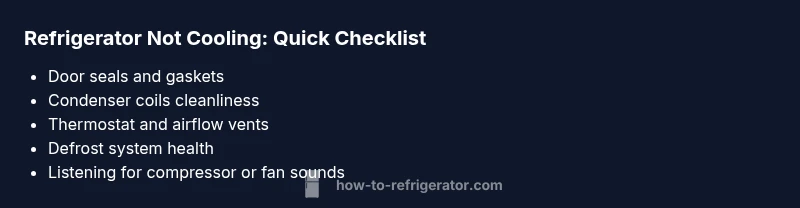
Quick Checks You Can Do Before Calling a Pro
Before you unplug or dismantle anything, run through these safe, low-effort checks. First, confirm the unit is powered and the outlet has power, and ensure the thermostat is set to a sufficiently cold temperature. Next, inspect door gaskets for cracks or gaps and verify the door closes fully. Clear any items blocking internal vents and listen for the evaporator fan when you open the door. If you hear unusual buzzing or the fan doesn’t run, note it for the diagnostic flow. These checks often resolve or clearly indicate the root cause without tools.
Common Causes If Cooling Is Weak Or Absent
There are several plausible reasons for a fridge that won’t cool. A leaky door seal allows cold air to escape; dirty condenser coils reduce heat removal; a malfunctioning defrost system leads to ice buildup that blocks airflow; a faulty compressor or start relay prevents the refrigerant from circulating. In some cases, a bad thermostat or control board keeps the compressor running at the wrong temperature. Each cause has a distinct diagnostic signal, so careful observation matters. Regular maintenance reduces the likelihood of these issues turning into expensive repairs.
Diagnostic Flow: Symptom to Solution Path
A practical diagnostic flow helps you avoid guesswork. Start with the symptom: is the fridge warm while the freezer stays cold, or is there no cooling at all? Step 1: power and thermostat checks. Step 2: door seals and air vents. Step 3: condenser coils cleanliness. Step 4: defrost system health. Step 5: evaporator fan operation and temperature sensor. Step 6: compressor and control board if needed. This flow emphasizes safety and minimizes unnecessary disassembly. Implement each step in sequence, noting results before moving on.
Step-by-Step: Common Fixes (Most Homeowners Can Do)
- Power check and thermostat verification
- Make sure the fridge is plugged in and the outlet has power. Verify the thermostat is set to a cold enough setting (usually around 37-40°F / 3-4°C for the fresh food compartment). If the unit was recently moved or bumped, the thermostat might be out of calibration.
- Tip: If you have a separate fridge thermometer, use it to confirm actual temperatures.
- Inspect door seals and door alignment
- Look for cracks, tears, or gaps in gaskets. A poor seal lets cold air escape every time the door is opened. Clean the gasket surface and ensure the door closes evenly.
- Tip: Perform a simple tissue test: place a thin piece of paper in the door frame and close the door; if you can pull the paper out easily, the seal may be compromised.
- Clean condenser coils
- Dusty or dirty coils hinder heat removal. Unplug the unit, locate coils (usually on the back or bottom), and gently vacuum or brush away debris. Do not use water on electrical components.
- Tip: Clean coils every 6–12 months or more often if you have pets or kids.
- Check defrost system and ice buildup
- Ice buildup on the evaporator can block airflow. If you see frost on the back wall, the defrost heater or timer may be failing. Manually defrost if heavy ice accumulates, then monitor.
- Tip: If you notice frequent frost, document cycling times for a technician.
- Test the evaporator fan and sensor
- With the door open, listen for the evaporator fan when the door switch is pressed. A failed fan stops cold air circulation. Replace if faulty.
- Tip: If the fan runs intermittently, it may be a motor or wiring issue requiring a pro.
- Evaluate compressor and start components
- If the compressor runs constantly or is unusually hot, or if you hear a consistent buzzing, there may be a more serious issue like a failing compressor or start relay. This step often requires professional service.
- Tip: Do not attempt refrigerant work yourself; it requires licensed technicians.
Safety Notes & When to Call a Professional
Electrical components, refrigerants, and sealed systems pose safety risks. If you smell burning insulation, hear buzzing or sizzling, notice oil leaks, or see ice forming abnormally, stop work and call a qualified technician. Do not attempt to repair refrigerant lines, high-voltage parts, or sealed-system components if you’re not trained.
Prevention Tips To Avoid Future Cooling Issues
Regular maintenance reduces the odds of a refrigerator not cooling. Clean condenser coils at least every 6–12 months, inspect door gaskets for wear, and avoid overpacking the interior which restricts airflow. Keep the fridge away from heat sources and ensure vents are unobstructed. Use a dedicated thermometer to monitor interior temperatures and adjust the thermostat as needed. Installing an inexpensive door seal conditioner can extend gasket life. A proactive maintenance routine helps you catch problems early and reduces surprise failures.
What To Do If It’s Still Not Cooling: Next Steps
If the diagnostic flow points to a defective component beyond your comfort zone—such as a faulty defrost timer, a bad compressor, or a refrigerant leak—schedule professional service promptly. Even when DIY fixes work temporarily, lingering issues can recur. The safest path is a structured assessment and timely repair by a trained technician who can diagnose electrical, refrigerant, or sealed-system problems accurately. Remember, timely service protects both food safety and energy efficiency.
Steps
Estimated time: 60-120 minutes
- 1
Power, thermostat, and basic checks
Verify power to the unit, confirm the outlet has power, and ensure the thermostat is set to a proper cold range. If the unit recently moved, relevel it and check for vibrations. These initial checks prevent unnecessary disassembly.
Tip: Document readings and settings before making changes. - 2
Inspect door gaskets and alignment
Close all doors firmly and inspect the gasket for cracks or gaps. Clean the gasket surface and test the door seal by closing on a piece of paper or dollar bill. If air leaks, replace the gasket or adjust door alignment.
Tip: A tight seal saves energy and improves cooling. - 3
Clean condenser coils
Unplug the fridge and locate the condenser coils. Gently remove dust with a vacuum hose or a coil brush. Reconnect power and listen for improved airflow; dirty coils can dramatically reduce cooling efficiency.
Tip: Do not use water directly on electrical components. - 4
Check defrost system for ice buildup
Look for excessive frost on the evaporator or back wall. If present, you may need a manual defrost or defrost timer inspection. Allow the unit to defrost fully and monitor if cooling resumes.
Tip: Frequent frost may indicate a defrost timer fault. - 5
Test evaporator fan and sensor
With doors open, listen for the evaporator fan when the door switch is pressed. A non-working fan blocks cold air circulation. If you hear no fan—replace or repair as needed.
Tip: Fan issues often point to motor or wiring problems. - 6
Assess compressor and control board
If the compressor runs continuously or makes loud noises, this may indicate a faulty compressor or start relay. This step frequently requires a pro; do not attempt refrigerant handling yourself.
Tip: Professional diagnosis prevents dangerous repairs.
Diagnosis: Fridge won't cool or warm temperature maintained in primary compartments
Possible Causes
- highPower issue or thermostat miscalibration
- highDoor seals not sealing properly
- mediumCondenser coils dirty or obstructed
- mediumDefrost system failure (heater/timer)
- lowEvaporator fan not functioning
Fixes
- easyCheck outlet, circuit breaker, and thermostat setting; adjust if needed
- easyInspect and replace door gaskets; ensure door alignment
- easyUnplug and clean condenser coils; ensure proper airflow
- mediumTest defrost system and heater; clear ice buildup if present
- mediumTest evaporator fan operation; replace fan or motor if needed
FAQ
Why is my fridge not cooling but the freezer is cold?
That pattern often points to poor air circulation from the freezer to the fridge, a blocked vent, or a door-seal issue. Check the bypass vent, ensure proper airflow, and inspect the fridge door gasket for leaks. If unresolved, proceed through the diagnostic flow for deeper fixes.
If your fridge isn’t cooling but the freezer is, check airflow and door seals first. If the problem persists, follow the diagnostic steps for deeper fixes.
Can a dirty condenser cause not cooling at all?
Yes. A dusty condenser can significantly reduce cooling efficiency and may stop cooling if heat removal is blocked. Clean the coils, ensure unobstructed airflow, and monitor for improved performance.
Dirty condenser coils can stop the fridge from cooling. Clean them and recheck performance.
Should I unplug and plug back in to reset the fridge?
Resetting by unplugging briefly can clear minor electronic glitches. Do this only after safe checks, and avoid frequent resets. If the issue recurs, proceed with the diagnostic flow or call a pro.
Unplugging briefly can reset electronics, but don’t rely on this repeatedly. If problems persist, use the diagnostic steps.
What sounds indicate a failing compressor?
Buzzing, clicking, or constant running can signal a compressor or start relay problem. If you hear unusual noises, consult a professional to assess refrigerant and sealed-system components.
Constant buzzing or unusual noises could mean the compressor or start relay is failing; get a professional evaluation.
Can I fix refrigerant leaks myself?
No. Refrigerant work requires licensed technicians and specialized equipment. Do not attempt to seal leaks yourself and avoid refrigerant handling without proper certification.
Refrigerant leaks must be handled by licensed technicians. Don’t attempt repair yourself.
When should I call a professional?
If you identify issues beyond basic checks—like refrigerant signs, a faulty compressor, or persistent frost despite defrost attempts—call a professional promptly to prevent further damage and ensure safety.
Call a professional if the problem involves refrigerant, compressor, or unresolved frost after defrost attempts.
Top Takeaways
- Start with basic checks before disassembly
- Clean coils and seal doors to restore cooling
- Follow a clear diagnostic flow for accuracy
- Call a professional for compressor or refrigerant issues