What to Do When Your Refrigerator Is Not Getting Cold: A Homeowner's Troubleshooting Guide
If your fridge isn’t cooling, this How To Refrigerator guide walks you through quick checks, common causes, a diagnostic flow, and a step-by-step fix to restore cooling safely at home.

Most often, a refrigerator stops cooling due to a simple issue you can fix in minutes, like a door gasket leak, dirty condenser coils, or a mis-set thermostat. Start with quick checks: confirm the door seals are tight, clean the condenser coils, and verify the temperature setting. If none of these help, power-cycle the unit and re-test.
Why Your Refrigerator Isn't Getting Cold
A refrigerator that won't get cold typically points to problems with airflow, temperature settings, or components that regulate heat exchange. Start by ensuring the unit is plugged in and that the outlet has power. Then check the door gasket for cracks or gaps that let cold air escape. If warm air leaks out, the internal temperature can never be maintained. Additionally, verify the evaporator and condenser fans are running when the compressor is on. A silent or humming fan can indicate a motor issue or a blocked vent. How To Refrigerator team emphasizes inspecting the coils behind the grille; dust and pet hair insulating the condenser can force the compressor to work harder and reduce cooling efficiency. In older fridges, a defective defrost timer can stop ice from melting, causing frost buildup that blocks airflow. By addressing these basics, homeowners frequently recover cooling without costly repairs.
Quick Checks to Perform Before You Start
- Ensure the fridge is level and not tilted; re-level if needed.
- Inspect door seals: close the door on a dollar bill; if it pulls out easily, replace the gasket.
- Check the temperature setting: aim for about 37-40°F (3-4°C) in the fridge and 0°F (-18°C) in the freezer.
- Listen for the compressor: it should hum and cycle on/off every few minutes; if the unit is silent, there may be a power or relay issue.
- Locate and clean condenser coils: dust buildup reduces cooling efficiency; vacuum and brush the coils at the back or under the grille.
- Ensure proper airflow: internal vents should not be blocked by containers or frost buildup.
If these checks don’t restore cooling, proceed to the diagnostic flow for deeper testing.
Common Causes and How to Test Them
A fridge not cooling can result from several common issues. A worn or dirty door gasket lets warm air in, so test by closing the door on a piece of paper or a dollar bill; if you can pull it out easily, replace the gasket. Dirty condenser coils force the compressor to work harder and can dramatically reduce cooling; clean them as described above. A mis-set thermostat is another frequent culprit; ensure the dial is not set too high or too low and verify with a thermometer. Frost buildup in the evaporator due to a faulty defrost system can block air flow; if you see frost, you may need to inspect the defrost timer and heater. Finally, a failed evaporator or condenser fan or a malfunctioning compressor may require professional service. Use the diagnostic flow to prioritize fixes starting with the simplest checks.
Diagnostic Flow Overview
This guide follows a logical flow: symptom → diagnosis → solutions. Start with quick, non-invasive checks (power, seals, and coils). If the symptom persists, test each potential cause in order of likelihood: door seal, coils, thermostat, defrost system, fans, and finally the compressor. For each cause, apply the corresponding fix and re-test. If you cannot isolate the issue or if you encounter refrigerant or compressor problems, it’s time to contact a licensed professional. This approach minimizes unnecessary repairs while keeping you and your family safe.
Step-By-Step Fix Preview
The following steps target the most common cause—dirty condenser coils and restricted airflow. Complete this sequence in about 30-45 minutes. You will unplug the unit, access the coils, and clean them thoroughly. Reassemble, plug back in, and test cooling. If cooling doesn’t return, proceed to additional diagnostic steps such as checking the door seals and thermostat settings.
Note: This is a preview. The full, detailed steps are in the dedicated STEP-BY-STEP block below for precise actions and safety notes.
Safety Warnings & When to Call a Pro
Working on a refrigerator involves electrical components and refrigerant systems. Always unplug before opening access panels. Do not touch refrigerant lines or attempt to repair internal cooling components yourself; contact a licensed technician for refrigerant work, compressor issues, or any sign of a refrigerant leak. If you notice frost buildup, unusual noises, or the unit is leaking water, stop troubleshooting and seek professional help. Regular maintenance by a pro can prevent many common cooling problems.
Long-Term Prevention: Maintenance That Keeps It Cold
To reduce future cooling problems, schedule periodic cleaning of condenser coils, inspect door seals annually, and ensure proper airflow around the fridge. Keep the interior organized so air can circulate freely. Set a stable temperature using a separate thermometer for verification. Regularly check the defrost system in frost-prone models and consider a service plan for older units. By integrating these habits, you reduce the chance of sudden cooling failures and extend the life of your refrigerator.
Steps
Estimated time: 30-45 minutes
- 1
Power down and access coils
Unplug the refrigerator, gently slide it away from the wall, and remove the front grille to access the condenser coils. Use a soft brush and a vacuum to remove dust and debris. Take care not to bend delicate fins.
Tip: Always unplug before touching electrical components; use a flashlight to see deep into coils. - 2
Clean coils and improve airflow
Thoroughly clean the coils until you can see a bright surface. Re-check the area behind the grille for obstructions like stored items or carpet fibers. Ensure there is at least a couple of inches of clearance around the back and sides.
Tip: Do not use water directly on electrical components; avoid spraying into electrical openings. - 3
Reconnect power and test cooling
Reattach the grille, push the fridge back into place, plug it in, and wait 5–10 minutes to see if the compressor starts and temperature falls. Listen for the fan and compressor cycling.
Tip: Give the system time to restart; some units require several minutes to stabilise. - 4
Check thermostat settings
Confirm the fridge is set around 37–40°F (3–4°C) and the freezer around 0°F (-18°C). If you have a separate internal thermometer, compare readings to the control dial.
Tip: Tiny mis-set changes can dramatically impact cooling; adjust gradually and re-test. - 5
Inspect door seals and defrost function
Examine door gaskets for cracks or gaps and replace if needed. If frost accumulates beyond a light layer, check the defrost timer/heater path and consider professional help to avoid refrigerant exposure.
Tip: A well-sealing door saves energy and prevents warm air infiltration.
Diagnosis: Refrigerator not cooling adequately
Possible Causes
- highDoor gasket not sealing properly
- highCondenser coils dirty or blocked
- mediumThermostat mis-set or faulty
- mediumDefrost system failure causing frost buildup
- lowEvaporator fan not running
- lowCompressor issue or refrigerant leak
Fixes
- easyTighten or replace door gasket; test for air leaks
- easyVacuum and clean condenser coils; ensure airflow around unit
- easyVerify thermostat setting and test with a thermometer
- mediumInspect defrost drain/timer; look for frost buildup and melt if present
- mediumTest evaporator/condenser fans and replace if faulty
- hardCall a professional for compressor or refrigerant issues
FAQ
Why isn't my fridge cooling even though the light is on?
A working light means power is reaching the unit, so the issue is likely airflow, coils, or thermostat. Start with door seals, coil cleaning, and thermostat checks.
If the light is on but it won’t cool, start with the door seals, coils, and thermostat settings.
Should I defrost frost buildup before using the fridge?
Frost buildup can block airflow. If you see frost, manually defrost or inspect the defrost timer and heater path. Persistent frost may require service.
Frost blocks airflow; defrost or check the defrost timer and heater.
Can a humming sound mean the compressor is failing?
A constant humming may indicate the compressor or a fan is under stress. If cleaning coils and seals doesn't help, contact a professional.
Humming can mean the compressor or a fan is struggling; get a professional if unresolved.
Is it safe to unplug the fridge to reset it?
Yes. Unplug for 5–10 minutes to reset the control board, then plug back in and wait a few minutes to test cooling.
Yes—unplug for a few minutes, then replug and check cooling.
How long should a defrost cycle take?
Defrost cycle duration varies; many systems complete in 20-40 minutes. If frosting persists, a defrost timer or heater issue may be present.
Most defrost cycles finish in about half an hour; persistent frost needs service.
When should I call a professional for a not-cold fridge?
If basic checks don’t restore cooling and you hear unusual noises, see leaks, or detect refrigerant smells, contact a licensed technician.
If basics fail or you hear leaks or noises, call a pro.
Watch Video
Top Takeaways
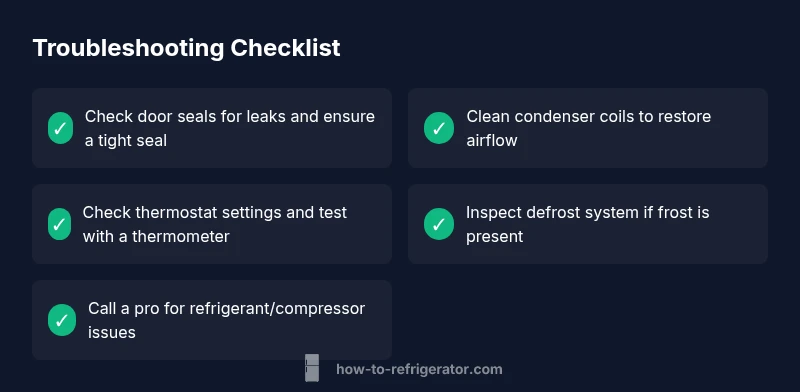
- Check door seals and level the fridge to stop warm air leaks.
- Clean condenser coils to restore cooling efficiency.
- Verify thermostat settings and defrost system before calling a pro.