Why is My Refrigerator Not Cold? Quick Diagnosis and Fixes
Urgent, step-by-step troubleshooting for a refrigerator that won’t cool. Learn quick checks, diagnostic flow, and safe fixes to restore cooling and protect food safety.

Most often, a fridge that won’t cool is caused by a poor door seal or an incorrect temperature setting, with dirty condenser coils as a close third. Start by inspecting the door gasket for leaks, confirm the thermostat is set correctly (around 37-40°F for the fridge, 0°F for the freezer), and clean dusty condenser coils.
Why your refrigerator not cooling happens: quick overview
According to How To Refrigerator, most cooling issues start with airflow or door seals. The team found that improper temperature settings, dirty condenser coils, and restricted airflow are common culprits. These factors affect how heat is removed from the interior and how evenly cold air circulates. Understanding these root causes helps you prioritize fixes that buy time for more serious problems. Always unplug before inspecting any internal components, and use a flashlight to avoid missing subtle signs like a cracked gasket or frost buildup. By recognizing the patterns behind not-cold symptoms, you can act quickly to protect food and reduce energy waste.
Quick checks you can do right now
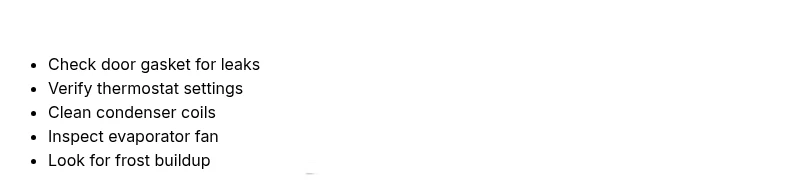
- Inspect the door gasket for cracks or gaps. A damaged seal lets warm air in and cold air out, so test with a folded bill: if it slides out easily, the seal may be failing.
- Verify the thermostat setting. For most households, the fridge should be around 37-40°F and the freezer at 0°F. If you’ve recently moved the dial, return it to the recommended range and monitor for a full cycle.
- Look for frost buildup or ice on the evaporator. Frost can block air passages and reduce cooling; gently thaw and clean if needed.
- Check condenser coils for dust. Dusty coils force the compressor to work harder and can reduce cooling efficiency. Clean with a vacuum or brush.
- Ensure air vents inside the fridge aren’t blocked by groceries. Blocked airflow causes uneven cooling and warm spots.
- Listen for the evaporator and condenser fans. If a fan isn’t running, it may hamper airflow and cooling.
If these checks don’t restore cooling, proceed to the diagnostic flow in the next section.
Common mechanical and electronic causes
- Door seals and leaks: A compromised gasket allows warm room air to seep in, causing the compressor to run longer and you to feel warmer air on shelves.
- Thermostat or temperature sensor failure: An inaccurate sensor can misread interior temperature, preventing the unit from cooling properly.
- Dirty condenser coils: Clogged coils reduce heat rejection efficiency, causing higher temperatures inside.
- Evaporator fan failure or airflow restriction: If the fan is blocked or burned out, cold air can fail to circulate to the fresh-food compartments.
- Frost buildup and defrost problems: Ice jams obstruct airflow and impair cooling; a malfunctioning defrost timer or heater may contribute.
- Defective compressor or refrigerant issues: These are less common and typically require professional service; dangerous or illegal handling of refrigerant is not advised.
Understanding these causes helps you decide what to test first and what to defer to a professional. This guide prioritizes safe, simple checks before touching any sealed components.
Safety and when to call a pro
Safety comes first. Always unplug the unit before inspecting electrical components, coils, or fan housings. Do not attempt refrigerant work yourself; handling refrigerant requires licensed technicians and specialized equipment. If you notice burning smells, oil leaks, or audible grinding noises from the compressor, stop using the unit and call a technician promptly. For most homeowners, non-invasive checks—door seal inspection, thermostat verification, and coil cleaning—can be done safely at home. If the problem persists after these steps, scheduling a diagnostic visit is the best course to prevent food spoilage and further damage.
Prevention tips to keep it cool
- Clean condenser coils every 6–12 months, more often in dusty environments, to maintain efficient heat rejection.
- Keep the appliance away from heat sources and ensure at least a few inches of clearance around the back for airflow.
- Don’t overload shelves; allow air to circulate and avoid obstructing vents inside the unit.
- Check the door seals regularly and replace damaged gaskets promptly to minimize warm air intrusion.
- Maintain a consistent room temperature and avoid frequent door openings during peak heat times.
- Schedule regular professional maintenance if your unit is older or you notice recurring cooling issues.
Documenting symptoms for service
When you call a technician, provide clear, organized information to speed up repair. Record the model and serial number, the exact temperatures you observe (fridge and freezer), any frost or condensation symptoms, noises you hear, and whether the issue happens after door openings or power events. Note the time of day when cooling drops become noticeable and whether the condenser fans run continuously or intermittently. This data helps a technician reproduce the problem and pinpoint the cause more quickly, reducing diagnostic time and cost. How To Refrigerator recommends keeping a simple troubleshooting log to track patterns over days or weeks.
Diagnostic ideas in practice
In real-world troubleshooting, you start with observable symptoms and work your way toward likely causes. If the door seal holds, test the thermostat range; if the temperature remains high, inspect the condenser coils while the unit is unplugged. If frost is present, thaw and inspect the defrost drain for blockages. If the air still remains stagnant after coils are clean, test the evaporator fan operation and verify that the damper or refrigerant flow isn’t restricted. Each step narrows the field, reducing unnecessary disassembly of sealed components and helping you decide whether a DIY fix is feasible or a pro is required.
Food safety and spoilage timeline
Food safety is critical when temperatures rise. Perishable foods can begin to spoil within a few hours if the interior temperature stays above 40°F. To protect your groceries, transfer perishables to a cooler or another cold appliance if you notice persistent warm temperatures. Discard any items that have been above safe temperatures for more than two hours, especially dairy, eggs, meats, and prepared foods. Regularly monitoring temperatures with a reliable thermometer helps you detect drifting temperatures sooner and prevents costly food loss.
Real-world case examples and fixes
Many not-cold fridge cases follow a familiar pattern: the door seal shows slight gaps, crust on coils reduces airflow, and the thermostat sits in an incorrect range. In some cases, a simple defrost and coil cleaning restore cooling without replacing parts. In other scenarios, a failing evaporator fan or a damaged damper requires part replacement or a service call. By documenting symptoms, homeowners can communicate clearly with technicians and receive faster, more accurate estimates. Remember that not all cooling issues are urgent emergencies, but delaying evaluation can lead to wasted food and higher repair costs over time.
Steps
Estimated time: 45-60 minutes
- 1
Power off and unplug
For safety, unplug the fridge before inspecting any mechanical or electrical components. Move away from water sources, and use a flashlight to inspect the back and coil area without touching live parts.
Tip: Always verify the plug outlet is not controlled by a switch you may have turned off accidentally. - 2
Inspect the door gasket
Open and inspect the door seal for cracks, stiffness, or gaps. If you can slide a thin piece of paper between the seal and the door frame with light resistance, the seal may be compromised.
Tip: If uncertain, perform a simple door-slam test: a feather-light touch should not let air pass; if it does, replace the gasket. - 3
Check thermostat setting
Make sure the thermostat is set within the recommended range (fridge around 37-40°F, freezer at 0°F). If it’s off-center or you can’t stabilize the temperature, test with a separate thermometer in both compartments.
Tip: After adjusting, give the unit 24 hours to stabilize before judging the result. - 4
Inspect condenser coils
Locate coils (usually at the back or bottom). If you see dust or lint, vacuum gently with a brush attachment and wipe with a damp cloth. Avoid bending fins.
Tip: Do not use water jets or harsh cleaners that can damage the coils. - 5
Test airflow and frost status
Check for proper airflow from vents. If you detect frost buildup inside the freezer or blocked evaporator, thaw and ensure the defrost drain is clear.
Tip: A defrost failure can mimic other issues; address frost and verify cycle operation. - 6
Assess for professional needs
If temperatures remain high after these steps, schedule a diagnostic visit with a licensed technician. Provide symptoms, model number, and a log of tests you performed.
Tip: Gather model/serial numbers and problem timeline to speed up service.
Diagnosis: Not cooling adequately or at all
Possible Causes
- highDoor seal leaks or improper door closure
- highThermostat or temperature sensor failure
- mediumDirty condenser coils reducing heat rejection
- mediumEvaporator fan failure or airflow blockage
- mediumFrost buildup or defrost system failure
- lowDefective compressor or refrigerant issues
- lowElectrical control board malfunction
Fixes
- easyReplace door gasket or reseal door to stop warm air intrusion
- easyTest and recalibrate or replace the thermostat sensor
- easyClean condenser coils and ensure proper airflow
- mediumReplace evaporator fan or repair airflow damper
- easyThaw frost, clear the defrost drain, and verify defrost system operation
- hardConsult a licensed technician for compressor or refrigerant issues
FAQ
What is the most common reason a refrigerator stops cooling?
Door seals or incorrect temperature settings are frequent culprits. Dirty condenser coils and airflow blockages also commonly cause warm spots. Start with seals, then temperature, then coils for the quickest win.
The most common reasons are a bad door seal, incorrect temperature settings, or dusty condenser coils. Start there for a quick check.
Why is my fridge warm but the freezer is cold?
That pattern usually means airflow from the freezer to the fridge is restricted. Check the damper, evaporator fan, and internal vents for blockages or frost buildup.
If the freezer is cold but the fridge isn’t, airflow is likely blocked—check the fan and vents.
Can a power outage cause fridge not to cool?
Yes. A power outage can reset electronic controls or trip a fuse, causing temporary warming. After power is restored, allow the unit to cycle for several hours and recheck temperatures.
Power outages can reset controls. Give the fridge time to cycle back to normal temperatures.
Is it safe to keep using a fridge that isn’t cooling?
Food safety is at risk. Keep the door closed to slow spoilage, monitor temperatures, and transfer perishables to another cold space if needed. If cooling doesn’t return promptly, call a professional.
If it’s not cooling properly, you should reduce usage and get a professional check soon to prevent spoilage.
When should I replace the thermostat?
If tests show consistent misreadings across ranges and after recalibration attempts, replacing the thermostat or sensor is warranted. Consider professional evaluation for accurate diagnosis.
If the thermostat readings are consistently wrong, replacement is likely needed and a pro can confirm.
How long does it take to fix a not-cold fridge?
Repair time varies by cause. Simple fixes like gasket replacement or coil cleaning can be done in under an hour, while complex refrigerant or compressor work requires professional service and more time.
Timing depends on the cause; some fixes are quick, others need a pro and take longer.
Watch Video
Top Takeaways
- Check door seals first and correct thermostat settings.
- Clean condenser coils regularly to maintain cooling efficiency.
- Document symptoms to speed up professional service.
- Know when to call a pro to avoid food spoilage and further damage.