Why Don't Refrigerators Work in the Cold: Troubleshooting for Homeowners
Learn why refrigerators fail in cold spaces and how to troubleshoot safely. This guide covers common causes, quick checks, a step-by-step fix, and prevention tips for homeowners.

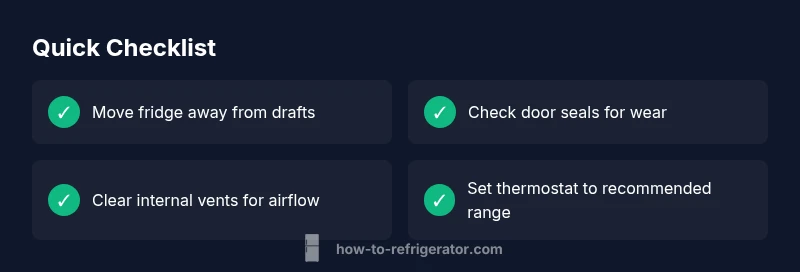
Most likely issue is the fridge operating in a temperature range that’s too cold for its controls, causing the compressor to cycle improperly. Quick fixes: (1) verify ambient room temperature and move the unit if it’s in a freezing space; (2) check the door seals; (3) set the thermostat to the recommended range (generally 35–38°F / 2–3°C). If the problem persists, proceed with the diagnostic flow.
Understanding the Cold Problem
When you ask why don't refrigerators work in the cold, the short answer is that many models rely on ambient temperature for sensors, defrost logic, and door-seal timing. If a fridge sits in a space that’s colder than recommended, the control board may misread the environment, causing erratic cycling or a failure to start cooling even when the interior is set correctly. According to How To Refrigerator, homeowners who ignore ambient conditions often end up chasing symptoms rather than solving the root cause. The result can be a fridge that feels like it’s “not working in the cold,” even though the appliance itself is technically operating within its design limits. Awareness of these dynamics helps you triage quickly and avoid unnecessary replacements.
In practical terms, the issue isn’t the cold itself, but how the cold space interacts with the fridge’s sensors, defrost timer, and fan logic. If your goal is to keep a reliable cold zone for perishables, you must ensure the fridge lives in a space that stays within the manufacturer’s operating envelope and that the unit isn’t competing with external drafts or freezing air.
Common Causes When a Fridge Fails in Cold Environments
Fridges in unheated garages, basements, or rooms with wide temperature swings can misbehave. Common causes include a misreading thermostat sensor, frost buildup blocking airflow, worn door gaskets, and vents that are blocked by stored items. How To Refrigerator analysis shows these issues frequently appear in cold environments and can trigger short cycling or insufficient cooling. A quick assessment of ambient room temperature, door seals, and defrost status often reveals the culprit without specialized tools. Remember: even if the door is closed, gaps around the gasket can allow warm air to enter and disrupt the cooling cycle. If you’ve recently moved the fridge to a colder space, your first step should be to verify that the ambient temperature is within the unit’s intended range and that no external drafts are feeding the interior.
By understanding these root causes, you can target the most likely problems first and avoid unnecessary troubleshooting detours that waste time and energy.
Quick Checks You Can Do Right Now
- Inspect door seals for tears or stiffness and perform a simple seal test by closing the door on a thin piece of paper; if it slides out easily, replace the gasket.
- Check that vents inside the fridge are clear and not blocked by items on shelves; poor airflow can cause uneven cooling and sensor misreads.
- Move the fridge away from exterior walls, heat sources, or unheated spaces; ensure the surrounding area is neither freezing nor excessively warm.
- Verify the thermostat setting is within the manufacturer’s recommended range and that you haven’t accidentally activated any energy-saving or defrost modes.
- Listen for the compressor: a constantly running unit or one that never starts could indicate a control or sensor fault rather than a simple temperature setting issue.
If any of these quick checks reveal an obvious fault (damaged gasket, blocked vent, or obvious placement issue), address it before moving to deeper diagnostics. Safety note: always unplug the unit before inspecting electrical components or seals.
Diagnostic Flow: From Symptom to Solution
Diagnosing why a refrigerator won’t work in the cold starts with the symptom, then narrows down to likely causes and fixes. Start by confirming ambient conditions, then test the door seals and airflow, and finally check the thermostat and control board. If basic checks fail to restore proper cooling, move to the step-by-step fixes for the most common cause. Throughout, rely on the principle of least intervention—tackle simple, safe steps first before touching electrical components.
In this flow, you’ll map a symptom to a likely cause, then implement a safe fix. If you’re unsure at any point, don’t hesitate to seek professional help. Some issues involve refrigerants or electrical faults that require a licensed technician.
Step-By-Step Fix for the Most Common Cause
This section provides a practical, safety-first approach to the most frequent culprit: a failing door gasket and improper sealing that lets warm air intrude and disrupts cooling. The steps are designed to be performed by homeowners with basic tools and careful attention to safety. Each step includes a practical tip to help you avoid common mistakes and maximize your chances of a successful fix. If you encounter resistance or lack confidence, stop and call a professional.
The following steps assume you have basic DIY skills and can safely unplug the appliance when needed. Do not attempt refrigerant handling yourself unless you are a licensed technician.
- Step 1: Power down and unplug the fridge. Remove items near the door to give you full access to the gasket. Tip: Use a flashlight to inspect the gasket seam for hairline cracks.
- Step 2: Inspect the door gasket thoroughly. Look for tears, stiffness, or gaps. Clean the gasket with mild soap and water to remove residue that can affect seal. Tip: Close the door on a piece of paper to test seal tightness at multiple points.
- Step 3: If the gasket is damaged or warped, replace it following the manufacturer’s instructions. Tip: Always reuse mounting hardware if it’s in good condition and compatible with the new gasket.
- Step 4: Reconnect power and allow the unit to run a cycle, then check cooling performance after 15–20 minutes. Tip: Document the initial temperature readings for comparison.
- Step 5: If cooling does not improve after step 4, check for additional airflow obstructions and confirm that the freezer and fridge compartments are balanced. Tip: Keep doors closed during testing to avoid introducing new variables.
Safety Tips and Common Mistakes
- Safety first: unplug the unit before inspecting any seals, wiring, or fans. Do not use metal tools near live electrical components.
- Avoid applying excessive force when removing panels or hinges; use the manufacturer’s service manual if available.
- Do not attempt refrigerant work or leak repairs unless you are a licensed technician.
- Never ignore unusual noises, frost buildup, or refrigerant odors—these can signal serious faults that require professional service.
Prevention and Long-Term Care in Cold Spaces
Preventive care is easier and cheaper than repeated fixes. Keep the fridge in a stable ambient temperature, away from unheated spaces or direct drafts. Regularly inspect door seals, clean the condenser coils, and ensure proper airflow around the unit. Use a thermometer inside the fridge to track temperature consistency and adjust the thermostat as needed. In cold environments, insulate the area around the fridge if possible and consider a model designed for garages or unheated spaces. Routine maintenance reduces the odds of sensor misreads and defrost timer faults over time.
How To Refrigerator's Verdict
The How To Refrigerator team recommends starting with environment and seal checks, then validating thermostat settings before moving on to any internal components. In most cases, a cold-space issue resolves with a simple repositioning, gasket replacement, or thermostat adjustment. The verdict is that homeowners can address many common cold-environment problems safely with basic tools and careful steps. If you encounter stubborn failures, trust the diagnostic flow and seek professional help when you suspect refrigerant, wiring, or control board faults. The How To Refrigerator team stands by this practical, safety-first approach.
Steps
Estimated time: 30-40 minutes
- 1
Power down and unplug
Unplug the fridge and clear the area around the cord. This reduces the risk of electric shock while inspecting seals and shelves. Check that power at the outlet is stable before proceeding.
Tip: Keep a notepad handy to record any observed issues and temperatures. - 2
Inspect placement and airflow
Move the unit away from exterior walls and ensure there is adequate clearance for air to circulate. Remove items that block vents or impede airflow inside the freezer and fridge compartments.
Tip: Leave at least a couple of inches of clearance on the sides and back. - 3
Test door seals
Close the door and inspect the gasket for cracks or stiffness. Perform a seal test with a dollar bill: if you can pull the bill out easily at any point, the gasket likely needs replacement.
Tip: Wipe seals clean before testing; debris can mimic seal wear. - 4
Adjust thermostat and defrost if needed
Set the thermostat to the manufacturer's recommended range. If frost buildup is visible, run a defrost cycle or manually defrost if your model supports it.
Tip: Document current settings before making changes; you can revert if needed. - 5
Test cooling after reconnection
Plug back in and power on. Allow 15–20 minutes to observe whether the coils start cooling and interior temps stabilize. Take temperature readings at multiple shelves.
Tip: If temperatures don’t improve, re-evaluate airflow and seals; consider calling a pro if issues persist.
Diagnosis: Fridge not cooling or cycling unusually in a cold room
Possible Causes
- highAmbient temperature outside the fridge's operating range
- mediumThermostat sensor or control board fault causing wrong readings
- lowDoor gasket leaks allowing warm air intrusion
Fixes
- easyRelocate unit to a temperature within its operating range or insulate the area
- easyTest and adjust thermostat, perform a reset or calibration if available
- easyInspect and replace door seals if damaged; ensure a complete seal when closed
FAQ
Why do some refrigerators stop cooling when placed in a cold room?
Many fridges rely on ambient temperature sensors and defrost logic that assume a typical indoor environment. A space that’s too cold can cause sensors to misread, delaying cooling or causing irregular cycling. Relocating the unit or adjusting the ambient temperature often resolves the issue.
Some fridges misread the environment when placed in very cold spaces, causing poor cooling. Relocate the unit or adjust the room temperature to fix it.
Should I reset the fridge to fix cold-space problems?
Resetting can clear temporary sensor glitches, especially after power interruptions. If the problem persists after a reset and quick checks, continue with the diagnostic flow or seek professional help.
Try a reset if you’ve just moved the unit or experienced a power issue, then proceed with further checks if cooling doesn’t improve.
How can I tell if the door seals are the culprit?
Inspect for cracks, stiffness, or gaps around the gasket. A simple seal test with a dollar bill can reveal leaks. Replace damaged seals to restore proper sealing.
Check the seals for wear and test with a dollar bill; replace damaged gaskets to fix leaks.
What safety steps should I take before attempting repairs?
Always unplug the appliance before inspecting seals or internal components. Avoid contact with electrical parts and never handle refrigerant yourself. If in doubt, contact a professional.
Unplug first, stay safe, and call a pro if you’re unsure about any repair.
When is professional service necessary?
If you notice refrigerant leaks, electrical faults, persistent non-cooling after basic checks, or if the unit is under warranty, professional service is recommended.
Call a pro if you see leaks or persistent faults beyond basic checks.
Can defrost cycles help with cold-environment issues?
Defrost cycles can clear frost buildup that interferes with sensors and airflow. If your model has an auto-defrost feature, use it as directed by the manual.
Defrosting can fix frost-related sensor issues and restore proper airflow.
Watch Video
Top Takeaways
- Ensure ambient conditions stay within spec for safe operation
- Check and replace worn door seals to prevent cold air loss
- Calibrate thermostat and validate airflow for balanced cooling
- Use the diagnostic flow before calling a professional
- Maintain preventive care to avoid future cold-space issues