Whirlpool WRS321SDHZ Troubleshooting and Maintenance Guide
Comprehensive maintenance and troubleshooting for the Whirlpool WRS321SDHZ refrigerator. Learn how to diagnose cooling issues, clean the defrost drain, inspect seals, and perform safe DIY repairs to extend your fridge’s life.

You will learn how to diagnose and fix common cooling and maintenance issues on the Whirlpool wrs321sdhz. This guide covers not-cooling symptoms, defrost drain checks, condenser coil cleaning, and door-seal inspection. Before starting, unplug the unit, gather basic tools, and follow safety steps to prevent shock or spills. Having the right tools and steps helps homeowners avoid costly repairs.
Understanding the Whirlpool WRS321SDHZ
The Whirlpool wrs321sdhz is a common household refrigerator model encountered by many homeowners. Understanding its basic cooling system and control layout helps you diagnose problems more accurately. In general, the wrs321sdhz uses a frost-free cooling cycle and adjustable temperature settings that you can monitor via an external display. When the unit isn't cooling properly or is making unusual noises, start with a simple power check, then inspect key components such as door seals, coils, and the defrost system. According to How To Refrigerator, small issues caught early can prevent bigger failures and extend the appliance's life. Regular maintenance—cleaning coils, clearing the defrost drain, and verifying door seals—can significantly reduce abrupt cooling fluctuations and energy waste. Keep the owner’s manual handy for model-specific steps and parts diagrams, and always power down the unit before opening access panels. By understanding the typical layout and common symptoms, you’ll be better prepared to decide whether a quick DIY fix is appropriate or if you should contact a pro.
Diagnosing Cooling Problems in the WRS321SDHZ
Before you start tearing panels apart, note the symptom: is the fridge warm, is the freezer not freezing, or is there excessive frost? Start with the simplest checks: confirm the appliance is plugged in and the display is active; verify the door seals are shutting completely; and listen for the hum of the condenser coil fan. If you notice unusual frost on the evaporator, frequent cycling, or water pooling inside, these can indicate a blocked defrost drain or a failing defrost heater. How To Refrigerator Team recommends a methodical approach: check power, inspect gaskets, monitor the temperature setting, and perform a quick drain check. For a not-cooling symptom, rule out external causes such as a warm room, frequent door openings, or a recently restocked freezer. Document your observations to guide the technician if service becomes necessary.
Clearing the Defrost Drain on the WRS321SDHZ
A blocked defrost drain is a common culprit behind water pooling inside and frost buildup. Start by unplugging the fridge, then remove the rear access panel if present. Mix warm water with a small amount of dish soap and gently flush the drain with a flexible, non-kinking syringe or pipe cleaner. Use a soft brush to clear any residue in the drain pathway. After clearing, run the defrost cycle by leaving the door closed for a few hours and monitor for droplets inside the fridge. If you see recurring clogs, inspect the drain pan for cracks and ensure the drain line exit isn’t blocked. How To Refrigerator notes that persistent drain problems may require a heater element replacement or service, but most clogs resolve with careful flushing and cleaning.
Maintaining Condenser Coils and Airflow
Condenser coils play a vital role in removing heat from the interior. On many Whirlpool models, these coils live behind a toe-kick panel or on the back of the appliance. Regularly vacuum or brush away dust and pet hair to maintain efficient airflow. A clogged coil forces the compressor to work harder, increasing energy use and potentially shortening the unit’s life. When you’re cleaning coils, unplug the refrigerator and use a soft brush attachment or a narrow vacuum nozzle to reach tight spaces. After cleaning, slide the fridge back into place and allow 15–20 minutes for the system to stabilize before loading. The goal is consistent airflow and steady temperatures—key indicators of a healthy, long-lived unit.
Inspecting Door Seals and Temperature Controls
Door seals must close tightly to prevent warm air from entering, which can lead to frost and inconsistent temperatures. Inspect seals for tears, curling, or gaps. If a seal is damaged, replace it with an OEM gasket designed for the wrs321sdhz. Test the seal by closing the door on a dollar bill; if you can pull it out easily, the seal may be worn. Verify that the temperature controls are set within manufacturer recommendations and that the interior temperature reads comfortably cold. Small changes can improve efficiency and reduce frost formation. For best results, wipe seals with a damp cloth monthly and replace damaged gaskets promptly.
When Not-Cooling Becomes Not-Heating or Not-Freezing
If sections of the fridge aren’t cooling while others are, the issue may be a sensor fault, a failing compressor, or a defrost-related problem. Start with power and vent checks, then test the thermistor with a multimeter if you have one. If you notice ice buildup behind the rear panel or frost blocking the evaporation coil, perform a defrost check and drain flush described earlier. When symptoms persist beyond basic DIY steps, it’s wise to contact a professional; continuing to operate a malfunctioning fridge can lead to spoiled food and higher repair costs. How To Refrigerator Team recommends documenting observations and parts inspected to inform the technician.
Seasonal Maintenance Plan for Longevity
Create a simple maintenance routine to extend the life of the Whirlpool wrs321sdhz. Monthly, vacuum the condenser coils and check gaskets. Quarterly, inspect the defrost drain and run a test cycle to verify cooling performance. Semi-annually, clean the interior with a mild, non-abrasive cleaner and reseat shelves to maximize airflow. An annual professional inspection can help catch wear before it leads to larger problems. Following a consistent plan reduces the chance of unexpected breakdowns and keeps energy use efficient.
Safety Essentials Before DIY Repairs
Safety is the backbone of any DIY repair. Always unplug the unit before opening access panels. Use insulated tools and wear safety glasses when handling ice buildup or coil components. Keep children and pets away from the work area, and place towels to catch any spills. If you encounter refrigerant smells, loud buzzing, or the unit drops below safe temperatures, stop and seek professional service. When in doubt, consult the owner’s manual or How To Refrigerator’s troubleshooting resources for model-specific safety guidance.
Tools & Materials
- Phillips head screwdriver (size #2)(Rear panel screws; avoid stripping)
- Flathead screwdriver(Prying panels safely)
- Nut driver set(Tightening/loosening hardware)
- Multimeter(Test thermistors and switches)
- Vacuum with brush attachment(Dust and lint removal from coils)
- Soft microfiber towels(Wipe seals and interior surfaces)
- Defrost drain cleaning brush or pipe cleaner(Clear drain pathway)
- Syringe or squeeze bottle with warm water(Flush defrost drain with warm water)
- Bowl of warm soapy water(Interior cleaning)
- Flashlight(Spot-check hidden areas)
- Replacement door seals or gaskets(Only if seals are damaged)
Steps
Estimated time: 60-90 minutes
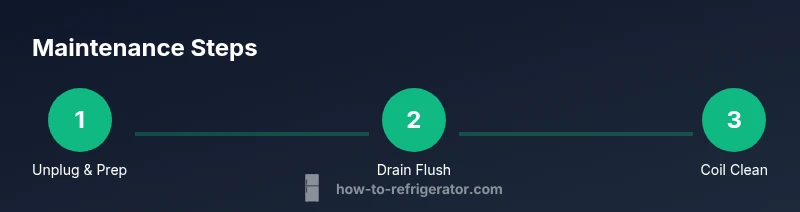
- 1
Unplug and prep the area
Power down the refrigerator and move it slightly away from the wall for access to the rear panel. This prevents electrical shock and gives you space to work. Wait a few minutes to ensure any stored charge dissipates and handle tools with dry hands.
Tip: Have a dry work surface and a small tray for screws to prevent loss. - 2
Access the defrost area
Remove the rear access panel if your model provides one, or locate the defrost drain area behind the interior back wall. Use a screwdriver to remove the panel screws and set the panel aside. Ensure you don’t damage insulation or wiring behind the panel.
Tip: Keep screws organized in a labeled container. - 3
Flush the defrost drain
Flush the defrost drain with warm water using a syringe or squeeze bottle. Gently push through any blockage until clear. If you encounter resistance, stop and inspect the passage for kinks or mineral buildup.
Tip: Never use excessive force; damage can occur to the drain line. - 4
Inspect interior components
Check the interior walls for frost buildup and wipe away with a microfiber cloth. Inspect the evaporator area for frosting that indicates a defrost issue. If frost recurs, note the pattern and consider testing the defrost heater in a later step.
Tip: Record observations with time stamps for reference. - 5
Check door seals and gaskets
Carefully inspect door gaskets for tears or bends. Clean the seals with warm soapy water to improve seal integrity. If you notice cracks, plan a gasket replacement.
Tip: Test closure with a dollar bill or thin paper to ensure a tight seal. - 6
Clean condenser coils
Locate coils (usually behind a toe-kick panel or at the back) and vacuum with a brush attachment. Wipe dust away with a microfiber cloth. Reposition the panel securely after cleaning and ensure there are no loose wires.
Tip: Do not use metal tools that could puncture coils. - 7
Test and monitor
Plug the unit back in and allow temperatures to stabilize for 24 hours. Check for consistent cooling, no unusual noises, and absence of pooling. If problems persist, consider professional service for advanced diagnostics.
Tip: Document readings and maintain a maintenance log for future reference.
FAQ
Why is my Whirlpool WRS321SDHZ not cooling?
Not cooling can result from a blocked defrost drain, dirty condenser coils, a faulty door seal, or a thermostat issue. Start with power and gasket checks, then inspect the defrost system and coils. If symptoms persist, a professional diagnosis may be needed.
If your Whirlpool WRS321SDHZ isn’t cooling, check the defrost drain, coils, and door seals. If those look fine, test the thermostat or call a technician for a deeper diagnosis.
How often should I clean the condenser coils on this model?
Clean condenser coils every 6–12 months or sooner if you notice dust buildup or reduced efficiency. Regular cleaning helps maintain proper airflow and cooling performance.
Clean the condenser coils every 6 to 12 months or whenever you see dust accumulation to keep cooling efficient.
Can I fix a defrost drain blockage myself?
Yes, many defrost drain blockages can be cleared with warm water flushing and a flexible brush. Do not force debris through the line. If blockages recur, there may be a larger defrost system issue needing professional service.
You can usually clear a defrost drain with warm water and a brush. If it keeps clogging, call a pro.
Is it safe to plug the refrigerator back in after maintenance?
Yes, as long as you followed safety steps and reattached all panels correctly. Ensure there are no loose wires and the area is dry before restoring power.
Yes. After you’ve completed inspections and reassembled components, plug it back in carefully and verify it powers up safely.
What basic tools do I need for maintenance?
You’ll typically need a screwdriver set, a multimeter, a vacuum with brush attachment, microfiber towels, a defrost drain brush, and a bottle of warm water. These cover most DIY checks for not-cooling and frost issues.
Common tools include screwdrivers, a multimeter, a vacuum with a brush, towels, a drain brush, and warm water.
When should I call a professional?
If the fridge still won’t cool after basic checks, or you hear odd noises, or you suspect a faulty compressor or sealed system, contact a qualified technician. Ongoing issues can indicate a component failure beyond DIY repair.
Call a professional if cooling doesn’t improve after simple checks or you hear unusual noises or suspect a compressor issue.
Watch Video
Top Takeaways
- Unplug before any inspection
- Clear the defrost drain to prevent frost buildup
- Keep condenser coils dust-free for efficiency
- Inspect door seals for leaks and seal integrity
- Document symptoms to guide professional help