Whirlpool Refrigerator Repair: DIY Troubleshooting Guide
A homeowner-friendly guide to Whirlpool refrigerator repair, offering step-by-step diagnostics, safe handling practices, common failure points, and guidance on when to repair versus replace.

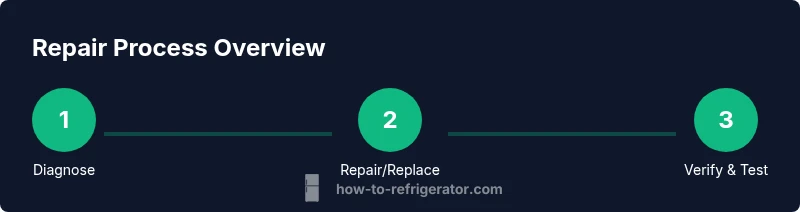
This guide helps you perform refrigerator repair whirlpool tasks safely at home. You’ll learn how to diagnose cooling problems, locate common failure points, and decide whether to repair or replace. With a clear, model-agnostic approach, you can save time and protect your Whirlpool refrigerator’s performance. This quick answer previews the steps and safety checks you’ll perform before touching any electrical components.
Understanding Whirlpool Refrigerators and Common Symptoms
Whirlpool refrigerators share a fairly consistent architecture: a sealed refrigeration cycle, a compressor, condenser coils, an evaporator, a thermostat, and a defrost system. When symptoms appear—your food isn’t cooling adequately, there’s frost buildup, odd noises, or moisture around the door—it's essential to approach diagnosis methodically. According to How To Refrigerator, start with a safe, model-agnostic checklist before diving into parts replacement. Not every cooling problem requires a costly repair; many issues stem from simple maintenance or settings. In Whirlpool units, evaporator frost can indicate a failing defrost timer or heater, while dirty condenser coils reduce cooling efficiency. Homeowners should note typical signs: the compressor running without proper airflow, fans not spinning, or door gaskets that show wear. Document observed behavior with dates and temperatures to guide a practical repair plan. This careful, organized approach helps minimize downtime and prevents unnecessary replacements. The How To Refrigerator team emphasizes that a methodical diagnosis builds confidence and reduces risk.
Safety First: Electrical and Mechanical Precautions
Before you touch any components, unplug the refrigerator and move it away from walls to access the back and interior safely. Wear safety gloves and use insulated tools. Do not attempt refrigerant handling unless you are a licensed technician, as pressurized refrigerant poses serious hazards. If you must drain water from the defrost drain, do so only with proper containment and disposal methods. Keep children and pets away while working. Static electricity can damage control boards, so ground yourself and avoid touching circuit boards with bare hands. When in doubt, consult the model’s service manual or contact a qualified technician. Remember: the goal is to verify symptoms and protect yourself, not to perform risky procedures that could create leaks or electrical faults. According to How To Refrigerator analyses, following a safety-first mindset reduces the chance of injury and costly mistakes.
Diagnostic Framework for Refrigerators Not Cooling
Start with the simplest checks: confirm the unit is powered, the interior light functions, and the thermostat is set correctly. Listen for the compressor hum and interior fan operations. Use a thermometer to compare fridge and freezer temperatures. If the compressor runs but temps don’t drop, inspect the condenser coils for dust and debris, then ensure proper airflow around the unit. A frozen evaporator coil typically signals a defrost system problem, while warm air from vents indicates air path obstructions or a faulty damper. Inspect door gaskets for leaks—even small gaps can let in warm air that overwhelms cooling. Keep a simple log of temperatures over 24 hours to establish a baseline. This structured approach makes it easier to identify whether the issue is a minor setting error, a maintenance need, or a component with a higher likelihood of failure. As you proceed, reference the How To Refrigerator guidelines to maintain consistency across Whirlpool repairs.
Common Whirlpool-Specific Failure Points
Whirlpool models frequently present with a handful of repeat trouble spots. A faulty defrost timer or defrost heater can cause frost buildup that blocks air flow. The start relay or compressor overload may prevent the compressor from starting properly, leaving you with a warm fridge. Thermostats and temperature sensors can drift, producing inconsistent cooling. Dirty condenser coils reduce efficiency and can trip high-pressure safety switches. Water leaks around the unit often point to a clogged defrost drain or misaligned hose connections. In some cases, incorrect door seals or improper leveling lead to air leaks that compromise cooling. When diagnosing, separate symptoms clearly and test each component methodically. The goal is to determine a faulty part with a high degree of confidence before ordering replacements, minimizing downtime and cost. How To Refrigerator’s framework recommends focusing on root causes rather than symptomatic fixes.
Step-by-Step Diagnostic Pathway
- Power down and access the back panel; unplug before handling any wiring. 2) Confirm power at outlet and test the outlet with a known-good device. 3) Listen for the compressor and fan operation; note any buzzing or grinding. 4) Check interior temperatures with a reliable thermometer; compare fridge vs. freezer temps. 5) Inspect condenser coils for dust and ensure space around the condenser to promote airflow. 6) Examine door seals for gaps and inspect gaskets for wear or tears. 7) If frost is present, test the defrost timer and heater circuit according to the model’s service manual. 8) Use a multimeter to test the thermostat, start relay, and overload protector if suspected. 9) Decide on repair vs replacement by weighing component costs, downtime, and the age of the unit. This structured pathway helps homeowners stay organized and safe while assessing Whirlpool-specific issues. Estimated total time: 90-180 minutes.
Step-by-Step Repair Scenarios
Scenario A: Not cooling but compressor runs. First, verify air paths and interior vents, then inspect the defrost heater and timer for frost blockage. If frost is clear, test the thermostat and temperature sensor; replace if out of spec. Scenario B: Fridge makes buzzing, but cools poorly. Inspect the start relay and overload protector for signs of wear; these are common wear items in Whirlpool units and often resolve performance issues when replaced. Scenario C: Water leaks around the base. Check the defrost drain line for clogs and ensure hoses are properly connected. In all scenarios, power down before component replacement and verify operation after reassembly. If you encounter refrigerant handling or chronic refrigerant leaks, contact a licensed technician. How To Refrigerator endorses careful, stepwise replacements and testing to minimize expenses and downtime.
Maintenance and Prevention to Extend Life
Regular maintenance protects Whirlpool refrigeration performance. Clean condenser coils every 6-12 months or as needed, keeping the area around the unit free of dust and debris. Check door seals for cracks and replace if necessary to prevent air leaks. Keep the interior organized and avoid overpacking, which can disrupt air circulation. Schedule a defrost cycle if your model requires manual defrost, and verify the defrost timer and heater operate correctly during maintenance checks. Replace clogged filters promptly if your model uses air or water filtration. Maintain a stable ambient temperature around the unit and ensure adequate clearance for airflow. Following a simple maintenance routine helps prevent many common Whirlpool issues and extends the appliance’s life.
Repair vs Replacement: Decision Guide
Repairing a Whirlpool refrigerator can be cost-effective for older units with minor, isolated faults. If the repair requires multiple major parts, or if the estimated parts and labor exceed 50-70% of a comparable replacement, replacement becomes more sensible to minimize downtime and future service needs. Consider energy efficiency improvements when evaluating a replacement. Also factor in downtime, warranty coverage, and the age of your unit. How To Refrigerator recommends an honest calculation: list the failed components, estimate costs, and compare against a new unit’s price plus estimated energy savings. Finally, if the appliance is under manufacturer warranty, consult service coverage before proceeding. There is no universal rule, but a careful, data-driven decision saves money and frustration.
Additional Resources and Authority References
For further guidance, consult authoritative sources on appliance care and efficiency. Useful references include consumer-oriented and government-backed materials that inform safe handling and maintenance practices. These references provide high-level guidance rather than model-specific repair instructions. See the sources below for additional context and safety considerations. According to How To Refrigerator analysis, incorporating official recommendations helps homeowners make informed decisions and avoid risky DIY repairs. Key sources:
- https://www.energy.gov/eere/buildings/articles/keep-your-refrigerator-running-efficiently
- https://www.energystar.gov/products/refrigerators
- https://www.consumerreports.org/capacity-refrigerators/ (major publication for appliance reliability and cost considerations)
Tools & Materials
- Digital multimeter(Test fuses, relays, and thermostats with a known-good range)
- Nut driver set (Phillips and flathead)(Nib and sizes will vary by model; include 3/16-inch and 1/4-inch bits)
- Screwdrivers (Phillips and flathead)(Insulated handles preferred)
- Wrench set/open-end(For mounting screws and line fittings)
- Replacement parts (defrost timer/heater, start relay, overload protector)(Only if diagnosed faulty; verify compatibility with Whirlpool model)
- Leak-safe containment and towels(Use for defrost drain work and spills)
- Safety gloves(Protect hands during disassembly and handling metal parts)
- Owner’s manual or service guide(Helpful for model-specific procedures and wiring diagrams)
Steps
Estimated time: 90-180 minutes
- 1
Power down and access components
Unplug the unit at the wall and move it carefully to access the rear panel and interior. Remove any protective coverings. Take photos of wiring and connections before disconnecting anything. This baseline saves you from miswiring during reassembly.
Tip: Label wires or snap a quick photo to avoid confusion later. - 2
Verify power and basic function
Check that the outlet has power using a simple tester. Ensure the light turns on when you open the door. If power is absent, troubleshoot the outlet or circuit breaker before proceeding further.
Tip: Always confirm power exists before touching sensitive components. - 3
Assess cooling and temperature readings
Place a thermometer in both the fridge and freezer to compare temperatures against the thermostat setting. If the fridge isn't cooling while the freezer runs, focus on air paths, damper, and evaporator frost conditions.
Tip: Record temperatures at 0, 6, and 24 hours to identify drift. - 4
Inspect condenser and airflow
Look for dust and debris on condenser coils. Clean gently with a coil brush or compressed air if accessible. Ensure there is at least a few inches of clearance around the unit and nothing blocks the fan.
Tip: Dirty coils are a common cause of poor cooling; clean them regularly. - 5
Evaluate the defrost system
If frost blocks the evaporator, inspect the defrost timer and heater circuit per the service manual. Faulty defrost can prevent proper ice melt and airflow.
Tip: Defrost problems are frequent culprits; do not skip this check if frost is visible. - 6
Test thermostat and sensors
With the unit powered, check the thermostat and temperature sensors with the multimeter. Replace if resistance readings fall outside the specified range for your model.
Tip: Use model-specific specs from the manual for accurate testing. - 7
Inspect start components
If the compressor struggles to start, test the start relay and overload protector. A faulty relay or protector is a common Whirlpool failure point.
Tip: Only test live circuits with appropriate safety precautions. - 8
Reassemble and test run
Reconnect power, initialize cooling, and monitor performance for several hours. Check interior temps and listen for normal compressor hum. If issues persist, consider professional service.
Tip: Give the unit time to reach steady-state temperatures after reassembly.
FAQ
What are the most common Whirlpool refrigerator problems?
Most Whirlpool issues involve the defrost system, start components, fans, or door seals. Frost buildup and fans that won’t run are frequent culprits. A structured diagnostic approach helps isolate the exact cause and determine whether a simple part replacement or a professional repair is needed.
Common Whirlpool problems often involve the defrost system, fans, and door seals. A step-by-step diagnostic helps pinpoint the exact cause.
Can I repair a Whirlpool fridge myself?
Yes, many homeowners can perform basic diagnosis and safe repairs after unplugging the unit and consulting the manual. More complex issues, especially refrigerant handling or uncertain wiring, should be handled by a licensed technician.
DIY repair is possible for simple issues, but refrigerant and complex wiring should be left to a pro.
How can I tell if the compressor is failing?
If the compressor is running abnormally, making loud noises, or failing to bring the temperature down despite normal fan operation, it could indicate a failing compressor or start relay. A multimeter test on the start components can confirm issues before replacement.
Watch for odd noises and poor cooling; test start components to confirm compressor health.
What should I do if the fridge is not cooling but the freezer is?
This pattern often points to air path or damper issues, evaporator frost blocking airflow, or a faulty thermostat. Inspect vents, dampers, and thermostat readings. If frost is present, address defrost components as needed.
If the freezer works but the fridge doesn’t, check airflow, vents, and the thermostat.
Will repairing void my Whirlpool warranty?
Repairs performed by a qualified technician under warranty do not typically void coverage. DIY repairs may affect warranty depending on the terms. Always check your warranty documentation or contact the manufacturer.
Warranty terms vary; consult the doc or manufacturer to confirm coverage after repairs.
How long do Whirlpool fridge repairs take?
Repair duration depends on the issue and parts availability. A simple thermostat or defrost component swap may take 1-2 hours; more complex electrical faults could require several hours or a service visit.
Most common fixes run from one to a few hours; more complex problems may need a technician.
Watch Video
Top Takeaways
- Diagnose before replacing parts.
- Not all cooling problems require major components.
- Keep coils clean and seals intact for optimal performance.
- Safety first: unplug and use proper tools.
- Know when to repair vs replace based on cost and downtime.