Parts for a Whirlpool Refrigerator: A DIY Repair Guide
Learn how to identify, source, and replace Whirlpool refrigerator parts safely. This guide covers common components, compatibility checks, tools, pricing ranges, and a step-by-step DIY repair approach.

You will learn how to identify common Whirlpool refrigerator parts you may need to fix cooling, replace door seals, or repair the ice maker, how to check compatibility, and where to source authentic parts. This guide includes safety steps, tool lists, and step-by-step replacement instructions to restore performance at home in minutes.
Understanding Whirlpool Refrigerator Parts
When you hear the phrase parts for a whirlpool refrigerator, think in terms of how a fridge is built rather than one single component. Whirlpool models share core subsystem groups, but exact part numbers vary by model family and production year. In this section, you’ll learn how parts are categorized and what to look for when diagnosing a problem. According to How To Refrigerator, successful DIY repairs start with accurate identification and a plan to source authentic parts. Knowing whether you’re dealing with electrical boards, sensors, or mechanical assemblies helps you avoid costly mis-orders and reduces downtime. In practice, you’ll encounter four major categories: refrigeration cycle components (compressor, evaporator, condenser, fans), control and sensor modules (thermostats, control boards), user-serviceable seals and gaskets (door seals, hinge gaskets), and consumables (filters, ice-maker components, water inlet valves). By understanding these categories and the symptom you observe, you’ll pinpoint likely affected parts and prepare for a safe replacement.
Common Parts You Might Need
Most Whirlpool repairs involve a handful of parts that frequently fail or wear out. The door gasket or door seal is a common starting point when you notice air leaks or frost buildup around the door. The ice maker kit and water inlet valve address ice production or water dispensing issues. Defrost heaters and thermostats handle frost buildup in the freezer compartment, while evaporator and condenser fans keep air moving through coils. Sometimes the issue is a failing control board or sensor that misreads temperatures. Condenser coils can become dirty and reduce cooling efficiency, especially if the fridge is in a dusty area. Understanding symptoms helps you choose the right part and avoid ordering parts you don’t need.
How to Check Compatibility and Source Parts
Before you order, locate the model number from the refrigerator’s data plate (usually inside the fresh food compartment wall or on the back). Use Whirlpool’s official parts lookup or trusted retailers to cross-reference the exact part number. OEM parts are generally the safest choice for reliability, but select aftermarket options can be compatible at a lower price; always verify fit with the model number and consult the part diagram. Keep a record of the model, serial number, and the date of purchase. How To Refrigerator recommends keeping notes on part numbers and exchange policies to simplify future repairs and reduce downtime. When shopping, compare pricing across multiple sources and check return policies in case the part doesn’t fit or function as expected.
Tools You’ll Need for Safe Replacement
Effective replacement requires the right tools and a focus on safety. A basic toolkit with a Phillips screwdriver set (sizes #1 and #2), a nut driver, and a set of pliers will handle most fasteners. A multimeter is handy for testing electrical components like thermostats or control boards, while a flashlight improves visibility in tight spaces. Always unplug the unit and discharge any capacitors before touching electrical components. Have fresh replacement parts ready, and consider ordering a spare screw kit to replace any lost fasteners. Protective gloves and safety glasses protect you from sharp edges and refrigerant exposure during disassembly.
Budgeting and Sourcing Strategies
Prices for Whirlpool parts vary based on part type, model year, and whether you choose OEM or aftermarket. In general, you can expect parts to range from a few dollars for small gaskets to a few hundred dollars for major assemblies like ice-makers or control boards. For many homeowners, choosing OEM parts provides peace of mind and longer life, while aftermarket options can offer cost savings if compatibility is confirmed. How To Refrigerator analysis shows that planning ahead—checking part diagrams, reading compatibility notes, and ordering matching parts for a single repair—reduces waste and returns. Always factor in shipping, tax, and potential restocking fees when budgeting for a repair.
When to Call a Pro and Safety Considerations
Some Whirlpool repairs involve high voltages, refrigerant handling, or sealed-system components that require specialized equipment and training. If you notice refrigerant odor, hissing sounds, or persistent electrical burn smells, it’s safer to call a licensed technician. Even for DIY projects, prioritize safety: unplug the fridge, avoid working behind the compressor compartment while the unit is hot, wear protective gear, and work in a well-ventilated area. If you’re unsure about a part’s compatibility or the correct replacement procedure, consult the manual or reach out to an authorized service provider.
Tools & Materials
- Phillips screwdriver set (size #1 and #2)(Crucial for removing cabinet screws and internal panels)
- Nut driver set (3/16" and 1/4")(Used for removing hex/torx fasteners on some Whirlpool parts)
- Torx driver set(Optional for certain models)
- Multimeter(Helpful for testing circuits on control boards)
- Replacement parts (OEM preferred)(Match model number and part number; verify compatibility)
- Safety glasses(Protect eyes from debris)
- Work gloves(Grip and hand protection)
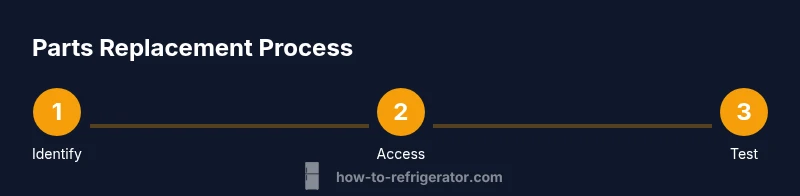
Steps
Estimated time: 60-90 minutes
- 1
Identify the faulty part
Review symptoms, compare with the part diagram, and confirm which component is most likely failed. Use the model number to locate the correct diagram and cross-check with multiple symptoms to avoid misdiagnosis.
Tip: Document symptoms with photos to ensure you order the correct replacement. - 2
Power down and unplug the refrigerator
Unplug the unit from the wall outlet and, if accessible, switch off the circuit breaker. This reduces the risk of electric shock while you work on electrical components.
Tip: Wait 5 minutes after unplugging to allow capacitors to discharge before handling any boards. - 3
Access the component housing
Carefully remove any interior panels or grille to expose the targeted part. Pay attention to wiring harnesses and connectors; label or photograph connections before disconnecting.
Tip: Put screws in labeled containers to prevent loss during reassembly. - 4
Remove the old part and disconnect safely
Detach the old part following the manufacturer’s guidance. Do not force connectors; use the correct tool and release tabs gently to avoid damaging sockets.
Tip: Keep track of small parts and note any orientation marks on connectors. - 5
Install the replacement part and secure connections
Position the new part, reconnect every harness, and secure mounting brackets as shown in the diagram. Double-check that fasteners are tight but not over-torqued.
Tip: If you encounter a stubborn connector, back off and re-seat it to avoid bent pins. - 6
Reconnect power and test the system
Plug the fridge back in and restore power. Run a basic function test (cooling cycle, ice maker, water dispenser) to confirm operation before final reassembly.
Tip: Monitor for unusual noises or leaks during the first 15 minutes of operation.
FAQ
Can I replace an individual part or must I replace the entire assembly?
Most common failures can be fixed by replacing an individual part. Some models require a full assembly replacement if multiple components are affected.
Most fixes involve individual parts; sometimes you may need the full assembly.
Are Whirlpool OEM parts worth the extra cost?
OEM parts typically offer the best fit and durability, which can translate into longer service life. Aftermarket parts can be suitable if you verify compatibility with the model and follow installation guides.
OEM parts fit best and last longer, but well-verified aftermarket parts can work too.
How do I know which part I need for a not-cold Whirlpool fridge?
Start with symptoms (not cold, frost buildup, strange noises) and locate the model’s parts diagram. Cross-check the suspected part against the symptoms and perform a basic test with a multimeter if you have one.
Match the symptom to the parts diagram and test if you can.
Is it safe to DIY replace an ice-maker? Shaking noises worry me.
Replacing an ice-maker is often straightforward if you follow the diagram and disconnect power. If the unit is still under warranty or if you encounter refrigerant-related issues, contact a pro.
Yes, it’s usually doable with care, but more complex issues call a pro.
What should I do if the part isn’t available right away?
Check alternatives in the same model family, request a hold or rush shipping, and document the part numbers for quick reordering once stock returns. Avoid mixing incompatible numbers.
If it’s out of stock, verify compatibility and be ready to reorder.
How long does a typical Whirlpool part replacement take?
Most straightforward replacements take about 60-90 minutes for a patient homeowner with a basic toolset. More complex control-board or refrigerant-related work may take longer and could require a pro.
Most fixes take about an hour or so; complex issues need a pro.
Watch Video
Top Takeaways
- Identify the exact faulty part before ordering.
- Always unplug the unit and wear safety gear.
- Check model and part numbers to ensure compatibility.
- Test the system after installation before final reassembly.