Repair Whirlpool Refrigerator: DIY Troubleshooting and Fixes
Learn safe, practical steps to diagnose and repair common Whirlpool refrigerator issues at home. This How To Refrigerator guide covers not cooling, frost buildup, defrost drains, and ice maker faults with clear, actionable instructions.

You can diagnose and repair common Whirlpool refrigerator issues yourself by following a safe, step-by-step approach. Start with basic safety: unplug the unit, remove items, and check for obvious frost or blockages. This guide covers not-cooling, unusual noises, defrost drain clogs, and door-seal leaks, with clear steps to fix or confirm you need service. Always prioritize safety and power down before inspections.
Understanding Whirlpool Refrigerator Repair: What You Can Fix at Home
According to How To Refrigerator, many practical refrigeration problems can be addressed by homeowners with basic tools and careful diagnostics. Whirlpool refrigerators, like other modern models, share common subsystems: the fresh-food compartment cooling circuit, the evaporator, defrost components, and the condenser. Before you reach for replacement parts, establish a safe plan, confirm that the issue is indeed a refrigerant or electrical symptom, and document what you observe. This approach reduces guesswork and helps you decide when a professional should be involved. In practice, most DIY repairs focus on accessibility, such as cleaning coils, sealing doors, clearing drains, and replacing simple fuses or relays. By respecting safety guidelines and the manufacturer’s specs, you can often restore performance without disrupting warranty terms. The How To Refrigerator team emphasizes patience, organization, and methodical testing to avoid accidental damage and ensure a reliable outcome.
Common Symptoms and Quick Diagnostics
Not cooling, unusual noises, or water leaks usually point to a few well-defined culprits. A fridge that isn’t cooling may have dirty condenser coils, a failed evaporator fan, a faulty thermostat, or a blocked defrost drain. Frost buildup on the evaporator can impede airflow, while water on the floor may indicate a clogged defrost tube or a leaking door seal. If the ice maker stops producing, the issue could involve water supply lines, a faulty icemaker module, or a jammed sensor. Use a simple checklist to organize observations: confirm the unit is plugged in, listen for fan operation, check for frost on the evaporator, inspect door gaskets for gaps, and wipe away dust from coils. How To Refrigerator analysis shows that addressing these basics early dramatically improves the odds of a successful home repair.
Safe Preparation and Safety Essentials
Safety is non-negotiable when working on any appliance. Start by unplugging the refrigerator and removing all stored items. If your unit has a water line, shut off the supply and disconnect the line following the manufacturer’s guidance. Keep a towel and a shallow tray for any condensation or small spills. Wear safety gloves and eye protection when handling sharp panels or electrical components. Take photos or notes before disassembly to aid reassembly. If the condenser is hard to reach, use a long-handled brush or vacuum with a narrow nozzle to avoid bending delicate fins. Finally, ensure children and pets stay away during the diagnostic window. The goal is to minimize risk while you verify symptom causes and prevent accidental electrical shock or water exposure.
DIY Troubleshooting for Not Cooling Whirlpool Refrigerators
Begin with the simplest checks. Confirm power at the outlet and ensure the circuit breaker is not tripped. Adjust the thermostat to a mid-range setting and observe any changes after 5–10 minutes. Inspect the condenser coils for dust and clean them with a vacuum and brush if needed. Listen for the evaporator fan when doors are closed; if you don’t hear it, the fan motor or a relay could be faulty. Look for frost on the evaporator that may indicate a defrost problem; a blocked defrost drain can cause pooling and meltwater on shelves. If after these steps the unit still fails to cool, test the door seals for air leaks and verify the internal temperature settings. If you suspect a refrigerant issue, lighting a safe test and scheduling professional service is advised. This method aligns with best practices from trusted home-appliance resources, including How To Refrigerator.
Clearing Defrost Drains and Combating Frost Buildup
A clogged defrost drain is a frequent reason for frost accumulation and water leakage inside the fridge. Start by emptying the freezer, removing shelves for access, and locating the defrost drain at the back of the freezer floor or ceiling. Use a flexible, non-metallic cleaner (such as a pipe-cleaner or a straightened wire) to gently dislodge any ice blockages. Do not use chemical drain cleaners in an appliance; they can leave residues and be unsafe around electrical components. After clearing, flush the drain with warm water through the tube, but avoid forcing ice deeper into the system. Re-check the drain pan under the unit and verify proper drainage during the first few hours of operation. Defrost times will vary, but patience is essential for a reliable fix.
Checking the Condenser, Fan, and Temperature Controls
Regular condenser coil cleaning improves airflow and cooling efficiency, reducing strain on the compressor. With the unit unplugged, access the coils and remove dust using a vacuum and soft brush. Reinstall panels carefully and power up to test. If the evaporator fan doesn’t run when the door is opened, the motor or control board may be faulty. Temperature control issues can mimic compressor failures; verify the thermostat contacts and ensure wiring is intact. If you hear loud humming or grinding, or if the unit runs continuously without cycling off, these may indicate a failing compressor or start relay. In such cases, evaluate repair costs and safety, and consider professional service for complex components.
When to Call a Technician and Planning Repairs
Some Whirlpool refrigerator issues are straightforward and affordable to fix, while others require advanced diagnostics or refrigerant handling. If you identify a refrigerant leak, a failed compressor, or a sealed refrigerant system, professional service is strongly recommended. For damaged door seals, coil damage, or sensor failures, you can often source compatible replacement parts and complete the repair at home with careful adherence to instructions. Before scheduling service, gather your model number, warranty status, and a concise record of observed symptoms, including when the issue started and any previous repairs. This preparation saves time and reduces diagnostic costs. The How To Refrigerator team reinforces the importance of safety and accountability when deciding between DIY fixes and professional repair.
Tools & Materials
- Phillips head screwdriver(for access panels and covers)
- Flat-head screwdriver(for prying open service panels)
- Nut driver set(for common appliance screws)
- Needle-nose pliers(for clamps and wires)
- Multimeter / voltage tester(to verify electrical components safely)
- Soft brush or coil cleaning brush(to clean condenser coils)
- Vacuum with brush attachment(to remove dust from coils and fans)
- Towels, tray, and bucket(for spills and condensation)
- Safety gloves(protect hands from sharp edges)
- Safety goggles(protect eyes during inspection)
- Camera or smartphone(document wiring and layout)
Steps
Estimated time: 45-75 minutes
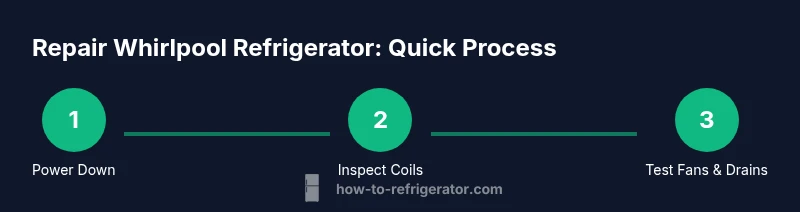
- 1
Power down and prep safely
Unplug the unit and remove all items from shelves. Photograph compartment layouts and panel locations to aid reassembly. If a water line is present, shut it off following the manufacturer’s instructions and disconnect carefully.
Tip: Never work with a plugged-in appliance; confirm power is fully disconnected. - 2
Check the condenser and coils
Locate the condenser coils (usually at the back or beneath the fridge). Vacuum dust and wipe with a soft brush. Re-seat panels securely after cleaning.
Tip: Clean coils every 6–12 months to maintain efficiency. - 3
Inspect the evaporator fan
With the panel removed, listen for the evaporator fan when doors are opened. If the fan doesn’t run, test wiring and the motor; replace if necessary.
Tip: A stalled fan can freeze the evaporator and cause cooling issues. - 4
Test thermostat and temperature controls
Check the thermostat setting and test for continuity with a multimeter per the model’s service manual. Ensure the control board is functioning and wiring is intact.
Tip: Set to manufacturer-recommended mid-range and observe for a cycle on/off pattern. - 5
Inspect the defrost system
If frost blocks airflow, locate the defrost heater and defrost drain. Clear any ice blockages with a flexible wire; do not use harsh chemicals near electrical parts.
Tip: Avoid forcing ice through the tubing – gentle probing is safer. - 6
Check water line and ice maker (if equipped)
Inspect the water supply line for kinks or leaks and verify the ice maker module operates. Replace faulty valves or modules if needed.
Tip: Shut off water supply before handling line connections. - 7
Decide on next steps
If tests indicate a refrigerant issue, a compressor fault, or persistent unusual noises, plan for professional service. Document findings to streamline diagnosis.
Tip: Create a written snapshot of symptoms to share with technicians.
FAQ
My Whirlpool refrigerator is not cooling; what should I check first?
Start with power at the outlet, thermostat setting, and listening for the evaporator fan. Check condenser coils for dust and inspect door seals for leaks. If cooling still fails, the issue may be with defrost or compressor components.
If your Whirlpool isn’t cooling, first check power, thermostat, and the evaporator fan. Clean the condenser coils and inspect door seals; if it still won’t cool, you might have a defrost or compressor issue requiring a pro.
How do I safely test electrical components without shocking myself?
Always unplug the unit before touching internal parts. Use insulated tools and wear gloves. If you’re not trained, skip voltage testing and consult a professional.
Always unplug the appliance before touching internals, and use insulated tools. If you’re not trained, don’t test voltage—call a pro.
Can I fix a clogged defrost drain myself?
Yes, you can clear a defrost drain with a flexible wire or pipe cleaner; avoid chemical cleaners. If water overflows, remove shelves and check the drain pan and tube.
You can clear a defrost drain with a flexible wire, but avoid harsh cleaners. If water overflows, check the drain tube and pan.
When should I replace the ice maker or compressor?
Ice makers and compressors have limited lifespans. If problems recur or repair costs rise significantly, replacement or professional assessment may be more economical.
If an ice maker or compressor keeps failing, consider replacement or professional repair to avoid repeated bills.
Is it safe to use household cleaners on coils?
Do not spray liquids near electrical components. Vacuum dust from coils and use a soft brush. Water contact with electrical parts should be avoided.
Avoid liquids around electrical parts; clean coils with a vacuum and brush.
Watch Video
Top Takeaways
- Power down before any inspection
- Clean coils to improve cooling efficiency
- Isolate the cause with a structured diagnostic
- Know when to call a professional