Troubleshooting and Fixes for wrx986sihz Refrigerator
Learn how to diagnose and fix common issues with wrx986sihz refrigerators. This How To Refrigerator guide provides safe, homeowner-friendly steps for cooling problems, defrost drainage, and routine maintenance.

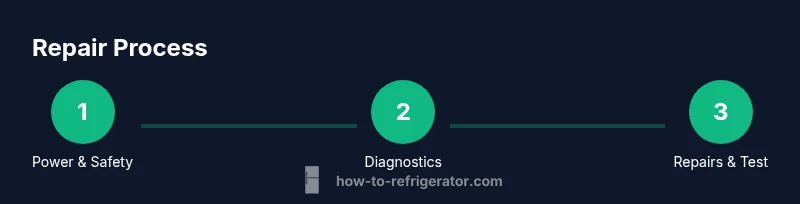
Goal: You will diagnose and fix common issues with the wrx986sihz refrigerator, focusing on not cooling, frost buildup, and drainage clogs. This guide covers safe prep, essential tools, and step-by-step fixes you can perform without professional help. Start by unplugging the unit, verifying power, and listening for compressor activity before you begin any inspection.
Getting to know wrx986sihz
The wrx986sihz is a modern frost-free refrigerator designed for family kitchens. It includes multiple cooling zones, an ice-maker option, and electronic controls. Understanding how it operates helps you diagnose issues quickly. According to How To Refrigerator, many problems with this model are related to airflow, defrost, or door seals rather than a singular failing component. In practical terms, you will often find that a clogged defrost drain or dusty condenser coils can cause intermittent cooling that feels like a mystery fault. Start your investigation by noting the symptoms, the area of the fridge affected (top, middle, or bottom), and any unusual noises. By focusing on airflow and temperature readings, you can differentiate between likely causes and decide whether to pursue basic fixes or deeper testing. If you’re new to appliance repair, approach each step methodically: verify power, observe the compressor, and keep a clear log of tests and observations.
Common symptoms and what they mean
Not cooling, frost buildup, water leaks, or excessive noise are the most common signs wrx986sihz owners report. Not cooling can stem from airflow problems, a dirty condenser, a failing thermostat, or a defrost drain that's blocked. Frosty drawers and a frost-covered evaporator often point to a defrost system issue or blocked heater circuit. Water leaks may indicate a clogged defrost drain or door seal leaks, while buzzing or grinding sounds suggest a fan problem or worn compressor components. This section helps you map symptoms to potential culprits, so you test in a logical order. From a practical perspective, start with the easiest checks first (seals, vents, and the outside area for air leaks) and progress to internal components if the symptom persists. How To Refrigerator’s experience with wrx986sihz models shows that many cooling-related problems are surprisingly simple to fix with routine maintenance and careful testing.
Safety first: unplugging and basic checks
Power safety is the first priority before any inspection. Unplug the appliance and switch off the dedicated circuit if possible. Use a non-conductive tool to gently test accessible connections and listen for the compressor activity when you reconnect power. Keep clear of the condenser fins and fan blades during inspection, and avoid touching sharp edges on panels. If you must move the fridge for access, have a helper and avoid pulling on power cords. Document what you test, what you see, and any signs of moisture or frost, so you can track changes over time. Always assume live circuitry unless you have verified power is disconnected. This careful approach minimizes the risk of electric shock and component damage during DIY troubleshooting.
Power and controller checks you can perform
Check the outlet with a simple lamp or meter to confirm it provides stable voltage. Inspect the power cord for wear or damage and replace if needed. Test the thermostat by adjusting setpoints and observing the compressor’s response; an unresponsive compressor or delayed reaction may indicate a faulty control board or sensor. Ensure the door switch activates when the door is opened, as a stuck switch can keep the compressor from running correctly. If you’re comfortable, use a multimeter to verify continuity on thermostat circuits and door-switch wiring. Keep notes of readings and correlate them with operational changes. If readings are outside normal ranges, you may need to replace parts or escalate to a pro.
Defrost drain and frost buildup: diagnosis
A clogged defrost drain is a frequent source of frost and water leakage. Inspect the drain line for kinks or blockages where ice often forms. Gently clear blockages with a flexible wire or pipe cleaner; avoid rigid metal tools that could damage coils or the evaporator. If you observe frequent frost buildup, follow the defrost timer and heater wiring path to check for continuity and heat at the evaporator. Document any frost patterns and monitor changes after clearing the drain. Clearing the drain often resolves both frost accumulation and leakage, restoring consistent cooling to the affected compartments.
Condenser coils and airflow: cleaning and maintenance
Dusty or blocked condenser coils reduce cooling efficiency and raise energy use. Unplug the unit and locate the coils (usually behind a grille at the back or beneath the machine). Use a soft brush or a vacuum with a brush attachment to remove dust, being careful not to bend the fins. Clean from the inside out, ensuring air can move freely around the coils. Recheck airflow after cleaning by listening for the fan and feeling for consistent air movement near the vent. Regular coil maintenance improves cooling, reduces noise, and extends compressor life. If you notice persistent heat buildup or an unusually warm exterior panel, recheck coils and surrounding area for obstructions.
Door seals and energy efficiency
Inspect door gaskets for cracks, tears, or missing sections. A poor seal allows warm air to enter, causing excess frost and shortened cooling cycles. Clean the gasket with a damp cloth to remove debris that can impair sealing. If you find cracks or gaps, replace the gasket and test the door’s seal by closing it on a piece of paper or a thin card to see if it holds firmly. Proper door seals help maintain proper temperatures and reduce energy use. For best results, perform this check whenever you notice condensation, frost, or unusual door drafts.
Preventive maintenance and when to call a pro
Establish a simple maintenance routine to catch problems early: visual checks of door seals, coil accessibility, drain clarity, and thermostat performance. If the unit still exhibits cooling problems after completing the steps above, or you detect refrigerant smells, unusual hissing, or buzzing from the compressor, stop DIY work and contact a licensed technician. Refrigerant work and sealed-system repairs require professional equipment and training. The best approach is to complete the safe inspections, document findings, and decide whether the issue is within a homeowner’s scope or requires professional service. How To Refrigerator recommends a staged approach: nail the basics first, then escalate only if necessary. The goal is reliable cooling with minimal downtime and safe handling of electrical components.
Tools & Materials
- Multimeter(to test voltage at power cord and thermostat circuit)
- Nut driver set(for internal panel screws)
- Screwdrivers (Phillips & flathead)(various sizes for panels and components)
- Vacuum with brush attachment(to remove dust from coils and vents)
- Soft cloth & mild detergent(for cleaning surfaces and gaskets)
- Defrost drain cleaning tool (flexible wire or pipe cleaner)(to clear blockages without damaging tubing)
- Replacement door seals (gasket)(if worn or torn)
Steps
Estimated time: 1-3 hours
- 1
Power down safely
Unplug the unit and switch off the dedicated circuit if accessible. Confirm power is off with a tester before touching any internal components.
Tip: Use a non-conductive tool and double-check the outlet with a meter. - 2
Check outlet and circuit status
Test the outlet with a lamp or voltage tester to ensure consistent power delivery. If the outlet or circuit trips, resolve electrical issues before proceeding.
Tip: Avoid probing the outlet with metal tools while it's powered. - 3
Inspect door seals and vents
Look for cracks or gaps in the gasket and ensure air can flow around the door perimeter. Clean seals to remove debris that could hinder sealing.
Tip: A simple test is to place a piece of paper at the door; if it slides out easily, the seal needs attention. - 4
Test thermostat and controls
Set the thermostat to a cooler setting and observe compressor response. If the compressor does not start or cycles irregularly, controls may be faulty.
Tip: Document readings and note if the temperature setpoints align with actual temperatures. - 5
Evaluate defrost system wiring
Trace defrost timer/heater wiring for signs of wear or loose connections. Check continuity with a multimeter where you’re comfortable.
Tip: Only perform electrical tests if you’re confident in your skills. - 6
Clear defrost drain and ice buildup
If frost blocks the drain, carefully clear blockages with a flexible wire. Avoid sharp tools that could puncture tubing or damage coils.
Tip: Work slowly and check downstream drainage with a small amount of water. - 7
Clean condenser coils and verify airflow
Disconnect power and dust off condenser coils with a soft brush or vacuum. Ensure airflow is unobstructed by removing nearby items.
Tip: Do not damage the fins; use gentle motions and a fin comb if needed.
FAQ
What are the most common causes of not cooling on wrx986sihz?
Not cooling is often caused by dirty condenser coils, a blocked defrost drain, a faulty defrost heater, a failing thermostat, or leaky door seals. Start with coils and seals before deeper testing.
Common causes include dirty coils, blocked defrost drains, and door leaks; start with coils and seals.
Can I fix a defrost drain clog myself?
Yes, you can clear a defrost drain using a flexible wire or pipe-cleaner after unplugging the fridge. Avoid chemical cleaners that may damage components.
You can clear the drain safely after unplugging the unit.
How often should I clean the condenser coils?
Clean coils when you notice dust buildup or reduced cooling efficiency. Regular visual checks help keep airflow unobstructed.
Check coils during routine maintenance when you notice reduced cooling.
Is it safe to attempt refrigerant repair myself?
No. Handling refrigerants requires licensing and specialized equipment. Leave leaks to a trained technician.
Refrigerant work should be left to pros.
What basic tools do I need for DIY fixes?
A basic toolkit with a multimeter, screwdrivers, and a vacuum cleaner is usually enough for initial checks.
A basic toolkit plus safety gear will cover many checks.
What warranty considerations apply to wrx986sihz repairs?
Warranties vary by model and purchase date. Check original documentation and contact the manufacturer for coverage details.
Check your warranty terms for coverage before repairs.
Watch Video
Top Takeaways
- Unplug before inspection and confirm power is off
- Check seals, defrost system, and condenser coils first
- Defrost drain clearance often resolves frost-related leaks
- If unsure about electrical work, stop and consult a pro