What Causes Refrigerator Compressor to Fail — Urgent Troubleshooting Guide
Learn the urgent, practical steps to diagnose why your refrigerator compressor fails—from power issues to faulty relays—plus a clear diagnostic flow, step-by-step repairs, safety tips, and prevention strategies.

Most refrigerator compressors fail due to electrical faults or mechanical wear: a seized motor, burnt windings, a faulty start relay, or refrigerant overload. If the unit won’t start or runs loudly and never reaches cold, power down the fridge and call a professional. In the meantime, check the outlet and clear unobstructed airflow around the condenser.
Why refrigerator compressors fail: common causes
The compressor is the heart of the cooling system, and it bears the brunt of constant operation. When a failure occurs, homeowners often blame the entire appliance, but the root causes are usually specific and addressable if caught early. According to How To Refrigerator, the most frequent culprits include electrical faults (like a short in the control board or wiring harness), mechanical wear from long service life, a failed start relay or capacitor, and refrigerant-related overload or leaks. Environmental factors—such as dirty coils, restricted airflow, or a blocked condenser—can also force the compressor to work harder, accelerating wear. Additionally, age and poor maintenance are common accelerants that raise the odds of a premature failure. By understanding these root causes, you can prioritize fixes that restore cooling and avoid unnecessary part replacements.
In practice, the goal isn’t just to replace a part; it’s to confirm whether the problem is isolated to the starter components or symptomatic of a larger system fault. The How To Refrigerator team has found that many compressor failures trace back to a preventable combination of dirty coils and electrical faults. Keeping the compressor area clean, ensuring proper airflow, and protecting the unit from power surges are simple steps that yield meaningful longevity benefits.
If you suspect a failure, act quickly: power down to avoid further damage, document any symptoms, and plan a diagnostic path before touching live electrical components. This approach minimizes risk and helps you decide whether a DIY fix is feasible or you should call a pro.
Symptoms to look for and what they mean
Noticing what your fridge is or isn’t doing is the first clue in diagnosing compressor trouble. Common signs include the compressor humming or buzzing without startup, the evaporator not cooling and the interior remaining warm, frost or ice buildup near the compressor or freezer coils, frequent cycling on and off, and a visible rise in cabinet temperature. Some units may run continuously yet fail to reach the proper cold levels. If you observe any combination of these symptoms, the problem could stem from the compressor itself or peripheral components like the start relay, relay overload, or refrigerant system.
From a diagnostic perspective, listen for unusual noises (ragged hums, clicks, or grinding) which can indicate mechanical wear or a stuck relay. Also check external clues: the condenser coils should be clean and free of dust; blocked coils force the compressor to strain. Finally, assess the power side—an unstable outlet or tripped breaker can masquerade as compressor failure. By mapping symptom patterns to likely causes, you can decide on a safe, efficient diagnostic path.
The brand context here matters: homeowners often underestimate how much a simple power issue contributes to compressor problems. The How To Refrigerator approach emphasizes starting with easy, low-risk checks and escalating only as needed.
Diagnostic flow: symptom-to-diagnosis pipeline
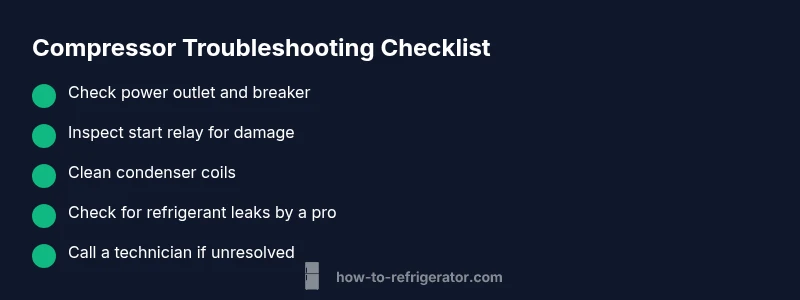
A systematic diagnostic flow helps separate the wheat from the chaff when diagnosing compressor failures. Start with the simplest checks and progress to more advanced tests:
- Symptom identification: note whether the unit cools, the compressor starts, and whether there are unusual noises.
- Safety and power checks: confirm the outlet is supplying power, the breaker isn’t tripped, and the cord isn’t damaged.
- Visual inspection: look for ice buildup, dirty coils, and signs of refrigerant leaks near the compressor.
- Relay and capacitor test: inspect the start relay and capacitor for cracks or scorching and test with a multimeter if you’re trained.
- Mechanical assessment: feel for proper compressor startup resistance and listen for abnormal noises.
- Refrigerant considerations: if you suspect a leak or improper charge, refrigerant work must be handled by a licensed technician.
Following this sequence helps avoid unnecessary repairs and narrows down whether the issue is electrical, mechanical, or refrigerant-related. If at any point you’re uncertain or the system shows signs of refrigerant issues, stop and contact a professional. Safety first.
This diagnostic framework aligns with How To Refrigerator’s evidence-based approach: start with safe, verifiable checks and escalate only when needed, documenting each step for technicians.
Step-by-step: diagnosing with the most common failure (start relay)
- Shut off power and unplug the fridge; move it away from the wall to access the back panel.
- Locate the compressor and its start relay/overload device on the side of the compressor.
- Visually inspect for cracks, discoloration, or melted insulation on the relay and wiring.
- If you have the right tools, test the relay with a multimeter; if it’s open or shorted, replace it with an identical or compatible unit.
- Reconnect wiring, reassemble panels, and plug the fridge back in. Listen for a smoother startup; the unit should cycle normally into cooling mode.
- If the compressor still fails to start or the unit continues to overheat, the problem may be the compressor windings or a refrigerant-related issue, which requires professional service.
Tip: Keep a clear label on wires before disconnecting any connector so you can reassemble exactly as you found them.
Safety tips and warnings
Safety is non-negotiable when working on a refrigerator’s electrical and cooling components. Always unplug the unit before touching any internal parts, use insulated tools, and avoid working near live lines. Refrigerant handling is hazardous and requires licensed technicians with proper recovery equipment. If you encounter oil residue around the compressor, a refrigerant leak may be present, and professional service is recommended. Do not attempt to vent refrigerant to the atmosphere. When in doubt, err on the side of caution and call a pro.
Additionally, avoid fan or coil damage by never prying or bending the condenser fins; use a soft brush to clean dust and debris. Proper airflow around the condenser is essential for efficient cooling and reduced compressor load. The smallest misstep can worsen the problem or void warranties, so prioritize safety and accuracy over speed.
By adhering to safety guidelines and avoiding risky shortcuts, you protect yourself and your appliance while increasing the likelihood of a correct diagnosis.
Prevention and maintenance to extend compressor life
Proactive maintenance reduces the likelihood of compressor failure and extends the overall life of your refrigerator. Regularly clean condenser coils, ideally every six months or as needed, and ensure there’s adequate clearance around the unit for heat dissipation. Check door seals for leaks or gaps—poor sealing makes the compressor work harder to maintain temperature. Keep the interior at a steady temperature; avoid frequent door opening and overloading the shelves. If your fridge is in an area with high ambient temperatures, consider relocating it away from heat sources.
Routine checks on electrical components, such as the power cord and outlet, help catch power-related issues early. If you notice rising energy bills or inconsistent cooling, schedule a professional inspection to verify refrigerant charge, electrical integrity, and compressor health. Proper maintenance is not only safer but also more cost-effective in the long run, especially for models with longer service life expectations.
How To Refrigerator’s guidance emphasizes consistent, preventive care as a core strategy to minimize the risk of compressor failures and maintain cooling performance over time.
When to call a professional and what to expect
If symptoms persist after basic checks, or you encounter refrigerant smells, oil around the compressor, or burnt wiring signs, it’s time to contact a licensed technician. A pro can perform a refrigerant charge check, leak detection, electrical tests, and compressor evaluation with appropriate equipment. Expect a thorough diagnostic report, potential part replacement, and a clear estimate before any work begins. A professional replacement compressor or complete unit service can restore cooling and protect your warranty.
Remember, not all failures are repairable in the field. In many cases, a failed compressor is beyond economical repair and requires replacement rather than patchwork fixes. The How To Refrigerator team recommends weighing the cost of repair against a full system replacement when professionals are involved.
Alternative content blocks and quick tips
This article’s structure supports a structured approach to troubleshooting, with a clear diagnostic path, practical steps, and safety-first direction. If you’re unsure at any point, stop and seek professional help. For the purposes of prevention, maintain regular coil cleaning, keep a clean, dry environment, and perform routine checks on wiring and breakers to reduce future risk of compressor failure.
Steps
Estimated time: 30-45 minutes
- 1
Power down and access the back panel
Unplug the fridge and move it away from the wall. Remove the back access panel to reach the compressor and start relay assembly.
Tip: Take photos before disconnecting wires to ensure proper reassembly. - 2
Inspect the start relay and overload
Visually inspect for cracks or burns. If you have a multimeter, test continuity; replace if no continuity or symptoms persist.
Tip: Handle connectors gently to avoid terminal damage. - 3
Test or replace the relay
If testing indicates failure or you can’t test safely, install a compatible replacement relay or capacitor kit.
Tip: Use manufacturer-specified or equivalent compatible parts. - 4
Reassemble and power on
Reattach the relay, weatherproof connections, and panel. Plug in and monitor startup behavior for a full cycle.
Tip: Listen for a clean start without abnormal buzzing. - 5
Evaluate cooling performance
Allow time for the unit to stabilize to its target temperature. If cooling remains insufficient, the compressor itself may be at fault.
Tip: Document temperature readings for technician reference. - 6
Call a professional if problems persist
If the compressor is not starting or shows signs of overheating or leaks, professionals should handle deeper diagnostics and refrigerant work.
Tip: Avoid attempting refrigerant handling without proper licensing.
Diagnosis: Fridge not cooling or compressor not starting; warm air inside, unusual noises, or continuous running
Possible Causes
- highPower supply issue (outlet, cord, or circuit breaker)
- highFaulty start relay or start capacitor
- mediumSeized or worn compressor windings/motor
- mediumRefrigerant leak or overload causing system stress
Fixes
- easyTest outlet with another appliance and reset breaker; replace damaged cord if needed
- mediumInspect/replace the start relay or capacitor on the compressor
- hardAssess compressor for seizure or motor wear; replace compressor if necessary
- hardSchedule licensed refrigerant service to detect leaks and recover refrigerant safely
FAQ
What are the most common signs of a failing refrigerator compressor?
Not cooling properly, warm air, unusual buzzing or clicking, and constant running are typical indicators that the compressor may be failing. These signs warrant a structured diagnostic approach.
Common signs include not cooling, warm air, and unusual buzzing; these point to possible compressor failure and should be checked with a careful diagnostic flow.
Can a refrigerator compressor be repaired, or does it need replacement?
Many compressor issues require replacement because repairs can be impractical or uneconomical. A qualified technician can advise whether a repair kit or full compressor replacement is the better option for your model.
Often you’ll need a replacement rather than a repair, but a technician can tell you which path is best for your unit.
Is it safe to DIY diagnose compressor problems?
Basic checks like power and airflow are safe, but refrigerant work, high-voltage components, and compressor replacements should be handled by licensed professionals to prevent injury and environmental harm.
Basic checks are fine, but refrigerant work and compressor replacement should be left to pros.
What should I do first if my fridge stops cooling?
First confirm power at the outlet and breaker, then inspect the coils and ensure the condenser is not blocked. If these basics check out but cooling remains poor, move to relay tests or contact a technician.
Check power, then coil cleanliness. If cooling still fails, test the relay or call a pro.
How long should a replacement compressor last?
A properly installed replacement can provide many years of service, but longevity depends on usage, maintenance, and proper refrigerant handling by technicians.
A replacement can last many years with proper maintenance, but avoid guesswork and rely on a qualified technician.
When should I consider warranty or service options?
If your fridge is under warranty, contact the manufacturer for covered service. If not, compare repair costs with the value of the appliance and consider a replacement if multiple major components fail.
If it’s under warranty, contact the maker. Otherwise weigh repair vs replacement carefully.
Watch Video
Top Takeaways
- Identify the most common failure risks early.
- Prioritize power and relay checks before deep diagnostics.
- Follow a structured diagnostic flow to avoid guesswork.
- Call a pro for refrigerant, compressor replacement, or complex electrical work.