Refrigerator Compressor: Troubleshooting and Safe DIY Fixes
A comprehensive, step-by-step guide for diagnosing and safely addressing refrigerator compressor issues, with homeowner-friendly tips, maintenance steps, and when to call a professional.

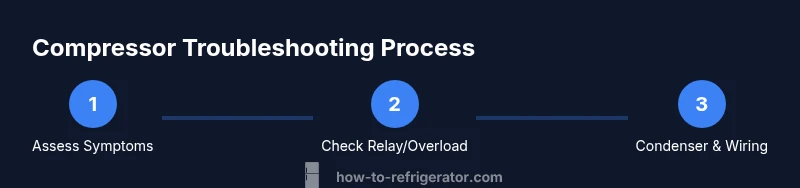
If your refrigerator isn’t cooling, the compressor may be the culprit. This guide walks you through identifying symptoms, powering down safely, testing the compressor’s start relay and overload, checking the condenser, and deciding when to DIY versus hire a pro. Follow these steps to diagnose common compressor problems and protect your appliance.
Understanding the Refrigerator Compressor
The refrigerator compressor is often described as the heart of the cooling system. It compresses refrigerant, raising its pressure and temperature so it can release heat in the condenser coils. When the compressor operates correctly, you’ll hear a steady hum and feel a cool air flow from the vents. If the unit isn’t cooling, or you notice unusual noises, the compressor or its supporting components may be at fault. According to How To Refrigerator, many DIY checks can reveal whether the issue lies with the start relay, overload protector, or the compressor itself. This section explains the compressor’s role in plain terms and sets expectations for what home troubleshooting can safely achieve.
How the Compressor Works in Plain Language
A typical household refrigerator uses a sealed refrigerant loop. The compressor compresses refrigerant gas into a high-pressure liquid, which then releases heat as it passes through condenser coils. The liquid expands and cools in the evaporator, absorbing heat from the fridge interior. If the compressor cannot circulate refrigerant properly, the evaporator won’t absorb enough heat, and temperatures inside the fridge rise. The process is cyclical and relies on a tight seal and healthy electrical connections. While the system is closed, external faults—like a faulty start relay or a fouled condenser—can mimic a failing compressor. Understanding the sequence helps you pinpoint whether the problem is electrical, mechanical, or related to airflow and heat rejection.
Common Symptoms That Point to a Problem
Beware of signs that the compressor or its support components may be failing. Common symptoms include a continuous or loud hum, warm air or no airflow from vents, frost or ice buildup in the freezer, and the compressor motor running excessively or cycling on and off abnormally. If you notice warm back panels or oil leakage near the compressor, stop using the fridge and unplug it. In some cases, a warm evaporator coil indicates inadequate refrigerant charge or a failed condenser fan, rather than a dead compressor. How To Refrigerator analysis shows that many apparently catastrophic compressor failures actually originate from a failing start relay or overload protector, which can be replaced without replacing the entire compressor.
Safety and Preliminary Steps Before You Start
Before any inspection, unplug the refrigerator and disconnect it from the power source. Do not work on live electrical components or expose refrigerant lines. If you must move the unit, do so carefully and avoid tilting the compressor, which can trap oil in the wrong places. Keep a clear workspace and wear safety glasses. If you detect any oil slicks, refrigerant odors, or refrigerant hissing, leave the area and contact a qualified technician. This phase minimizes risk and preserves your ability to accurately diagnose issues without creating safety hazards.
Testing the Start Relay and Overload Protector
Accessing the back panel or the service panel, locate the start relay and overload protector connected to the compressor. Disconnect power before handling any connectors. Use a multimeter to test continuity across the relay pins when the unit is unplugged, and check the resistance of the overload protector according to the manufacturer’s specifications. A faulty relay or protector can prevent the compressor from starting even when the rest of the system is intact. If you’re unsure, substitute with a known-good relay or consult a wiring diagram for your model. Proper testing helps you distinguish between a relay issue and a true compressor failure.
Checking the Compressor Itself for External Damage
Carefully examine the compressor for signs of oil stains, dents, or abnormal vibration when the unit runs. A loose mounting or misaligned condenser can place extra wear on the compressor, leading to overheating. If the compressor case is hot to the touch after a brief run, this could indicate an overworking motor or insufficient airflow. Do not attempt to disassemble the sealed compressor. Visual checks and noninvasive tests can reveal leaks or damaged components and guide your next steps.
Common DIY Fixes Homeowners Can Try (With Caution)
Several fixes are feasible for non-technical homeowners. Start by cleaning the condenser coils to improve heat rejection, ensuring there is at least several inches of clearance around the unit for airflow. Check door seals for tightness and replace worn gaskets to reduce heat intrusion. Vacuum coils with a brush to remove dust and debris, and ensure the fans are spinning freely. If the start relay or overload protector tests indicate a fault, replacing those components may restore start-up function without replacing the compressor itself. Remember: refrigerant handling requires licensed professionals, and many repairs beyond the relay or protector should be deferred to a pro.
When to Replace vs. Repair and How to Choose a Technician
If the compressor is truly failing and the system is not under a reasonable warranty, replacement is often the more cost-effective option. A technician can verify refrigerant leaks, test electrical circuits, and determine whether an accelerated failure mode is present. When selecting a technician, ask about warranty coverage, refrigerant type, and the expected lifespan of the compressor. The goal is a reliable repair with a clear cost estimate and a plan for preventive maintenance.
Proactive Maintenance to Extend Compressor Life
Preventive maintenance can significantly extend the life of your refrigerator compressor. Regularly clean condenser coils, keep the unit level, and ensure proper clearance around the back and sides for airflow. Clean door gaskets and verify thermostat accuracy to maintain consistent cooling. Schedule periodic professional service to check refrigerant charge, inspect electrical connections, and test the start components. Consistent maintenance reduces the likelihood of sudden compressor failure and helps you avoid expensive repairs.
Tools & Materials
- Multimeter(Digital preferred; measure resistance and continuity)
- Insulated screwdriver set(For panel screws and connector access)
- Nut drivers or socket set(Back panel access)
- Pliers (needle-nose)(Handle small connectors safely)
- Electrical tape(Secure splices and temporary insulation)
- Safety gloves and glasses(Personal protection during inspection)
- Replacement start relay and overload protector (optional)(Only if tests indicate failure)
- Dry rags or towels(Clean spills and wipe condensate)
- Vacuum with brush attachment(Clear dust from condenser coils)
- Model-specific service manual or diagram(Helpful for wiring and relay testing)
Steps
Estimated time: 60-120 minutes
- 1
Power down and unplug
Begin by unplugging the refrigerator and removing any power strips. This ensures your safety while inspecting electrical components such as the start relay and overload protector. If you must disconnect connectors, label them to preserve correct reassembly.
Tip: Double-check the wall outlet with a non-contact tester to confirm there is no live voltage before touching wiring. - 2
Access the compressor area
Move the fridge gently away from the wall and remove the rear access panel. Expose the compressor and its heat sink. Ensure you have adequate lighting and a clean workspace to avoid accidental drops or damage to hoses.
Tip: Take a quick photo of connectors before unplugging anything in case you need reference during reassembly. - 3
Inspect start relay and overload protector
Locate the start relay and overload protector attached to the compressor. Check for signs of cracking, scorching, or discoloration. If the device feels loose or shows heat damage, it may need replacement.
Tip: Avoid touching the relay’s terminals with bare hands; use insulated tools to test connections. - 4
Test with a multimeter
With the unit unplugged, test continuity across the relay pins and measure resistance per the service manual. Compare readings to the expected values for your model. A non-responsive relay or open circuit indicates a faulty start device.
Tip: Record your readings to compare against later if you reassemble and test again. - 5
Inspect the compressor terminals
Carefully examine the compressor terminals for loose or corroded connections. Tighten or clean as needed, but avoid bending terminals. Damaged wiring can mimic compressor failure by preventing start-up.
Tip: Use a small amount of dielectric grease on connectors to deter future corrosion. - 6
Check condenser and airflow
Examine condenser coils and ensure cooling airflow is unobstructed. A blocked condenser can cause the compressor to overheat and fail prematurely. Clean coils with a brush or vacuum if dusty.
Tip: Keep at least 2–3 inches of clearance behind the unit for proper heat dissipation. - 7
Reassemble and test
Reconnect all components, restore power, and observe the compressor behavior for several minutes. Listen for a steady start and normal cycling. If startup remains erratic or the unit fails to cool, proceed to professional service.
Tip: If the compressor overheats or emits a burnt smell, power down immediately. - 8
Document results and plan next steps
Record the outcomes of your tests, including relay condition and any component replacements. Decide whether to continue DIY fixes or contact a licensed technician for refrigerant handling and advanced diagnostics.
Tip: Keep receipts and notes for warranty or service records.
FAQ
What are the most common signs that a refrigerator compressor is failing?
Common signs include persistent humming, insufficient cooling, warm back panels, ice buildup, and unusual cycling. These symptoms can also result from faulty relays or airflow issues, so systematic testing is essential before assuming the compressor itself is bad.
Common signs are humming, not cooling, or warmth at the back. If in doubt, check relays and airflow first.
Can I fix a compressor myself, or should I hire a pro?
Basic maintenance and relay testing can be done by a confident homeowner with the right tools. More complex tasks, such as refrigerant handling or replacing the compressor itself, should be performed by a licensed technician to avoid safety hazards and code violations.
DIY is for simple tests; call a pro for refrigerant work or a full compressor replacement.
Is a buzzing or humming sound from the back of the fridge normal?
A light hum is normal when the compressor starts or runs, but a loud or continuous buzzing can indicate electrical or mechanical issues. If the noise is persistent after power restoration, it’s wise to have a professional inspect the unit.
A soft hum is okay; a loud or continuous buzz needs a professional look.
How long should a refrigerator compressor last?
Compressors are designed to last many years, often a decade or more depending on usage and maintenance. If you’re frequently needing repairs, it may be time to evaluate overall system health and energy efficiency.
Most last many years with proper care, but frequent repairs suggest broader issues.
What safety steps should I take before inspecting a compressor?
Always unplug the fridge, avoid touching live wiring, and work in a dry area. Refrigerant handling requires licensed technicians, and disassembly of sealed components can be dangerous.
Unplug first, stay dry, and don’t touch sealed refrigerant parts.
What is a start relay and why might replacing it help?
The start relay provides the initial push to start the compressor. A faulty relay can prevent startup even when the rest of the system is fine. Replacing a bad relay is a common, non-invasive fix.
The start relay gets the compressor going; a bad one is a common DIY fix.
Watch Video
Top Takeaways
- Identify whether the issue is electrical (relay/overload) or mechanical.
- Always power off before touching the compressor area.
- DIY fixes are safest for relay/overload and coil cleaning, not refrigerant handling.
- If in doubt, consult a licensed technician to avoid risking refrigerant exposure or compressor damage.