How to Fix Refrigerator Compressor: A Comprehensive Home Guide
Learn to diagnose and fix common refrigerator compressor problems with clear, step-by-step instructions, safety tips, and guidance on when to call a professional.

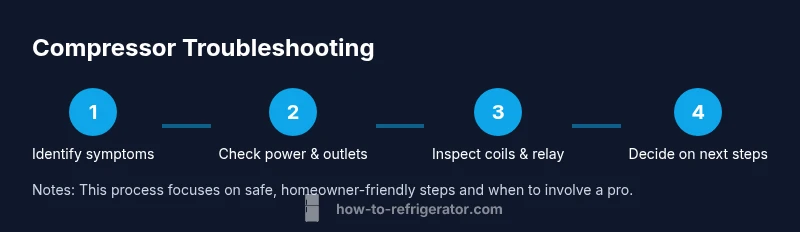
You're about to learn how to fix a refrigerator compressor by safely diagnosing common causes, verifying power, and performing reset or coil-related checks. This guide walks you through step-by-step investigations, from unplugging for safety to testing the start relay and condenser coils, with clear warnings about when to call a pro. Follow these actionable steps to reduce cooling issues without unnecessary replacement parts.
Why the refrigerator compressor matters
In this overview of how to fix refrigerator compressor, the compressor is the heartbeat of the cooling system. A healthy compressor pumps refrigerant through the sealed system, removing heat from the interior. When it struggles, you’ll notice warmth inside, frost at the evaporator, or longer cycles. According to How To Refrigerator, understanding the compressor's role helps homeowners troubleshoot safely and avoid unnecessary part replacements. This section explains how the compressor works in simple terms and why seemingly minor issues can cascade into bigger cooling problems. You’ll also learn practical signs your compressor may be failing, and what to check first before diving into hands-on fixes. By focusing on the core components—compressor, start relay, condenser coils, and airflow—you’ll create a clear plan to diagnose and address symptoms without guessing.
Common signs of compressor problems
A failing compressor often shows a few telltale symptoms that homeowners can observe without specialized tools. If your refrigerator is warm inside while the freezer portion still has cold spots, or if you hear a constant buzzing or grinding noise, the compressor could be under strain. The unit may cycle on and off frequently, or it might trip the circuit breaker when powering on. Frost buildup on the evaporator or unusually long run times are additional red flags. While some issues are caused by ancillary components, persistent cooling problems after basic checks often point to the compressor or its start components. In such cases, address small maintenance tasks first—clean coils, ensure proper door seals, and verify thermostat settings—as these steps can alleviate symptoms that mimic compressor faults. The How To Refrigerator team recommends testing these indicators as a first step before pursuing replacement options.
Safety first and prep work
Before you touch any parts, prioritize safety and preparation. Unplug the fridge or switch off the dedicated breaker to avoid electrical shock and refrigerant hazards. Keep a flashlight handy and work in a dry area; never handle metal tools near energized components. If your model has a bottom front grille, remove dust from the condenser coils with a soft brush and vacuum, as dirty coils add load to the compressor. Review the user manual for model-specific warnings, and never bypass safety features. If you’re unsure about any step, pause and consult a professional. This approach aligns with best practices for home appliance maintenance and keeps you out of harm’s way while you assess the situation. The How To Refrigerator analysis, 2026, emphasizes safety as the foundation of any DIY repair.
Homeowner-friendly checks you can perform
You don’t need fancy equipment to start diagnosing cooling issues. Start with the simplest checks: verify power at the outlet using a voltage tester; ensure the plug is firmly seated and the circuit isn’t tripped. Inspect the condenser coils for dust and debris and clean them gently with a coil brush. Check the door seals for gaps and replace worn gaskets to maintain proper internal temperatures. Make sure the thermostat is set to a normal level and that the evaporator fan can spin freely (when safe to access). These checks reduce the risk of misattributing a symptom to the compressor. For visual guides and reference diagrams, see the article’s accompanying images. The practical steps here help you rule out easy problems and are a good first pass before inviting a pro.
When to test start relay and electrical components
The start relay and overload protector are small components attached to or near the compressor. If you are comfortable with simple disassembly, locate the relay, reseat it, and listen for a more stable startup. If you notice heat buildup near the compressor or persistent buzzing, the relay or overload may be failing. You can test continuity with a multimeter if you have the training to do so, but avoid poking or prying at live parts. Replace only with the same part type and rating from the manufacturer. If you’re unsure, skip this step and proceed to the professional option. This step separates quick fixes from deeper electrical issues.
What to do next: repair vs. replacement
After performing basic checks, you must decide whether the issue can be resolved through homeowner maintenance or requires professional service. If the compressor makes no sound, does not hum, or is hot to the touch after a reset, contact a licensed technician, especially if refrigerant handling is involved. In most cases, sealed system repairs and compressor replacements require specialized tools and refrigerant recovery methods that are beyond DIY. The How To Refrigerator team recommends documenting symptoms, timelines, and any noises, which helps the technician diagnose quickly. If the costs and risk are high, replacement with a newer, energy-efficient model may be more economical in the long run.
Tools & Materials
- Insulated gloves(Protect hands while handling electrical components)
- Multimeter or voltage tester(To verify outlet voltage and continuity safely)
- Screwdriver set (Phillips and flat-head)(For panel access and components)
- Soft brush or coil cleaning brush(To clean condenser coils without damage)
- Shop vacuum with brush attachment(Clean dust from coils and surrounding area)
- Flashlight(For lighting in tight spaces)
- Owner's manual or model-specific guide(Helpful to locate the start relay and service access points)
Steps
Estimated time: Estimated total time: 2-4 hours
- 1
Unplug the refrigerator
Disconnect power by unplugging the cord from the wall outlet. If the plug is hard to reach, switch off the dedicated circuit breaker and wait at least five minutes before resuming. This prevents electrical shock while inspecting components.
Tip: Do not touch metal parts while the unit is energized; wait at least five minutes after unplugging to avoid capacitors discharging. - 2
Check circuit and outlet
Test the outlet voltage with a voltage tester; verify 120V supply and that the circuit isn’t tripped. If you see no power, reset the breaker and try another outlet if possible. If the outlet is controlled by a wall switch, ensure it is ON before proceeding.
Tip: If the outlet is on a dedicated circuit, avoid overloading it with other appliances. - 3
Clean condenser coils
With the unit unplugged, use a soft brush and vacuum to remove dust from the condenser coils. A clean coil reduces the compressor load and improves heat exchange. After cleaning, re-check for any obvious obstructions in front of the grille or fan.
Tip: Take before-and-after photos of coil area for reference during future maintenance. - 4
Inspect the condenser fan area
Look for debris around the condenser fan and ensure the fan blades spin freely when accessible. If you can safely reach the fan, remove obstructions and confirm there’s no rubbing or grinding noise when the appliance is powered for a brief test run (only if you’re qualified).
Tip: Never force a jammed fan; if it won’t spin freely, stop and consult a professional. - 5
Test start relay (if accessible)
Locate the start relay near the compressor; reseat the relay if it appears loose, and check for signs of damage. Do not force connections; a loose relay can prevent the compressor from starting or cause intermittent operation.
Tip: If you don’t feel confident testing continuity with a meter, skip this step and move to professional options. - 6
Run a controlled test and observe
Plug the unit back in and let the compressor run for about 60 minutes, watching for steady cooling and normal cycling. If the appliance remains warm or keeps tripping the breaker, stop testing and seek professional service. Record any noises, heat, or delays to share with a technician.
Tip: Keep a notebook of symptoms and time stamps to accelerate diagnosis.
FAQ
What are common signs that my refrigerator compressor needs replacement?
Not cooling, persistent buzzing, or overheating after a reset are strong indicators the compressor may need replacement. If basic checks don’t restore cooling, contact a professional for a definitive diagnosis.
Not cooling, loud buzzing, or overheating after a reset can indicate the compressor needs replacement; consult a professional for a definitive check.
Can I fix the compressor myself?
Some homeowners can perform safe, basic maintenance, like cleaning coils and verifying power. However, handling sealed refrigerant systems or internal compressor components should be left to licensed technicians.
You can do basic maintenance, but avoid working with sealed refrigerant systems; a professional should handle that.
Is a humming compressor a normal sign of operation?
A soft, even hum is typical when the compressor runs. A loud buzz or no sound at all after normal startup can indicate a problem requiring inspection.
A soft hum is normal; a loud buzz or no sound after startup may signal an issue needing a professional check.
How long does a compressor replacement take?
Replacement duration varies by model, but most services take a few hours to a full day, depending on parts availability and access.
It usually takes several hours to a full day, depending on the model and parts.
Should I replace the condenser coils instead of the compressor?
Condenser coils influence cooling efficiency and compressor load. If coils are clogged or damaged, clean or replace them; a compressor issue may still require professional diagnosis.
Coils affect cooling; clean or replace coils first, but a compressor problem may still need a pro.
What are the safety risks if I attempt DIY repairs?
Electrical shock, refrigerant exposure, and damaging sealed systems are serious risks. If unsure, stop and call a professional to avoid hazards.
There are real safety risks; if unsure, call a professional rather than risking harm.
Watch Video
Top Takeaways
- Unplug before inspection to ensure safety
- Clean coils to reduce compressor load and improve cooling
- Know when to DIY and when to call a professional
- Document symptoms to inform repair decisions