Water Supply Line for Refrigerator: Install & Troubleshoot Guide
Learn how to install or repair the water supply line for your refrigerator with practical steps, safety tips, and maintenance guidance from How To Refrigerator.

Goal: safely install or repair the water supply line for your refrigerator so the ice maker and water dispenser work reliably. You’ll need the right 1/4-inch compression fittings, a braided stainless line, a shut-off valve, and basic tools. Start by shutting off water, power (if accessible), and clear the area. Then route and connect the line, and finally test for leaks before leaving the job.
What is the water supply line for refrigerator and why it matters
According to How To Refrigerator, the water supply line for refrigerator is a small but essential plumbing segment that feeds the ice maker and water dispenser. It connects your home's cold-water supply to the appliance using a 1/4-inch compression connection. A reliable line prevents leaks, backflow, and air pockets that can affect ice quality or beverage water. Understanding what's involved helps homeowners plan, install, and maintain the line safely. In most homes, a braided stainless steel or copper line is used, routed through cabinets, and secured to prevent strain on the fittings. This guide focuses on safe, practical installation and maintenance that avoids water damage and preserves appliance performance. It also highlights common pitfalls and best practices to ensure a long-lasting connection that keeps your fridge functioning smoothly.
Safety first: shutoffs, electrical safety, and leak risk
Before you touch any plumbing, safety comes first. Begin by turning off the main water supply to prevent accidental leaks during work. If the line runs near electrical outlets or the fridge itself, consider unplugging the unit to reduce the risk of shock while handling fittings. Have towels or a small bucket ready in case of a drip as you disconnect lines. Never work on a live line when you suspect a frozen or damaged segment, and always verify there is no residual pressure in the segment you intend to work on. These precautions minimize the chance of a flood that could damage floors or cabinets.
Types of supply lines and fittings
There are several common options for refrigerator supply lines, with braided stainless steel and flexible copper being the most reliable for consumer use. The standard connection is 1/4-inch compression fittings at both ends, compatible with the valve outlet and the fridge inlet. When choosing line length, allow a little slack to accommodate movement and to prevent kinking that can restrict flow. Consider an anti-siphon valve or backflow preventer if your local code requires it. For most kitchens, a high-quality braided stainless line with factory-installed compression nuts offers the best balance of durability and ease of installation.
Planning your install: measurements, routes, and accessibility
Accurate planning reduces surprises during installation. Measure the distance from the shut-off valve to the fridge inlet with the fridge pushed a few inches away from the wall to allow working clearance. Plan a clean route that keeps the line away from hot appliances, sharp edges, and potential pinch points. Mount line clamps or brackets every 12 to 18 inches to prevent sagging and to avoid stress on fittings. Check your cabinet space and ensure there is room behind the fridge to access the valve and connections for future service.
Step-by-step plan overview (no duplication of the full sequence)
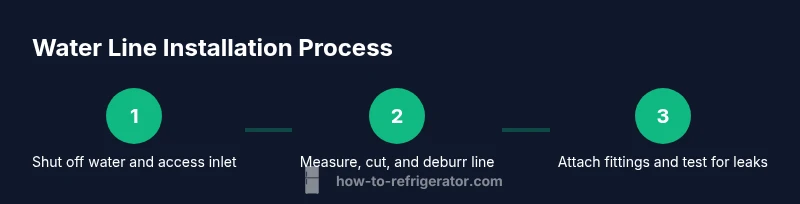
The installation or replacement follows a logical sequence: (1) shut off water and access the inlet, (2) remove the old line if present, (3) cut the new line to length with a clean edge, (4) install compression fittings on both ends, (5) connect the valve side first and then the fridge inlet, and (6) slowly re-open the supply to test for leaks and purge air. This overview helps you anticipate potential snags without getting lost in tiny details during the actual steps.
Tools and materials overview
A well-prepared toolbox speeds up the job and reduces the chance of mistakes. You will typically need a braided stainless steel refrigerator supply line (1/4-inch compression), a shut-off valve if you don’t already have one, a compression wrench, adjustable wrench, thread seal tape (PTFE), a utility knife or tubing cutter, and a small bucket or towels for spills. Having extra fittings (compression nuts, ferrules) on hand helps if you need to replace a damaged component. Always verify compatibility with your specific refrigerator model and local code requirements before starting.
Leak testing and preventive maintenance
After completing connections, slowly reopen the shut-off valve and inspect every joint for drips or moisture. Wipe away any water and watch for a few minutes to ensure a steady, leak-free seal. Run water through the dispenser and ice maker to purge air—this also helps identify slow leaks that can be missed at first. Schedule a quick annual check: inspect fittings for corrosion, verify line routing remains secure, and replace any aged lines or worn seals before they fail. Proactive maintenance saves floor damage and avoids service calls.
Troubleshooting common issues
If you notice leaking at a joint, tighten carefully with the appropriate wrench, but avoid overtightening which can crush the compression ferrule. If the ice maker doesn’t fill, check that the valve is fully open and the line isn’t kinked or bent. Low water flow can result from a partial blockage or a too-long run; remeasure and trim the line if necessary. If you still see problems after testing, consider replacing the line entirely, using a higher-quality hose, and confirming compatibility with your fridge’s inlet size.
Cost considerations and timeline
Prices for refrigerator supply lines vary by material and length, but homeowners typically choose braided stainless steel for durability. The total cost includes the line, fittings, and any valve you install—often a small, one-time investment that pays off in reliability. A typical install or replacement completes within an hour or two, depending on cabinet layout and accessibility. Plan for a dry run to minimize disruption and ensure you have all required parts before starting.
Tools & Materials
- Braided stainless steel supply line (1/4-inch compression)(Choose equal-length ends; ensure compatibility with fridge inlet and shut-off valve)
- Shut-off valve (angle stop) with 1/4-inch compression outlet(If your home lacks a valve, install a new one to allow future maintenance)
- Compression wrench set(Two wrenches recommended to prevent twisting the line)
- Adjustable wrench(Use the correct size to avoid rounding fittings)
- PTFE thread tape (Teflon tape)(Wrap 2-3 turns around male threads for a watertight seal)
- Tubing cutter or utility knife(Make clean, square cuts to prevent leaks)
- Bucket and towels(Contain spills and dry the area after testing)
- Spare compression fittings (nuts and ferrules)(Useful if you need to replace worn parts)
Steps
Estimated time: 45-60 minutes
- 1
Shut off water and access the inlet
Locate the main water shut-off and, if possible, the refrigerator’s dedicated shut-off valve. Turn the valve to the off position to relieve pressure. If your system has a secondary valve near the fridge, close it as well. This prevents uncontrolled water release during disconnection.
Tip: Have a towel ready; water can spurt when you loosen the line, especially if the valve was under pressure. - 2
Move the fridge for access
Gently pull the refrigerator away from the wall just enough to access the inlet tubing and valve. Check behind for any power cords or hoses that might snag. Do not rely on brute force; use a helper if the unit is heavy.
Tip: Place a folded blanket on the floor to protect surfaces and reduce friction while moving the appliance. - 3
Disconnect the old line
Loosen the compression nut on the valve side using two wrenches (one on the valve, one on the nut) to avoid twisting the valve. Detach the line from the fridge inlet, and set the old line aside. Inspect the valve outlet for corrosion or damage before attaching a new line.
Tip: Only loosen the nut a few turns at a time to avoid slipping and damaging fittings. - 4
Prepare the new line
Cut the braided line to length with a clean, square cut. Deburr any burrs or rough edges. Dry-fit the line to ensure it reaches the fridge inlet without pulling tight. Apply a small amount of PTFE tape to male threads on the valve if required by the hardware.
Tip: Measure twice; it’s easier to trim a little extra than to rework a too-short line. - 5
Attach fittings on both ends
Install compression nuts and ferrules on both ends of the new line (or verify factory-installed fittings). Hand-tighten, then snug with a wrench per the manufacturer’s instructions. Avoid overtightening, which can deform ferrules and cause leaks.
Tip: Lubricate threads lightly with plumber’s tape to improve sealing and prevent galling. - 6
Connect to valve and fridge
Attach one end of the line to the shut-off valve and the other end to the fridge inlet. Ensure the line runs smoothly with no sharp bends or kinks. Clip the line to cabinets at regular intervals to prevent movement.
Tip: Check that the dispenser line is not routed through a heat source or an area with high vibration. - 7
Restore water and test for leaks
Slowly reopen the shut-off valve and inspect all connections for leaks. If you see moisture, tighten the fitting slightly and recheck. Once no drips are observed, run water through the dispenser and ice maker for several minutes to purge air.
Tip: Keep a paper towel handy to quickly detect slow leaks during the initial test. - 8
Finish clean-up and document maintenance
Push the fridge back into place and wipe down any water spills. Note the date of installation and set a reminder for inspection every 12 months. If you notice recurring leaks or corrosion, replace the line promptly.
Tip: Record part numbers and valve type for future maintenance or if you need service.
FAQ
Do I need a shut-off valve for the refrigerator water line?
Yes. A dedicated shut-off valve helps isolate the fridge for maintenance and reduces the risk of leaks spreading through the house.
Yes, you should have a shut-off valve for easier maintenance and leak control.
What fittings size should I use?
Most refrigerator lines use 1/4-inch compression fittings. Check your fridge and valve outlets to confirm, and replace any mismatched parts.
Most lines use 1/4-inch compression fittings; verify both ends before buying.
Can I use flexible plastic tubing instead of braided line?
Flexible plastic can work in a pinch, but braided stainless steel offers better durability and leak resistance for long-term use.
Plastic tubing works briefly, but braided stainless steel lasts longer.
How long should I test for leaks after installation?
Open the valve gradually and inspect all connections for several minutes. Run water through the dispenser to purge air and confirm there are no drips.
Open the valve slowly and check for leaks for a few minutes.
What causes backflow and how can I prevent it?
Backflow can occur if a line is submerged or poorly routed. Use an anti-siphon valve where required and keep the line above potential sources of backflow.
Backflow can happen if the line is routed poorly; use anti-siphon devices where needed.
Is it okay to install a line myself if I rent the home?
If your lease allows alterations and you can restore property, a DIY install is possible. If unsure, consult a licensed plumber or the property manager.
Check your lease and local rules before proceeding; consider a pro if unsure.
Watch Video
Top Takeaways
- Plan the layout before starting to avoid backtracking.
- Use braided stainless steel for durability and easy installation.
- Test thoroughly for leaks after connecting all joints.
- Maintain lines annually to prevent unexpected failures.
- Document the install for future maintenance.