Water Line on Refrigerator: Fix and Maintenance Guide
Learn to diagnose and repair a leaking or noisy water line on your refrigerator with clear, actionable steps. From hose checks to valve replacement, this How To Refrigerator guide keeps homeowners confident and safe.

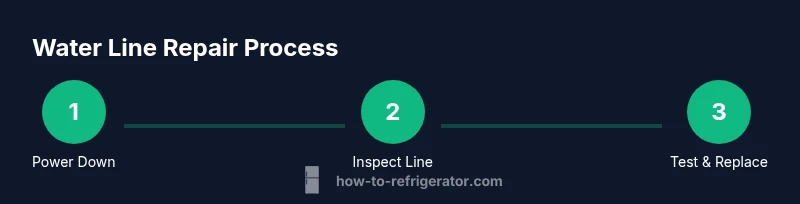
You're going to diagnose and fix a water line issue on your refrigerator. Start by safely shutting off the water supply and unplugging the unit, then inspect the supply hose, inlet valve, and fittings for cracks, kinks, or loose connections. If damage is found, replace the hose and tighten all fittings to stop leaks.
Understanding the water line on refrigerator
Your refrigerator water line delivers water to the ice maker and the water dispenser. The line usually runs from a household supply valve to a flexible hose that connects to the fridge's inlet valve. Most modern setups use a 1/4-inch OD line with compression fittings. Common failure points include kinks or crimps behind appliances, loose fittings, cracked hoses, or a malfunctioning inlet valve. The How To Refrigerator team notes that many problems stem from simple mechanical issues rather than complex refrigeration failures. A calm, methodical inspection can reveal the culprit and save you a service call. Gather your tools, shut off the water supply, and pull the fridge away from the wall just enough to access the back panel. This initial stage sets the foundation for a safe, effective fix.
Symptoms indicating a faulty water line
Leaks around the back of the fridge or pooling on the floor are obvious signs. You may also notice reduced water flow or no water to the dispenser or ice maker, frost buildup near the line, a rattling or hissing valve sound, or damp insulation around the inlet valve. If you see any of these, don’t assume it’s a single loose nut—inspect the entire run from the supply valve to the fridge. Even small pinholes in a flexible hose can cause dripping over time and lead to larger leaks. Document the layout of your line before touching anything so you can reassemble it correctly later.
Safety first: preparation and electrical caution
Before you touch any plumbing or electrical components, unplug the refrigerator and shut off the home water supply valve. Wear gloves for grip and protection, and place a towel or small bucket under the connection to catch drips. If you rent or you’re unsure about the plumbing in your home, consult a licensed professional. Avoid using power tools on live electrical parts near water, and never work behind heavy appliances without a helper if you’re not confident.
Diagnostic steps you can perform
- Inspect the entire line for visible damage, kinks, or crimps. A damaged hose should be replaced.
- Check compression fittings at both ends for tightness; loosen and reseat if necessary, then retighten only by hand and with a wrench as needed to avoid crushing the fitting.
- Test the water supply valve by turning it on slowly and watching for leaks at the valve body. If the valve leaks, replace it.
- Verify the line length and routing; avoid sharp bends that can kink the hose or place stress on the fittings.
- Reconnect, gradually restore power and water, and monitor for dripping for 10–15 minutes. If any leak persists, recheck fittings or consider replacing the entire line.
How to fix or replace the water line
If the line is cracked, kinked, or the fittings won’t seal, replace the entire run with a new supply line kit designed for refrigerators. Choose between copper or braided stainless-steel options. Copper provides durability, while braided stainless offers flexibility. Measure the distance from the wall valve to the fridge inlet, account for the appliance’s depth, and add some slack for future movement. Install the new line with compression fittings, tighten snugly, and use Teflon tape on male threads if recommended by the kit manufacturer. Route the line away from heat sources and avoid sharp bends. After installation, slowly reopen the supply valve and check all connections for leaks. If you see moisture, tighten the fittings a touch more and re-test.
Maintenance to prevent future leaks
- Replace refrigerator water lines every 5-7 years, or per manufacturer guidance, to prevent material fatigue.
- Use braided stainless or copper lines with corrosion-resistant fittings and avoid cheap, low-volume hoses.
- Keep the back area clear of dust and debris; dust can hide tiny leaks and make faults harder to spot.
- Install a shut-off valve near the wall connection to isolate the fridge for future maintenance without shutting off the whole house.
- Periodically inspect for kinks, bulges, or damp insulation and replace immediately if any suspect signs appear.
Authority sources and additional reading
For safety and best practices, reference Energy Department guidance on keeping appliances efficient and safe, as well as safety education resources from the CPSC. For practical repair guidance, see established home-maintenance extensions from university extensions. These sources help validate the process and offer additional context on when to call a professional.
Troubleshooting tips from homeowners
- Always have a backup plan: a small bucket and towels can save a lot of cleanup time during a leak.
- Label hoses and valves before disassembly so reassembly is straightforward.
- If you’re unsure about the type of line, bring photos or measurements to a hardware store to buy the correct replacement.
Authority sources
For safety and reliability, consult authoritative references and industry guidelines. This section provides URLs to credible sources you can review for additional context and verification. The aim is to supplement your hands-on work with trusted information from recognized institutions and agencies.
Tools & Materials
- Flathead screwdriver(Access panels or kick plates; avoid prying.)
- Phillips screwdriver(Screws securing back panels or brackets.)
- Adjustable wrench(Compression fittings; avoid over-tightening.)
- Pliers(Grip hoses and clamps; avoid damaging tubing.)
- Replacement water supply line kit(Choose 1/4-inch OD line; copper or braided stainless.)
- Teflon tape(For threaded connections if recommended by kit.)
- Bucket or towel(Catch drips during disconnection.)
- Gloves(Hand protection and grip.)
Steps
Estimated time: 20-40 minutes
- 1
Power down and shut off water
Unplug the refrigerator and close the wall valve to stop water flow. This reduces the risk of leaks and electrical shock while you work. Place towels nearby to catch drips.
Tip: Keep a photo of the connections before you begin so you can reassemble accurately. - 2
Expose and inspect the line
Carefully pull the refrigerator away from the wall to access the back. Remove any panels to reveal the supply line and fittings. Look for kinks, cracks, corrosion, or moisture around the connections.
Tip: Inspect both ends of the line—at the wall valve and at the fridge inlet valve. - 3
Check fittings and tighten
Using the wrench, gently tighten compression fittings at both ends. Don’t overtighten; metal fittings can strip threads or crack tubing. Wipe away any moisture to better see leaks.
Tip: If a fitting spins without tightening, the nut may be damaged and require replacement. - 4
Decide if a replacement is needed
If the hose shows cracks or bulges, replace the entire line. Measure distance and select a line with appropriate length and material. Ensure compatibility with your fridge model.
Tip: Choose braided stainless for flexibility and durability, or copper for long-term rigidity. - 5
Install the new line
Install the replacement line starting at the valve and connecting to the fridge inlet with proper fittings. Route the line to avoid sharp bends or contact with hot surfaces. Hand-tighten fittings, then give a quarter-turn with a wrench.
Tip: Leave a slight slack to accommodate fridge movement without stressing fittings. - 6
Test for leaks and restore power
Slowly open the wall valve and power the refrigerator back on. Watch all connections for 5–10 minutes; if moisture appears, tighten a bit more and recheck. Replace panels and return the fridge to its mounted position.
Tip: Keep towels handy for the initial test; a leak may appear briefly as seals settle.
FAQ
What causes a refrigerator water line to leak?
Leaks usually come from loose fittings, cracked hoses, or a faulty inlet valve. Environmental factors like vibration, improper routing, or kinks can also contribute. Inspect each connection and replace damaged parts to stop the leak.
Leaks typically come from loose fittings, cracked hoses, or a bad inlet valve. Check each connection and replace damaged parts to stop the leak.
Can I fix a water line leak myself?
Yes, many leaks can be fixed with basic tools and a replacement line. If you encounter refrigerant lines, electrical components, or persistent leaks, consider calling a professional.
Yes, many leaks can be fixed with basic tools and a replacement line. If you see refrigerant lines or persistent leaks, call a pro.
What tools do I need to fix a water line?
Essential tools include screwdrivers, an adjustable wrench, pliers, a replacement water line kit, Teflon tape if recommended, and towels to catch drips. A bucket helps if you have a larger leak.
You’ll need screwdrivers, a wrench, pliers, a replacement line kit, tape if advised, and towels.
How long does a typical water line repair take?
Most compact repairs take 20-40 minutes, depending on line type and access. Longer jobs occur if you need to remove panels or replace the wall valve.
Most repairs take about 20 to 40 minutes, depending on access and whether you need to replace the valve.
Should I replace the entire line or just the hose?
If the line is old, cracked, or repeatedly leaking, replace the entire run. If the hose shows minor wear but the system is otherwise sound, a hose replacement may suffice.
If it’s old or leaking, replace the whole run; if it’s just worn, a hose replacement may work.
Is there a warranty if I repair it myself?
Warranty coverage varies by part and retailer. Check your appliance warranty and the replacement-line kit terms. If in doubt, keep receipts and document the repair steps.
Warranty varies by item—check your appliance and kit terms. Save receipts and notes of what you did.
Watch Video
Top Takeaways
- Identify whether the leak is from the hose or fittings first.
- Use a quality replacement line with proper fittings.
- Always shut off water and power before starting work.
- Test for leaks gradually and inspect after installation.