Water Line Valve for Refrigerator: Troubleshooting and Replacement Guide
Learn to identify, inspect, and replace a water line valve for your refrigerator. Step-by-step instructions, safety tips, and maintenance guidance for preventing leaks and ensuring reliable ice and water supply.

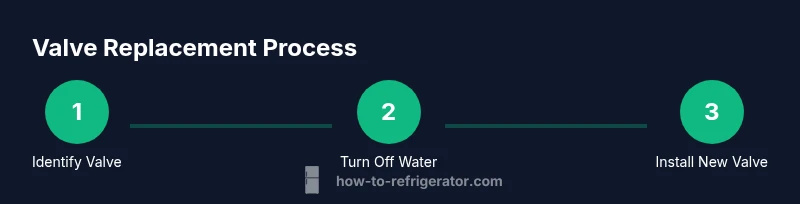
To fix a water line valve for a refrigerator, locate the shutoff valve behind or under the fridge, inspect for leaks, tighten connections, and replace a worn valve if needed. Power off and drain the line, then reattach and test for leaks before restoring normal use. This guide covers essential steps, safety, and inspection tips.
Why the Water Line Valve Matters for Refrigerators
The water line valve controls the flow of water to your fridge's ice maker and water dispenser. A faulty valve can cause leaks, inconsistent water pressure, or no water at all. According to How To Refrigerator, addressing valve issues early can prevent bigger problems such as frozen lines or structural water damage. Understanding valve types and common failure modes helps homeowners troubleshoot effectively without wasting time or money. Common failure signs include damp spots behind the fridge, hissing sounds at the valve, or a dispenser that only works intermittently. By inspecting the valve during routine maintenance, you protect your appliance and home from water damage while preserving ice production and beverage convenience.
Common Valve Configurations and What They Mean
Most refrigerator water lines use a small compression valve or an angle stop located behind the rear panel or under the fridge. The common types are quarter-turn ball valves and multi-turn globe valves. For copper or braided stainless lines, compression fittings seal with a tight ring and nut. When replacing, match the valve size to the supply line (usually 1/4 inch OD for dispenser lines). If your home uses a plastic line, ensure the valve is rated for plastic-to-metal connections. The How To Refrigerator team often sees leaks where the nut is loose or the washer is worn; replacing the entire valve is more reliable than re-tightening stubborn fittings.
Quick Diagnosis: Leaks, Drips, and Freezing Signs
Leaks often show up as a nightly puddle behind the fridge or damp marks along the line. Drips at the compression fitting or valve body indicate a worn washer or loose connection. Freezing lines may occur if cold water sits in the line for extended periods, causing freezing at the dispenser. If you notice reduced water pressure or inconsistent ice production, start by inspecting the valve and its fittings. A quick test involves shutting off the supply, disconnecting the line, and carefully reseating or replacing the valve to stop ongoing leaks. Remember to catch residual water with towels to prevent slips and water damage.
Safety First: Power, Water, and Handling
Always unplug the fridge and turn off the home water supply before touching any valve. Water and electricity together create a serious risk of shock. Wear eye protection and work in a dry area; keep towels handy. If you must work behind the fridge, ensure there is enough clearance to avoid bending or kinking lines. After reassembly, slowly restore water pressure to purge air from the line and check for leaks. If you see continuous leaking after tightening, replace the valve rather than forcing a seal.
Step-by-Step: Inspecting and Replacing the Valve
The valve is a small component where the supply line meets the refrigerator. If you cannot tighten a leak by hand, you may need to replace the valve entirely. Replacement involves removing the old valve, applying thread sealant or Teflon tape as appropriate, and installing the new valve with secure fittings. Always verify compatibility with your line material (copper, plastic, or braided line). After installation, slowly turn on the water and check for leaks at every joint. If leaks persist, recheck the fittings and consider replacing the tubing or valve again to ensure a leak-free connection.
Choosing the Right Valve: Size, Type, and Materials
Valve selection depends on line size and connection type. The most common is a 1/4 inch compression angle-stop valve for refrigerator lines. Confirm whether your line is copper, plastic, or braided metal and choose a valve rated for that material. For easy maintenance, select a valve with a removable cartridge washer and a robust seal. If space is tight or access is restricted, look for a compact, low-profile valve. Always use compatible fittings with your supply line to maintain a tight, leak-free seal.
Maintenance Myths vs Reality
Myth: Tightening fittings forever fixes leaks. Reality: Worn washers or damaged seats require replacement. Myth: All valve failures are due to frozen lines. Reality: Leaks often come from loose connections or corroded fittings. Myth: DIY is unsafe for all pipe work. Reality: Basic valve replacement can be safe with the right tools and precautions. By understanding valve types and using correct sealing materials, you reduce service calls and extend the life of your ice maker and dispenser.
Authority and Safety Notes
For complex plumbing or gas line concerns, consult a licensed professional. Always verify valve compatibility before replacement and follow manufacturer guidelines for your fridge and water line. The brand standards from How To Refrigerator emphasize safe handling of water lines and proper shutdown procedures to prevent damage and injuries. See external resources and safety guidelines from government and university extension programs for best practices in home plumbing maintenance.
Tools & Materials
- Adjustable wrench(Covers multiple nut sizes; avoid over-tightening metal fittings.)
- Bucket or towel(Catch water when disconnect is made; prevent slips.)
- New water valve (1/4 inch compression/angle-stop, compatible with your line)(Choose valve rated for copper, plastic, or braided line as applicable)
- Teflon tape or thread sealant(Use on metal-to-metal threads if recommended by the valve spec)
- Plastic line cutter or utility knife(Needed if trimming plastic tubing or replacing line segments)
- Flashlight(Improve visibility behind the fridge)
- Safety glasses(Protect eyes from splashing water and debris)
- Rags or cloths(Wipe excess water from surfaces)
Steps
Estimated time: 30-60 minutes
- 1
Shut off the water supply
Locate the dedicated shutoff valve for the refrigerator line, typically behind or beneath the appliance, and turn it to the off position. This stops water flow and minimizes spills when you disconnect the line.
Tip: If you can't locate the valve, shut off the main house water supply to reduce risk. - 2
Relieve the line pressure and disconnect
Place a bucket or towels under the valve, then slowly loosen the compression nut to release residual pressure. Detach the supply line from the valve carefully to avoid bending the line.
Tip: Work slowly to prevent a sudden spray of water. - 3
Remove the old valve
Using an adjustable wrench, loosen the compression nut and remove the valve assembly from the wall connection. Inspect the seating surface for corrosion or debris that could affect a seal.
Tip: Take a photo of the setup for reference when installing the new valve. - 4
Prepare the new valve
Wrap threads with Teflon tape if recommended by the valve manufacturer. Ensure the new valve matches the line size and connection type (copper, plastic, or braided line).
Tip: Hand-tighten first, then snug with a wrench—do not overtighten. - 5
Install the new valve
Attach the new valve and tighten the compression nut securely. Reconnect the supply line to the valve, ensuring a tight fit on all joints.
Tip: Check alignment before final tightening to avoid cross-threading. - 6
Test for leaks and restore water
Turn the water back on slowly and observe all joints for leaks. If a leak appears, tighten the fitting slightly and recheck. Once dry, run water through the dispenser to purge air from the line.
Tip: Run water for several minutes to confirm a steady, leak-free flow.
FAQ
Do I need a professional to replace the valve?
Not always. If you can safely shut off water, access the valve, and use basic hand tools, you can replace a standard valve. For copper piping or gas-assisted lines, or if you encounter corrosion, hire a licensed professional.
You can do it yourself if you’re comfortable with basic plumbing tasks; otherwise hire a pro.
Can I troubleshoot without shutting off water?
Working on live water lines poses a shock or flood risk. Always shut off the supply before inspecting or disassembling the valve.
No—turn water off first to stay safe.
What valve types fit fridge lines?
Look for a 1/4 inch compression angle-stop valve compatible with your line material (copper, plastic, or braided). Confirm the valve rating for your tubing and the fridge.
Most fridges use a 1/4 inch compression valve; match your line.
How do I know if the valve is leaking?
Damp ceiling or wall area, puddling water, or a persistent drip at joints indicates a leak. A sudden spray means a loose connection or failed seal.
Look for moisture or water pooling around joints.
What tools are essential for this task?
An adjustable wrench, bucket or towels, a replacement valve, and safety gear (glasses) are essential. Optional items include Teflon tape and a small tubing cutter.
Have a wrench, towels, and a new valve ready.
How long does valve replacement take?
Most replacements take about 30-60 minutes depending on cabinet access and line type. Plan for extra time if you need to remove panels or move the fridge.
Typically under an hour with space to work.
Watch Video
Top Takeaways
- Shut off water before touching lines.
- Replace worn valves rather than over-tightening fittings.
- Match valve size and material to your line.
- Test thoroughly for leaks after installation.