Replace Filter Whirlpool Refrigerator: A Step-by-Step Guide
Learn how to replace your Whirlpool refrigerator water filter with a clear, step-by-step guide. Tools, safety tips, and flushing instructions help ensure clean, safe water and ice.

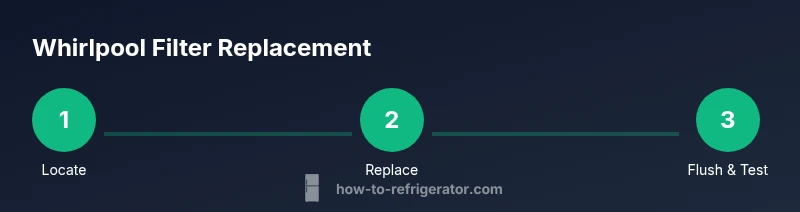
To replace a Whirlpool refrigerator filter, locate the filter housing, remove the old cartridge, install a new compatible Whirlpool filter, and flush until water runs clear. This quick DIY fixes common water-taste issues and preserves ice quality. According to How To Refrigerator, always verify model compatibility before purchasing, keep hands dry, and follow the manufacturer’s instructions.
Understanding Whirlpool filters and why replacement matters
Whirlpool refrigerators use cartridge-style water filters that are either inside the grille or behind a small panel. Over time, filters collect minerals, chlorine, and sediment, which can dull taste and reduce water flow. Replacing the filter on a regular maintenance schedule helps preserve ice quality and dispenser performance. The How To Refrigerator team emphasizes that choosing the correct filter type for your exact model is essential to ensure proper fit and filtration. Always consult your owner's manual or the model-specific guide to confirm compatibility and replacement intervals, which can vary by usage and water quality. If taste or flow declines, a fresh filter is often the quickest improvements you can achieve through a DIY replacement.
Choosing the right filter for your Whirlpool model
Whirlpool uses several filter types across its refrigerator line. The most common cartridge is model-specific, so you’ll want to locate your fridge’s model number (usually on a sticker inside the fresh food compartment or on the door jamb) and match it to the correct filter family. When shopping, look for terms like “Whirlpool compatible filter” and verify the part number against the manual. If you own a high-end or older model, there may be a push-to-release or twist-lock style. In all cases, avoid generic filters that aren’t rated for your exact model, as they can underperform or leak.
Safety and preparation for replacement
Before touching any water fittings, unplug the fridge if you can, or ensure the area is dry and safe. Have a towel handy to catch drips and a soft cloth to wipe the housing. Wear gloves if you prefer, although it’s not mandatory. Place a shallow tray under the area to catch any drips when removing and installing the filter. Clear a small space in front of the fridge to give yourself room to maneuver. These precautions help prevent slips and keep your kitchen tidy while you work.
Before you start: check water supply and filter location
Confirm the water supply is on and that you understand where your filter sits. Some Whirlpool models place the filter behind the grille in the fresh-food section, while others hide it behind the lower access panel in the fridge. If you’re unsure, consult the model-specific guide. A quick visual check confirms you’re about to remove the correct cartridge—look for the filters with the correct color-coded ring or locking mechanism. Identifying the right orientation helps ensure a secure seal when you install the new filter.
Common mistakes and troubleshooting
Common mistakes include overtightening the filter housing, which can damage the O-ring or threads, and incorrectly seating a new filter leading to leaks. Don’t reuse old filters; always replace with a new one that matches your model. If you notice reduced water pressure after replacement, check for obstructed tubing or a mis-seated O-ring. If you encounter persistent leaks, reseat the filter, wipe the area dry, and consider replacing the O-ring if it’s worn. When in doubt, pause and consult the manual or a trusted repair guide.
After replacement: flush, test, and recycle old filter
Flush the dispenser with several glasses of water to purge air and any residue from the filter. Continue until the water runs clear and the taste is clean. Inspect the area around the filter for leaks during and after flushing. Reset any indicator lights if your model supports it. Finally, dispose of the old filter according to local guidelines and note the replacement date for future maintenance.
Tools & Materials
- New Whirlpool refrigerator water filter (compatible model)(Check model compatibility by model number or part number on the label.)
- Soft cloth or towel(Wipe up drips and hold housing while opening.)
- Nitrile gloves(Optional for clean hands and grip.)
- Dish soap and water(For cleaning the filter housing exterior.)
- Flashlight(Improves visibility in tight compartments.)
- Small bucket or tray(Catch drips during replacement.)
Steps
Estimated time: 15-25 minutes
- 1
Locate the filter housing
Find the filter housing on or behind the grille, or inside the refrigerator, depending on your model. Confirm you’re working with the correct cartridge by checked markings or manual guidance.
Tip: Use a flashlight to inspect alignment notches before touching the filter. - 2
Remove the old filter
Grip the filter and rotate counterclockwise until it unlocks, then pull straight out. Have a towel ready for any drips during removal.
Tip: If it won’t budge, check for a locking tab or release mechanism. - 3
Prepare the new filter
Remove packaging, inspect the O-ring for damage, and moisten it lightly with water to ensure a proper seal.
Tip: Avoid touching the O-ring with dirty hands. - 4
Install the new filter
Insert the new cartridge and rotate clockwise until it clicks or seats fully as required by your model.
Tip: Do not overtighten; snug fit is enough and prevents damage. - 5
Flush the line
Run water through the dispenser for 2-3 minutes or until the water runs clear to purge air and residues.
Tip: Discard the first 2-3 glasses of water to ensure taste is fresh. - 6
Reset the indicator (if present)
Some Whirlpool models have a filter indicator. Reset or replace the timer if required by the manual.
Tip: Refer to the owner’s manual for exact reset steps. - 7
Check for leaks
Look around the housing for drips and wipe dry. If leaks persist, re-seat the filter or replace the O-ring.
Tip: Tighten gently and test again after a brief wait. - 8
Dispose and date your replacement
Dispose of the old filter per local guidelines and note the replacement date for future maintenance.
Tip: Set a reminder for the next filter replacement.
FAQ
How do I know which Whirlpool filter fits my refrigerator?
Check your fridge model number and use Whirlpool's compatibility guide to locate the exact filter type. If in doubt, contact support before purchasing.
Check the model number and Whirlpool's compatibility guide before buying.
How often should I replace a Whirlpool water filter?
Most Whirlpool refrigerators require replacement every 6 to 12 months, depending on usage and water quality. Replace sooner if you notice changes in taste or flow.
Most Whirlpool filters last 6 to 12 months; replace sooner if you notice changes in taste or flow.
Can I reuse an old Whirlpool filter?
No. Reusing old filters reduces filtration efficiency and may introduce contaminants. Always install a new, compatible filter.
Don't reuse filters; replace with a new one.
What should I do if water leaks after replacement?
First, unplug and dry the area, then reseat the filter, ensuring the O-ring is intact. If leaks persist, replace the filter or seek professional help.
If leaks persist, reseat or replace the filter and check the O-ring.
Do I need to flush after replacement, and for how long?
Yes. Flush for 2-3 minutes or until water runs clear to purge air and residues. This improves taste and safety.
Flush for a few minutes until the water clears.
Can a filter change improve ice quality?
Yes. A fresh filter reduces mineral buildup and often improves ice taste and clarity.
A new filter can improve ice taste and clarity.
Should I reset the filter indicator light?
If your model supports a reset function, perform it after replacement. Otherwise, the indicator may reset automatically.
Reset the indicator if your model supports it.
Watch Video
Top Takeaways
- Verify model compatibility before purchasing.
- Install the new filter firmly but not over-tighten.
- Flush 2-3 minutes after installation.
- Check for leaks and reset indicators if applicable.
- Dispose of the old filter properly.