Whirlpool Refrigerator Filter Replacement Guide for Homeowners
Learn how to replace the filter for Whirlpool refrigerators with a clear, safety-focused method. This guide covers model selection, step-by-step replacement, priming, flushing, and maintenance tips from How To Refrigerator to keep your water clean.

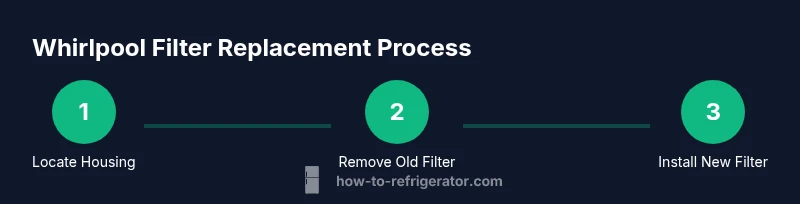
This guide helps you correctly replace the filter for Whirlpool refrigerator and restore clean water. Start by locating the correct filter model with your manual, gather the replacement cartridge and basic tools, then perform a safe, hand-tight installation. After replacement, flush the lines to remove air and debris and reset any indicator light if applicable.
What the Whirlpool refrigerator filter does and when to replace
A refrigerator water filter reduces chlorine taste and odor, particulates, and some contaminants. For Whirlpool models, the filter is designed to improve water quality for drinking and ice. The typical lifetime is influenced by water usage, source water quality, and how often the ice maker runs. How To Refrigerator notes that filters are commonly rated for roughly six months of typical use, but always follow your specific model's guidance. If you notice weaker flow, off-taste, or odd cloudy water, it's time to replace the filter. Before you buy, check your owner's manual or the label on the current filter to ensure compatibility. Replacing a clogged filter promptly protects the appliance and improves water quality. Also consider your overall maintenance schedule for the fridge; a clogged water filter can put extra strain on the water inlet valve and reduce efficiency. According to How To Refrigerator, staying on top of filter replacement is part of responsible fridge maintenance and helps preserve the system’s performance.
How to identify the right Whirlpool filter model
Whirlpool refrigerator models can use several different filter cartridges. Start by locating the model number on the interior wall, the user manual, or the current filter itself. Most Whirlpool filters are labeled with a compatible family name (like Whirlpool, EveryDrop, or brand-specific identifiers). When in doubt, remove the existing filter and compare the threading and housing shape to the options listed in your manual. The goal is to select a filter that threads snugly and seats without gaps. If you can't locate the model number, use the fridge’s documentation online or contact customer support with your serial number for accuracy.
Preparation and safety basics
Before you begin, place a towel or small tray under the filter area to catch drips. Wash your hands and ensure the fridge is plugged in for safety if you’re moving it. Have your replacement filter, a clean cloth, and a container ready to capture any residual water. If your model requires it, read the manual’s guidance on whether you should shut off the water supply briefly. In general, avoid using any tools that could damage the housing; many Whirlpool filters are hand-tightened. If you encounter resistance, stop and verify you are turning the correct direction and not cross-threading.
Common mistakes and safety tips
A frequent mistake is replacing the filter with an incompatible cartridge. Double-check the model number and exact filter family before purchase. Do not overtighten the new filter; hand-tight is typically enough and overly tight can crack the housing. Another error is neglecting to flush the system after installation, which can leave air and particulates in the lines. Always run water for a few minutes and inspect for leaks around the housing. Finally, avoid using hot water to flush or prime a filter, which can damage the filter media and affect performance.
Maintaining filter performance and energy efficiency
Regular filter maintenance improves ice quality and reduces chlorine taste. To maximize performance, replace the filter as soon as you notice a change in taste or flow, or roughly every six months as a baseline. Keep spare filters on hand to avoid gaps in replacement timing. After installation, flush the system to clear air; this also helps ensure the fridge’s water inlet valve remains reliable. A clean filter and properly flushed lines contribute to better energy efficiency by maintaining proper water pressure and reducing unnecessary strain on the water system.
Troubleshooting common issues after replacement
If water flow remains slow after replacement, ensure the filter is fully seated and not cross-threaded. Check that the housing seal is intact and there are no visible leaks. If you see leaks, re-tighten gently and inspect for cracks in the housing or filter cartridge. If the taste remains off after flushing, run water for longer and consider replacing the filter with a new cartridge, ensuring model compatibility. For persistent problems, consult Whirlpool support or a qualified technician rather than forcing installation.
Tools & Materials
- Whirlpool-compatible water filter cartridge(Confirm model compatibility by checking the fridge label and manual)
- Owner's manual or model number handy(Use to verify the exact filter type)
- Clean cloth or towel(Wipe spills and dry hands after handling the filter)
- Container or tray for drips(Catch water during replacement)
- Gloves (optional)(Keep hands clean and dry during replacement)
- Flat-head or Phillips screwdriver (optional)(Only if your model uses a panel that requires a tool)
Steps
Estimated time: 10-20 minutes
- 1
Locate and access the filter housing
Identify whether your Whirlpool filter sits in the grille, behind a base panel, or inside the fridge cavity. Open the access area and prepare the workspace. You may need to remove a cover or grille to reach the filter.
Tip: Consult the manual to confirm the exact location for your model; demos vary by year and design. - 2
Remove the old filter
Grip the filter cartridge and turn it counterclockwise to release from the housing. Expect some water to drip as the seal releases. Stop if you feel excessive resistance and verify you are turning the correct direction.
Tip: Keep a towel handy and avoid forcing the filter out to prevent damage. - 3
Prepare the new filter
Remove any protective caps from the new cartridge and inspect the O-ring. Do not skip priming; run cold water over the exterior first to remove loose debris. Align the new filter with the housing threading.
Tip: Prime by running water through the filter for about 10 seconds to saturate the media before installation. - 4
Install the new filter
Insert the cartridge and turn clockwise until it is snug. Do not overtighten; a tight fit prevents leaks but over-tightening can crack the housing. Restore any removed cover or grille.
Tip: If you feel resistance, back off slightly and realign; cross-threading is a common cause of leaks. - 5
Flush and check for leaks
Run cold water through the dispenser or call button for 2-3 minutes to flush out air and any residual carbon dust. Inspect the housing for leaks after a short period; if you see dampness, tighten gently or reseat.
Tip: Place a cup under the dispenser to collect output and monitor the flow rate during the flush. - 6
Reset indicator and clean up
If your model has a filter indicator, reset it per the manual. Wipe the area clean and dispose of the old filter properly. Recycle if the cartridge is accepted by local programs.
Tip: Not all models require a reset; confirm with your owner's manual. - 7
Test the system and finalize
Test both ice and water functions to ensure proper delivery and taste. If taste remains off, repeat the flushing step or replace with a new cartridge. Confirm there are no leaks after a final 5-minute test.
Tip: If problems persist, contact How To Refrigerator or Whirlpool support for model-specific guidance.
FAQ
How do I know which Whirlpool filter to buy for my fridge?
Check the model number on the fridge or the current filter and reference the manual or Whirlpool's official filter finder to confirm compatibility. Using an incorrect filter can affect water quality and flow.
Check your model number and current filter to confirm compatibility before buying a replacement.
Can I pre-wash or prime a new filter before installing?
Yes. Rinse the new filter under cold water for about 10 seconds to saturate media and flush out loose carbon particles before installation.
Rinse the new filter with cold water for a few seconds to prime it.
What should I do if the water leaks after replacement?
First, ensure the filter is fully seated and not cross-threaded. Check the gasket and housing for damage. If leaks persist, reseat or replace the filter and inspect the housing.
If it leaks, reseat the filter and check the gasket and housing.
How often should Whirlpool fridge filters be replaced?
Most Whirlpool fridge filters are designed for about six months of typical use. Replace sooner if taste, odor, or flow declines.
Typically every six months, or sooner if water quality drops.
Is there a difference between fridge filters and faucet filters?
Yes. Fridge filters affect ice and water from the fridge dispenser, while faucet filters filter water at the tap. Use the filter type specified for each application.
Fridge filters service ice and water from the fridge; faucet filters are for the tap.
Can I reuse the original packaging for disposal?
Dispose of the old filter according to local guidelines. If the packaging is recyclable, follow local recycling rules for plastics and paper.
Check local rules for disposing or recycling the old filter.
Watch Video
Top Takeaways
- Identify the correct Whirlpool filter model before purchase.
- Prime and flush the new filter to clear air and debris.
- Tighten the filter hand-tight; avoid tools that could damage the housing.
- Reset your indicator if applicable and monitor for leaks.
- Dispose of the old cartridge properly and maintain regular replacement cadence.