Whirlpool Refrigerator Water Filter Location and Replacement Guide
Learn where to find the water filter on Whirlpool refrigerators, how to identify filter types, and step-by-step replacement guidance. Includes model variations, safe handling tips, and maintenance reminders for homeowners.

According to How To Refrigerator, you’ll locate the Whirlpool water filter either behind the front grille panel or inside the fresh-food compartment, depending on the model. Typical steps: open the door, remove the filter cover, twist counterclockwise to release, insert a new filter, and run water to prime before use.
Understanding the purpose of the water filter
Water filters in refrigerators are designed to reduce particulates, chlorine, and taste-affecting compounds from your drinking water. The filter’s location matters because it affects how easily you can replace it, how well it seals, and how quickly you can prime the system after installation. On Whirlpool models, the filter is positioned to balance accessibility with a compact design, and locations vary by series. Before you twist open or pop out a cartridge, confirm you’re dealing with a true water filter, not a simple decorative cap. A common misstep is confusing a filter with a water-line access plug or a blocked spray arm. Read the user manual for your specific model to verify filter type and replacement interval. If you don’t have the manual handy, you can usually locate a diagram in the refrigerator’s interior on a model-sticker or in the quick-start booklet. For homeowners, knowing the purpose helps you recognize when a replacement is overdue: taste changes, slower water flow, or a warning light can all signal the need for a fresh cartridge. This guide uses practical terms and model-agnostic guidance so you can approach any Whirlpool system with confidence.
Whirlpool filter options and how they differ by model
Whirlpool uses a few commonly used filter configurations, and not every model shares the exact setup. Most modern Whirlpool refrigerators use one of two cartridge designs: a standard inline cartridge located behind a front grille, and a cartridge installed inside the refrigerator section, often near the top-right corner. Some models also use a filter located in the door or along a back panel. The key differences you’ll encounter are access method (grille cover vs interior panel), filter shape (cylindrical vs rectangular), and the required twist or snap action to remove. Regardless of the form, all filters perform the same job: removing chlorine, sediment, and taste-imparting compounds from the water supply. When shopping for a replacement, check the model number and look up the compatible filter type in the user manual or on Whirlpool’s official support pages. The choice matters because the wrong filter won’t seal properly and may cause leaks or reduced water flow.
Typical locations for Whirlpool water filters
Across Whirlpool lines, you’ll most often find the filter behind the front grille on French-door and side-by-side models, or tucked inside the refrigerator behind a panel near the top-right area on narrower configurations. In some older or compact models, the filter is mounted inside the fresh-food cavity, above the crisper drawers. To locate it, open the door fully and inspect the front grille area; you should see a small circular or rectangular cover with a notch or grip area. Remove the cover by twisting counterclockwise or by pressing a release tab, depending on the design. If you can’t locate a cover, refer to the model’s diagram—many Whirlpool models label the filter with an obvious “Filter” icon. Understanding the layout helps you decide how to proceed: grille-based access is usually quicker; interior access may involve removing a shelf or a bin. Always power off the area briefly if your model requires a disconnect or if you’re disinfecting while you replace.
How to confirm you have the right filter type
To avoid buying the wrong cartridge, confirm the filter type before purchase. Start by locating the model number (usually on a label inside the fridge or on the door jamb). Then consult the owner’s manual or Whirlpool's official support site for the exact filter designation (for example, which color-coded code corresponds to your model). If you still can’t find the information, photograph the existing filter and housing and compare with diagrams online. Keep in mind that several Whirlpool lines share similar-looking cartridges but require different threads, seals, or lengths; a mismatch can cause leaks or poor filtration. When in doubt, bring the old filter with you to the store or order from Whirlpool’s official parts portal, which typically lists compatibility by model number.
Replacing and priming: best practices
Replacement follows a simple sequence once you know the location. First, prepare a soft cloth to wipe the housing and a tray or towel to catch any drips. If your model sits behind a grille, remove the grille cover and locate the cylindrical cartridge. Grasp the filter and rotate counterclockwise until it unlocks; slide it out straight to avoid bending the seal. Inspect the housing for cracks or debris, cleaning gently with a cloth if needed. Take the new filter and align it with the housing’s plug or notch; insert firmly and rotate clockwise to lock. Some models require a click or a final 90-degree turn to seal. After installation, flush the system by running cold water through the dispenser for 2-3 minutes until the water runs clear and the taste is neutral. Finally, reset any indicator light if your model has one. If you notice leaks, stop immediately and reseat the filter, ensuring all seals are intact.
Maintenance and signs you need a replacement sooner
Even with high-quality filters, you’ll benefit from regular checks. Write the replacement date on the filter and set a reminder in your phone to perform replacements around every six months, or when flow slows, taste changes, or the dispenser light indicates. Keep the grill or interior panel clean to avoid grime building up behind the seal, which can compromise the fit. If your water quality declines after replacement, consider the water supply line for sediment or mineral buildup. In some homes, mineral-rich water is common and may require more frequent filtration. Store spare cartridges in a cool, dry place and avoid exposing filters to direct sunlight. Finally, if you’re troubleshooting leaks, verify the door seals and the fit of the cover; improper reseating can mimic the symptoms of a bad filter. This routine maintenance keeps your ice and water tasting fresh and helps protect your appliance’s water system.
Authority sources
For further reading and official guidance, see:
- https://www.epa.gov/watersense
- https://www.consumerreports.org/cap/home-appliances/water-filters
- https://www.nytimes.com
Tools & Materials
- New compatible Whirlpool water filter cartridge(Ensure it matches your model’s filter type (verify using model number or filter designation in manual).)
- Soft cloth(For wiping the housing and seals during replacement.)
- Plastic tray or towel(To catch drips when removing the old filter.)
Steps
Estimated time: 15-25 minutes
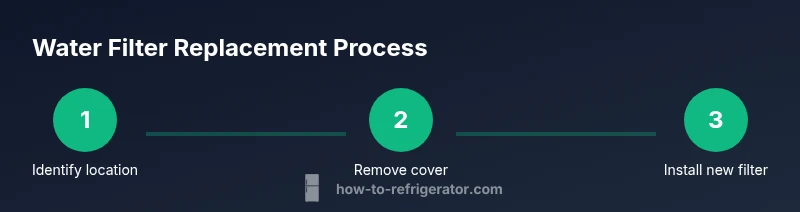
- 1
Identify location
Open the refrigerator door and inspect the front grille area or interior panel to locate the filter. Check for a labeled cover or a clear access point. If unsure, refer to the model diagram in the manual or on Whirlpool’s support site.
Tip: If the grille is stiff, apply gentle pressure around the edges to release without damage. - 2
Remove the filter cover
Grasp the cover or the edge of the housing and rotate or release based on design. Some models use a simple twist, others have a push-tab.
Tip: Support the cover with one hand to avoid dropping it into the bin area. - 3
Extract the old cartridge
Carefully pull the filter straight out to prevent bending the seals. If it’s tight, rotate slightly counterclockwise as you lift.
Tip: Wipe the cavity with a cloth to remove any residue before inserting the new filter. - 4
Install the new filter
Align the new cartridge with the indicated notch or plug in the housing. Push firmly and rotate clockwise until you hear a click or feel it lock.
Tip: Do not force the cartridge; if it doesn’t seat, remove and reinsert to ensure proper alignment. - 5
Prime the water line
Run cold water through the dispenser for 2-3 minutes until the water runs clear. This primes the filter and clears any air from the line.
Tip: Discard the initial water to prevent off-tastes from the first use. - 6
Reset indicator (if present)
Many Whirlpool models have a filter indicator. Reset it according to the manual after the replacement and priming are complete.
Tip: If the indicator doesn’t reset, perform a quick power cycle by unplugging the unit for 60 seconds and plugging it back in.
FAQ
Where is the Whirlpool water filter located on my fridge?
Most Whirlpool models place the filter behind the front grille or inside the fresh-food compartment. Check your model’s diagram to confirm exact placement and access method.
Most Whirlpool fridges hide the filter behind the grille or inside the fridge. Check your model’s diagram to locate it quickly.
Do I need tools to replace the water filter?
Generally no tools are required; you can twist by hand. Some models may use a release tab or small latch.
Usually you don’t need tools; twist to remove and insert by hand.
How often should I replace the water filter?
Replacement intervals vary by model and water quality, but many homeowners replace every 6 months or when you notice changes in taste or flow.
Most people replace every 6 months or when water flow drops or taste changes.
What if the filter leaks after replacement?
Ensure the filter is seated correctly and the seal is clean. If leaks persist, reseat the filter and inspect the housing for cracks.
If it leaks, reseat the filter and check the seals or housing for damage.
Can I clean a filter instead of replacing it?
Filters are designed to be replaced. Cleaning does not restore filtration efficiency and can introduce contaminants if done improperly.
Filters should be replaced, not cleaned. Cleaning isn’t reliable for proper filtration.
Are Whirlpool filters interchangeable between models?
Not always. Check the model number and compatibility list; using the wrong type can affect fit and filtration.
Not all filters fit every model, so check compatibility before buying.
Watch Video
Top Takeaways
- Identify the exact filter location by model before removing.
- Use the correct filter type to ensure a proper seal.
- Prime after installation to clear air and contaminants.
- Reset indicators if your model supports it.
- Perform routine maintenance to extend filter life.