Whirlpool Side-by-Side Refrigerator Water Filter Replacement Guide
Learn how to identify, select, and replace the water filter in Whirlpool side-by-side refrigerators. Practical, step-by-step guidance to improve water quality and keep your dispenser flowing.

In this guide you’ll replace the water filter on a Whirlpool side-by-side refrigerator. You’ll locate the filter, choose the right compatible cartridge, and complete a safe replacement using a simple twist or snap-in method. Follow these steps and run water to prime the new filter for fresh-tasting ice and drinks.
Understanding Whirlpool side-by-side water filters and why they matter
Water filters in Whirlpool side-by-side refrigerators are designed to reduce contaminants before water hits your dispenser or ice maker. They influence taste, odor, and clarity, so using the correct cartridge and replacing it when needed keeps your water fresh and your ice clean. According to How To Refrigerator, using the right filter for your model and installing it properly can restore optimal flow and water quality, making daily use noticeably better.
What this means for you
- Clean, crisp water and ice boosts enjoyment and confidence in your fridge.
- A correct filter reduces mineral buildup and improves dispenser performance.
- Regular checks help you catch a drop in performance before it becomes a bigger issue.
Common filter configurations and how they differ
Whirlpool side-by-side fridges typically use an external filter cartridge that snaps or twists into a dedicated housing. Some models place the housing behind a grille, others near the base grille or inside the fresh food compartment. The key differences to note are filter type (twist-in vs snap-in), filtration rating (how many contaminants are removed), and the orientation of the filter when installed. Knowing which configuration your model uses helps you avoid ordering the wrong part and reduces the chance of leaks. This is also why confirming your model’s compatibility before purchase matters. If you’re unsure, consult your user manual or the manufacturer’s website for the exact cartridge family that fits your model.
Where to find and read your model's filter label
To ensure you buy the correct cartridge, locate the filter label on your Whirlpool unit. Check the filter housing itself for a model or part number, and verify the filter size (diameter and length) and the filter type indicated by the symbol or text on the housing. If you cannot locate a label, use your fridge’s model number (found inside the fresh-food compartment or on the side of the cabinet) to search the official support site. Keeping notes or photos helps you reference the exact filter family when shopping. Reading the label is especially important because cross-compatibility with third-party filters isn’t universal.
How to choose the right filter for your Whirlpool side-by-side
Choose a filter that matches the exact cartridge family recommended for your model. Avoid generic substitutes unless a manufacturer explicitly approves them for your unit. When in doubt, compare the filter’s dimensions, threading, and seal design with the housing’s requirements, and look for certifications that verify filtration performance. If you are scanning the market, prioritize filters that claim the same contaminant reductions your system advertises and check customer reviews for consistency in taste and flow. How To Refrigerator analysis shows that selecting an incompatible cartridge can lead to poor fit and reduced filtration efficiency, so accuracy matters.
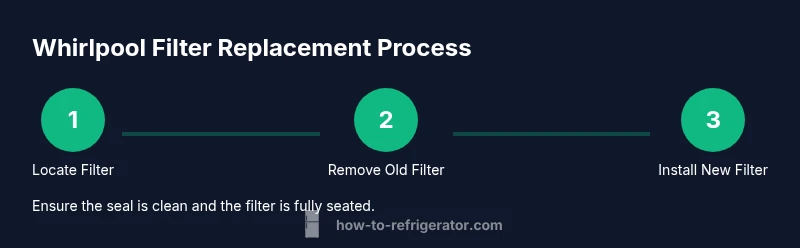
Step-by-step replacement overview
This overview covers the core actions you’ll take to replace the filter. You’ll perform the replacement safely, without risking leaks or contamination. The steps below align with the more detailed procedure in the STEP-BY-STEP block, giving you a quick reference while you work.
How to prime and flush water after replacement
Priming the new filter is essential. After installation, run water through the dispenser for 2–3 minutes or until you see a steady flow and clear water. This removes air and initial loose carbon fines and helps bring the system to full filtration performance. If you notice any air spurts, pause and run the water longer until the stream becomes consistent. Regularly flushing also helps maintain taste and prevents stale water from sitting in the line.
Maintenance routines to prolong filter life
To get the most from your Whirlpool filter, replace it on a regular schedule and avoid letting the water sit stagnant in the line for extended periods. Use the dispenser area as a quick indicator: if flow slows or taste changes, it’s time for a replacement, typically every 6 months depending on usage and water quality. Keep a small log of replacement dates and model numbers for quick future shopping. Cleaning the housing seal with a dry cloth before reinstalling reduces the chance of leaks.
Troubleshooting: common issues after replacement
If you notice leaks, double-check the filter is fully seated and locked into place. A loose or misaligned filter can cause drips at the housing. If water flow is weak after replacement, flush again and confirm there aren’t any kinks or restrictions in the supply line. Some models require resetting a filter indicator after replacement; consult your manual for the correct procedure. Taste changes after replacement can indicate the filter is still new and needs more flushing, or that the wrong cartridge was installed.
Safety considerations and common mistakes to avoid
Never force a filter into a housing that’s not aligned with its key notch or orientation; you may damage the seal. Always shut off the water supply before starting and protect the floor with a towel or small container for spills. Do not reuse an old filter seal, and never skip flushing after installation.
Environmental considerations and disposal of used filters
Used filters should be disposed of according to local regulations. Many cartridges are recyclable or accepted at home improvement stores or recycling centers. Place the spent filter in a waste container to prevent exposure to stale water or residual carbon, and recycle the packaging when possible.
Tools & Materials
- New Whirlpool-compatible water filter cartridge(Ensure it matches your model’s filter family and is certified for your system.)
- Gloves(Optional for cleanliness and to avoid contact with dirty water.)
- Clean cloth or towel(Wipe spills and dry the housing area.)
- Bowl or tray(Catch any residual water when removing the old filter.)
Steps
Estimated time: 15-25 minutes
- 1
Shut off water supply
Locate and close the water valve that feeds the refrigerator. This prevents water from flowing during filter removal and reduces the risk of spills.
Tip: Have a towel handy in case water drips when you disconnect the old filter. - 2
Locate the filter housing
Identify the filter housing location based on your model (often behind the grille or at the bottom left). Ensure you have a clear working area.
Tip: If you’re unsure, refer to your manual or take a quick photo of the housing before removing the old filter. - 3
Remove the old filter
Twist the cartridge counterclockwise or release the quick-release tab, depending on your model. Carefully pull it straight out without forcing it.
Tip: Prepare for a small amount of water; a tray helps prevent mess. - 4
Prepare the new filter
Unpack the new cartridge and inspect the O-ring. If the O-ring isn’t pre-lubricated, moisten it with a little water to ensure a proper seal.
Tip: Do not use oil or soap on the O-ring; keep it clean and dry until installation. - 5
Install the new filter
Insert the new cartridge into the housing and twist clockwise or snap it in until it’s secure. Align the filter with the notch or arrows as required by your model.
Tip: You should hear or feel a click when it’s fully seated. - 6
Restore water supply and prime
Turn the water valve back on and run water from the dispenser for 2–3 minutes until the water runs clear.
Tip: If you see air bubbles, continue flushing until steady, clear water appears.
FAQ
Do I need to shut off the water supply before replacing the filter?
Yes. Turning off the water supply prevents spills and accidental leaks while you remove and replace the filter. Reopen the valve only after the new cartridge is securely installed.
Yes—turn off the water supply before you start, then reopen after installation.
How do I know which filter fits my Whirlpool side-by-side model?
Check the filter label on the housing or consult your model’s user manual and the manufacturer’s site. Use the model number to confirm compatibility and avoid cross-compatibility issues.
Check the housing label or your manual to confirm the exact cartridge family for your model.
Can I use a generic filter in place of the Whirlpool cartridge?
Some models allow third-party filters, but compatibility isn’t guaranteed and performance may vary. Always verify compatibility with your model before purchasing a substitute.
Only use filters your model supports to ensure performance and avoid leaks.
How often should I replace the water filter?
Most users replace every 6 months or when you notice a drop in water flow or taste quality. Check your manual for the recommended interval for your model.
Typically about every six months, or sooner if flow drops or taste changes.
What should I do if water tastes metallic after replacement?
Rinse the dispenser for a few minutes to flush out any residual carbon and air. If taste persists, replace with a compatible cartridge and verify proper seating.
Flush it well, then recheck the filter fit and compatibility.
Is it safe to dispose of used filters with regular trash?
Used filters can be recyclables in some areas or disposed of with regular trash where allowed. Check local guidelines and recycle programs if available.
Check local disposal rules for used water filters.
Watch Video
Top Takeaways
- Replace with the exact Whirlpool cartridge family
- Prime and flush after installation
- Check for leaks and proper seating
- Keep a replacement log for maintenance
- Follow model-specific guidance for best results