GE Refrigerator Side-by-Side Water Filter Replacement and Maintenance
A comprehensive, step-by-step guide to locating, replacing, and flushing the GE side-by-side water filter. Learn model identification, safety checks, and post-install maintenance from How To Refrigerator.

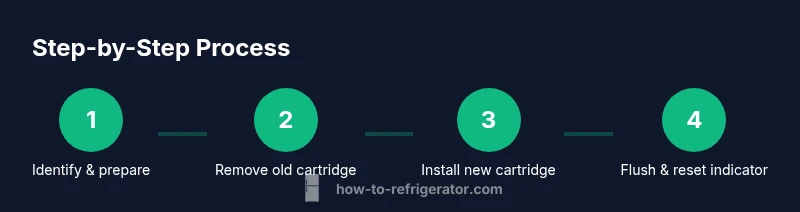
Learn to locate the correct GE water filter for your side-by-side, replace the cartridge, and flush the line until clear. This quick guide covers model identification, safety checks, and post-install steps to ensure clean, pressurized water from your GE refrigerator, with minimal tools and no special skills for a safe fix.
Understanding the GE refrigerator side-by-side water filter system
Ge refrigerator side-by-side water filters are designed to remove chlorine, sediment, and contaminants from your drinking water. The filters fit within a dedicated housing in the refrigerator door or the interior rear wall, depending on the model. When functioning properly, you’ll notice crisper taste and better water flow, plus fewer sediment particles in ice. In GE side-by-side models, the filter is generally a cartridge that locks into a sealed housing; most units require periodic replacement rather than any disassembly of the plumbing. This section helps you recognize when a filter is due for replacement and how to choose a compatible GE filter. For homeowners troubleshooting, remember that a worn or clogged filter can degrade water quality and put extra strain on the ice maker and dispenser.
How to identify the right GE water filter for your model
To pick the correct filter for a GE side-by-side refrigerator, start with your model number. GE typically provides a matching filter list in the user manual or on their official support site. Look for the filter’s orientation (vertical vs. horizontal) and the cartridge shape, then confirm compatibility with your model. If you’re unsure, compare your current filter’s label to the GE cross-reference guide and avoid generic or incompatible replacements. Proper fitment ensures a secure seal, prevents leaks, and ensures effective filtration. Always purchase a cartridge labeled for GE side-by-side refrigerators to maintain water quality.
Signs your GE water filter needs replacement
Common indicators include a noticeable drop in water flow, a change in taste or odor, or cloudy water from the dispenser. If the ice tastes metallic, or you see specks in the water, it’s a strong signal the filter has degraded. The dispenser light or status indicator may also alert you when the filter needs replacement. If you observe leaks around the filter housing, stop using the dispenser and inspect the seal. Addressing these signals promptly preserves water quality and prevents further wear on the cooling system.
What happens if you don't replace the filter
Neglecting to replace a clogged water filter can slow water flow, increase sediment buildup, and reduce ice production. Over time, filter inefficiency can place extra stress on the refrigerator’s water valve and may introduce contaminants into drinking water. By maintaining regular replacement, you help sustain system pressure and improve the overall performance of the ice maker and dispenser. This is a practical maintenance task homeowners can perform with basic tools and careful handling.
Safe handling and maintenance tips
Always shut off or relieve water pressure at the shut-off valve before removing the old cartridge. Keep a towel handy for spills and wipe the housing after replacement to remove condensation. When inserting the new cartridge, avoid cross-threading and ensure the seal is intact. Hand-tighten only; tools are rarely required unless the housing is stiff. After installation, run cold water through the dispenser for several minutes to flush out loose carbon particles and air bubbles before use.
Post-installation flushing and indicator reset best practices
After installing the new filter, prime it by running water through the dispenser for about 2–3 minutes, or until the water runs clear. If your GE model has a reset option for a filter indicator, follow your manual’s procedure to reset it accurately. Keep an eye out for leaks during the first 10 minutes of flushing and check the seals again if you notice any dripping. Regularly refreshing the filter improves water quality and helps maintain optimal ice production.
Tools & Materials
- GE side-by-side water filter cartridge (model-specific)(Verify compatibility with your GE refrigerator model before purchasing.)
- Clean towel or microfiber cloth(Use for spills and wipe-down around filter housing.)
- Clean bowl or small container(To catch water when removing the old filter.)
- Gloves (optional)(Keeps hands dry and protected during replacement.)
- Phillips head screwdriver (optional)(Only if your housing uses screws; most GE housings twist off.)
Steps
Estimated time: 10-15 minutes
- 1
Power down and prepare
Before you begin, locate the water shut-off valve and place a towel or bowl to catch any drips. This reduces mess and protects your floor. Confirm you have the correct GE filter model before starting to avoid misfit.
Tip: Having a clean, dry workspace speeds up the process. - 2
Locate the filter housing
Find the filter housing cover on the GE side-by-side model. It’s usually on the inside of the fridge or behind a small panel. If you can’t locate it, consult the owner’s manual or GE support page.
Tip: If the cover is stiff, apply gentle pressure and don’t force it to avoid damage. - 3
Remove the old cartridge
Open the housing by twisting or unfastening screws, then pull out the old cartridge straight. Have a towel ready for any water that escapes and avoid twisting the cartridge at an angle which can damage the seal.
Tip: Keep the old cartridge for reference in case you need compatibility confirmation. - 4
Install the new cartridge
Insert the new GE water filter cartridge, aligning it with the housing’s slots. Ensure the seal engages fully and the cartridge sits flush. Close the housing and restore any screws if present.
Tip: Avoid overtightening the housing; a snug fit is sufficient. - 5
Prime and flush the filter
Run cold water through the dispenser for 2–3 minutes or until clear. This clears carbon fines and removes air bubbles that can affect taste. Place the removed cartridge in a safe spot if you’re unsure about storage.
Tip: Initial flushing helps prevent sediment from impacting ice quality. - 6
Reset indicator and inspect
If your model has a filter indicator, reset it per the manual. Check for leaks around the housing during the first few minutes of use. If leaks appear, power down and re-tighten the housing.
Tip: If the indicator doesn’t reset, re-check the seals before calling support.
FAQ
How often should I replace the GE refrigerator water filter in a side-by-side model?
GE recommends replacing the water filter according to the model’s guidelines or whenever you notice reduced flow, taste changes, or odor. Regular checks help maintain water quality and dispenser performance.
Replace the filter according to your model’s guidelines or when you notice changes in water taste, flow, or smell.
Do I need a specific GE filter model for my side-by-side refrigerator?
Yes. Use a GE-approved cartridge designed for your exact side-by-side model. Compatibility ensures an adequate seal, proper filtration, and prevents leaks.
Use the GE-approved cartridge your model specifies to ensure fit and filtration.
What are signs that I need to replace the water filter?
Look for slower water flow, taste or odor changes, cloudy water, or a dispenser indicator light. Leaks around the housing also signal a replacement is needed.
Slower flow, bad taste or odor, cloudy water, or a dispenser light are common signs.
Can replacing the filter affect water pressure or taste?
A clogged or old filter can reduce flow and alter taste. Replacing the cartridge typically restores normal pressure and improves water quality.
Yes, a clogged filter can lower flow and worsen taste; replacement fixes it.
Is it safe to drink water immediately after replacement?
Freshly replaced filters may release carbon fines. Run cold water for a few minutes and inspect for taste before using as your primary water source.
Run water for a few minutes to clear fine particles before drinking.
What should I do if the filter housing leaks after replacement?
Turn off the water supply and carefully inspect seals. Re-seat the cartridge and tighten housing gently. If the leak persists, consult support.
Turn off water, check seals, re-seat, and tighten. If leaks continue, contact support.
Watch Video
Top Takeaways
- Identify the correct GE filter before replacement.
- Shut off water and clear spills prior to replacement.
- Install, prime, and flush the new cartridge fully.
- Reset the indicator if available and verify leaks.
- Follow GE’s model-specific guidance for best results.