GE Refrigerator Water Filter Guide: Replacement & Maintenance
Learn how to select, install, and maintain the refrigerator water filter for GE models. Step-by-step replacements, troubleshooting, and best practices for clean, safe water from How To Refrigerator.

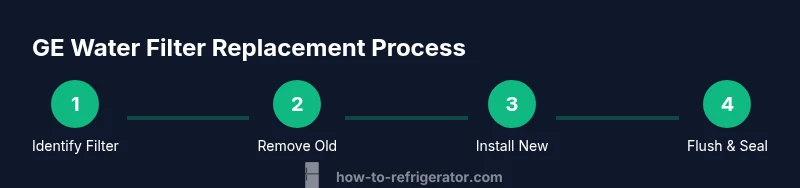
This guide shows how to identify the correct GE filter, replace the cartridge, and reset the indicator for your refrigerator. Steps include locating the filter housing, removing the old cartridge, installing a new filter securely, and flushing the line to remove air. You’ll also find safety tips and common mistakes to avoid for optimal water quality.
Why the GE Refrigerator Water Filter Matters
Maintaining a clean refrigerator water filter is essential for safe drinking water and ice. The correct filter for your GE model helps remove particulates, chlorine taste, and other contaminants that affect flavor and odor. According to How To Refrigerator, regular filter maintenance protects water quality and helps your fridge run efficiently. When the filter is clogged or past its useful life, you may notice slower water flow, off-tastes, or ice with an unusual appearance. By prioritizing timely replacement and proper installation, homeowners can ensure consistently crisp, clean water from their GE refrigerator and extend the life of the appliance. Regular maintenance also supports energy efficiency, since a clogged filter can place extra strain on the cooling system. In short, a well-maintained refrigerator water filter is a small step with a big impact on daily household water quality and appliance reliability.
Types of GE Water Filters and Compatibility
GE refrigerators typically use replaceable cartridges that fit the filter housing built into the unit. The right filter depends on your model, door configuration, and whether you have a water dispenser or internal filtration. The most common filters are designed to fit standard GE housings, so verify compatibility by checking your user manual, the filter housing dimensions, or the model number plate inside the refrigerator. Do not assume a filter is interchangeable across GE lines; even slight differences in thread size or cartridge length can prevent a proper seal and cause leaks. When in doubt, contact GE support or a trusted repair resource to confirm compatibility before purchasing a filter. This ensures you don’t waste money on the wrong part and helps maintain water pressure and filtration efficiency.
How to Identify the Correct Filter for Your GE Refrigerator
Start by locating the model number plate on your GE fridge (usually inside the door frame or on the back). Note the housing type and the size of the filter cartridge. Use GE’s official support site or the user manual to cross-check the model with compatible filters. If you don’t have the manual handy, you can often identify the exact filter by measuring the cartridge dimensions and comparing them to GE’s listed options. When ordering, prefer filters labeled as compatible with GE refrigerators and verify the installation orientation (arrow on the cartridge shows flow direction). A correctly matched filter ensures optimal contaminant removal and prevents leaks due to improper fit. According to How To Refrigerator, accurate identification reduces trial-and-error purchases and frustration.
Step-by-Step: Replacing a GE Refrigerator Water Filter (descriptive guide)
Replacing the filter involves several careful checks: ensure power to the internal lights is off if you’re reaching behind interior panels (to avoid shocks and accidental openings), prepare a towel to catch any water, and gently twist the old cartridge out. Align the new cartridge with the housing, push in firmly, twist until it clicks, and wipe away any residual water. Once installed, run water through the dispenser for several minutes to flush out air and loose carbon sediment, which improves taste and helps achieve maximum filter performance. Finally, reset the indicator light if your model uses a status display. This sequence preserves water quality and keeps the system primed for continued operation.
Troubleshooting Common GE Water Filter Issues
If you notice leaks after replacement, re-seat the cartridge and check that the seal is intact and not cross-threaded. A tight fit with an even seal prevents water from leaking around the housing. If the water flow seems weak after installation, flush the line longer and confirm the cartridge is fully engaged. Odors or off-flavors can result from air pockets or an old cartridge; flushing with water for several minutes typically resolves this. For persistent issues, it’s wise to run through the model’s diagnostic tips in the manual or contact GE support. Regular maintenance reduces the likelihood of leaks, tastings, or clogs.
Maintenance Schedule and Best Practices
Set a replacement cadence that fits your usage and water quality—generally every several months or when the taste or flow changes. Label the replacement date on the filter packaging or a maintenance calendar. Store filters in a cool, dry place, and avoid exposing them to moisture or heat. After replacement, document the model number, purchase date, and where the filter was installed to simplify future retakes. Periodic checks for leaks, cracks in the housing, or abnormal noises help catch problems early and prevent water damage. Proper disposal of used filters reduces waste and supports eco-friendly household maintenance.
Safety and Disposal of Used Filters
Handle spent filters with dry hands and avoid squeezing carbon blocks, which can release dust. Seal a used cartridge in a plastic bag before disposal to prevent any residual carbon from dispersing. Keep replacement filters in their original packaging until you’re ready to install them. If you have concerns about the water supply line or the filter’s fit, don’t force anything—consult GE support to avoid damaging the refrigerator or injuring yourself. This approach keeps you safe and ensures the filter system remains reliable over time.
Tools & Materials
- GE-compatible water filter cartridge(Choose a cartridge labeled compatible with your GE model and housing type)
- Soft cloth(For wiping the housing and removing fingerprints or water spots)
- Towel or small tray(To catch any water that spills during replacement)
- Gloves (optional)(Keeps hands clean and dry during replacement)
- Marker or tape(Label the replacement date for maintenance tracking)
Steps
Estimated time: 15-25 minutes
- 1
Prepare the area and identify the filter
Clear the area around the fridge, lay a towel to catch drips, and confirm you have the correct GE-compatible filter for your model. Check the model number plate inside the refrigerator if you’re unsure which cartridge to buy.
Tip: Double-check compatibility before removing the old filter to avoid leaks or misfits. - 2
Remove the old filter
Gently rotate or pull the old filter out of its housing according to your model’s design. If it’s tight, apply even pressure and stop if you feel resistance to avoid breaking the housing.
Tip: Use a cloth to grip the cartridge to prevent slipping and protect the housing seal. - 3
Prepare the new filter
Unpack the new cartridge and remove any protective caps. Inspect the O-ring seal for damage and ensure the filter is oriented correctly based on the arrow showing flow direction.
Tip: Do not remove protective covers from the filter until you’re ready to install. - 4
Install the new filter
Insert the cartridge into the housing and rotate or push until it clicks into place, signaling a secure fit. Wipe away any moisture around the housing to ensure a clean seal.
Tip: If your model uses a quick-click mechanism, confirm it’s fully seated before proceeding. - 5
Flush the water line
Run water through the dispenser for 3–5 minutes or until the water runs clear. This removes air and any loose carbon dust from the new filter and improves taste.
Tip: Collect the flushed water in a cup or pitcher to monitor taste and clarity. - 6
Reset indicator and verify
If your GE fridge has an indicator light, reset it according to the manual. Check for leaks for a few minutes after the flush and confirm water flow has returned to normal.
Tip: Document the replacement date for future maintenance scheduling.
FAQ
Do I need to shut off the water supply before replacing the filter?
Yes. Turn off the water supply to prevent leaks while removing and installing the cartridge. This minimizes spills and reduces the risk of water damage.
Yes. Turn off the water supply before removing the old filter to prevent leaks.
How do I know which GE filter to buy for my fridge?
Check your refrigerator’s model number and reference GE’s compatibility guide or user manual. Use filters labeled as compatible with GE models and verify housing size and orientation.
Check your model number and verify compatibility with GE's guide before buying.
How often should I replace the GE refrigerator water filter?
Typically every 6 months, or sooner if water flow slows or taste changes. Your usage and water quality influence the replacement timing.
Most people replace about every six months, or when the water flow slows or flavor changes.
What should I do if the new filter leaks after installation?
Shut off the water, remove and re-seat the cartridge to ensure a proper seal, and check for any cracks in the housing. If leaks persist, consult GE support.
If it leaks, re-seat the filter and check the seal; if it continues, contact GE support.
Why does the water taste off after replacement?
Air pockets and carbon dust can cause temporary taste changes. Flush the line for several minutes until taste improves.
Air pockets can cause a temporary taste; flushing usually fixes it.
Can I reuse an old filter?
No. Used filters lose effectiveness and can harbor bacteria. Always replace with a new, compatible GE cartridge.
No, reuse isn’t recommended; replace with a new cartridge.
Watch Video
Top Takeaways
- Always verify compatibility before purchasing a GE filter.
- Install the cartridge securely and flush to clear air and carbon dust.
- Reset indicators if applicable and monitor for leaks after replacement.
- Maintain a replacement schedule based on usage and water quality.
- Store and dispose of filters responsibly to reduce waste.