GE Refrigerator Water Filter Replacement: Step-by-Step Guide
Learn how to replace your GE refrigerator water filter with this comprehensive homeowner guide. Tools, steps, tips, and troubleshooting to ensure clean, safe water for your family.

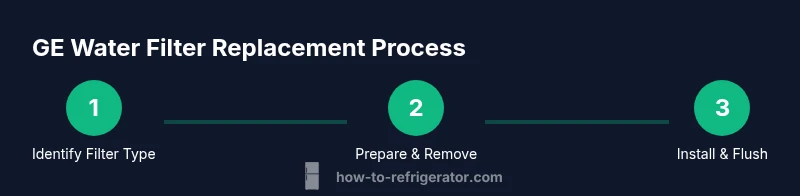
Goal: Replace your GE refrigerator water filter safely and correctly, restoring clean, great-tasting water. You’ll verify model compatibility, gather essential tools, install the new filter, flush the system, and confirm there are no leaks. This step-by-step approach minimizes waste and ensures safe water. See our detailed guide below for hands-on instructions.
Why regular refrigerator water filter replacement ge matters for GE owners
Clean, safe drinking water starts at the filter. For GE refrigerators, the filter plays a critical role in removing chlorine taste, sediment, and other particulates before water reaches your dispenser or ice maker. The exact taste you experience behind the door often depends on how consistently you replace the filter. According to How To Refrigerator, skipping replacements can degrade water quality and reduce appliance efficiency. The How To Refrigerator team found that timely refrigerator water filter replacement ge yields the best tasting water and minimizes mineral buildup in the filter housing. When filters become clogged, water pressure drops, potentially causing slower dispensing and leaks. By scheduling regular replacements, you extend the life of the filter housing and help prevent more costly repairs. In this guide you’ll learn how to identify the right GE model for your unit, gather the necessary tools, and complete a safe replacement with minimal waste.
Understanding GE filter models and compatibility
GE offers several filter families designed for different refrigerator lines. Most push-in and twist-in configurations share one goal: remove impurities while preserving water pressure. Before you buy, locate your model number and the exact filter type required for your unit. The label inside the fridge near the filter housing usually lists compatible part numbers or filter names. If you aren’t sure which GE replacement filter to buy, consult your owner's manual or How To Refrigerator’s compatibility guide. In particular, if you’re performing a refrigerator water filter replacement ge, make sure you choose the GE-approved part. GE filters commonly indicate their compatibility on the packaging; verify the part number aligns with your unit's filter housing. After confirming compatibility, you can proceed with confidence.
Choosing the Correct GE Filter Model
Choosing the correct GE filter model is essential for performance and safety. Start by checking the fridge's user manual for the exact part number and filtering media. Look inside the fridge for a sticker or tag that lists compatible GE replacement filter models. As a rule, purchase the filter that GE designates for your model year and hardware. If you replace with a non-GE or third-party filter, you may void warranties or experience reduced filtration efficiency. GE filters typically indicate compatibility on the packaging; verify the part number aligns with your unit's filter housing. After confirming compatibility, you can proceed to the replacement with greater confidence.
Why a safe replacement matters and how to prepare
A safe replacement reduces the risk of cross-contamination and ensures the filtration media remains effective. Begin by washing your hands, then lay out the work area to catch drips and spills. Ensure you have a dry, clean surface around the filter housing so you can inspect seals and o-rings. If the filter is difficult to remove, do not force it; consult the manual for the correct technique (some GE models require a twisting motion, others a pull-and-release). Proper preparation minimizes waste and speeds up the replacement process.
Post-install checks and maintenance
After installing the new GE filter, it’s important to flush the system to remove any air and loose carbon particles. Run water through the dispenser for several minutes until the water runs clear and steady. Inspect the area around the filter housing for any sign of leakage over the next few hours; a small initial drip is normal as seals seat, but persistent leakage requires reseating the filter or replacing a faulty housing gasket. Establish a regular replacement cadence based on usage, water quality, and household needs to ensure ongoing performance and water quality.
Common mistakes and how to avoid them
Common mistakes include overtightening the filter, which can damage the housing; replacing with an incompatible model, which can impair filtration and void warranties; and skipping the flushing step, which leaves air and carbon dust in the lines. Always verify compatibility, follow GE’s installation instructions, and flush until clear. If you notice reduced water pressure after replacement, recheck the fit and seals, and consult the manual or How To Refrigerator for troubleshooting tips.
Tools & Materials
- New GE water filter compatible with your GE refrigerator model(Check the model number in your user manual or inside the fridge; ensure it matches GE’s compatibility guide.)
- Gloves(Protect hands from sharp edges and cold water.)
- Clean rag or towel(Place under the filter housing to catch drips.)
- Bucket or container(Optional, for collecting water during removal.)
- Mild dish soap and soft cloth(For cleaning the filter housing if needed.)
- Filter wrench (optional)(Use if the housing is stubborn.)
- Owner's manual or GE compatibility chart(Helpful to confirm model compatibility.)
Steps
Estimated time: 20-25 minutes
- 1
Identify the correct GE filter model
Locate the refrigerator model number and check the filter housing to determine the exact GE replacement filter required. If you’re unsure, consult the owner's manual or GE’s compatibility guide. This step prevents buying the wrong part and saves time later.
Tip: Take a photo of the filter label to reference later. - 2
Prepare the workspace and shut off the water (if applicable)
Clear the area around the fridge, place a towel to catch spills, and if your fridge has a dedicated water line shutoff, turn it off to minimize leaks during removal.
Tip: Have a rag ready for any unexpected drips. - 3
Remove the old filter
Open the filter cover or twist the filter counterclockwise to release it. If your unit uses a push-in style, press the release tab or collar to remove. Keep the old filter nearby for reference in case you need the model name.
Tip: Do not force it; damaging the housing can create leaks. - 4
Clean the filter housing
Wipe the housing and gasket with a damp cloth to remove mineral deposits or residue. Ensure the surface is dry before installing the new filter to ensure a proper seal.
Tip: A clean surface prevents leaks and improves seating. - 5
Prepare the new filter
Remove packaging and protective caps. If required by your GE model, prime the filter by running a small amount of water through it before installation.
Tip: Do not skip priming if your model requires it. - 6
Install the new filter
Insert the new filter into the housing and rotate clockwise until it seats or snaps into place, depending on the design. Do not over-tighten; a gentle snug fit is enough.
Tip: Align any tabs or ridges with the housing. - 7
Reconnect water supply and secure the housing
If you shut off water, turn the valve back on. Ensure any hoses or lines are seated and that the housing is closed properly to prevent leaks.
Tip: Recheck seals after turning the water back on. - 8
Flush the system to bleed air
Run water through the dispenser for several minutes or until the flow is steady and clear. This removes air and activates the new filtration media.
Tip: Discard the first batches of water until it’s clear. - 9
Reset indicator and record the replacement date
If your model has a filter indicator, reset it according to GE’s instructions. Note the replacement date so you don’t miss the next scheduled change.
Tip: Set a calendar reminder for future replacements.
FAQ
How do I know which GE filter model fits my refrigerator?
Check the fridge’s model number and the label on the existing filter housing for compatible GE part numbers. If in doubt, consult the owner's manual or GE’s compatibility guide.
Look up your fridge model number and compare it to GE’s compatibility chart to find the right filter.
How long should I flush the water after installing a new filter?
Run water through the dispenser until it runs clean and steady, typically for a few minutes, to clear air and carbon dust.
Flush the water until it’s clear and steady.
What if I still see air bubbles after replacement?
Air bubbles are common right after installation. Continue flushing and inspect fittings for a loose seal.
If air persists, flush longer and check the seal.
Can I reuse an old GE filter?
No. Reusing a filter can lead to bacterial growth and reduced filtration efficiency.
Don’t reuse filters; replace with a fresh GE part.
Is it safe to replace a water filter if there’s a leak in the line?
If you see a leak, turn off the water supply and inspect fittings. If leaks persist, stop use and consult a professional.
If you see a leak, fix it before continuing.
How often should GE refrigerators require filter replacement?
Replacement frequency depends on usage and water quality; monitor the indicator or set a reminder.
Check the indicator and replace as needed.
Watch Video
Top Takeaways
- Replace filters on a regular maintenance schedule
- Confirm filter compatibility before buying
- Flush after installation to remove air and carbon dust
- Check for leaks and reseat if needed
- Reset the indicator to track future replacements