GE Refrigerator Water Filter Change: A Homeowner’s Guide
Learn how to safely replace the GE refrigerator water filter with a clear, expert walkthrough. This How To Refrigerator guide covers tools, steps, maintenance tips, and troubleshooting to ensure clean, fresh water from your GE fridge.

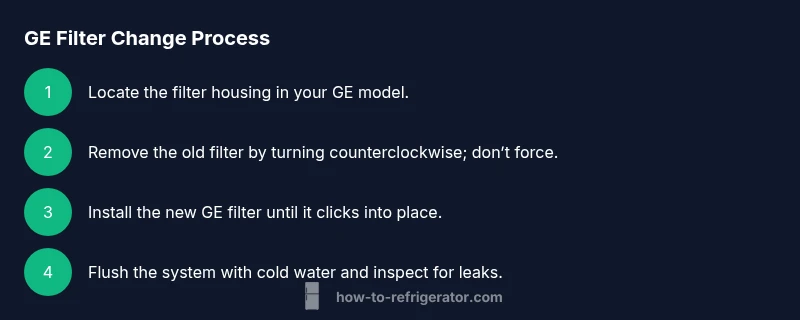
You can safely replace the GE refrigerator water filter in about 10–15 minutes by following these steps: locate the filter, twist counterclockwise to remove, discard the old cartridge, insert the new GE filter until it clicks, flush with cold water for 3–5 minutes, and reset the indicator if your model has one.
Preparing for a GE Water Filter Change
According to How To Refrigerator, starting with the right mindset and a clean workspace will save you time and prevent accidental spills. Begin by removing any items stored near the fridge that could get wet during the process. The GE water filter system is designed for homeowner maintenance, but you still need to respect basic safety practices: handle the filter with clean hands, avoid forcing a stubborn cartridge, and keep the area dry. If your fridge sits on a textured floor, place a small towel or tray beneath the opening to catch drips. A quick check of the model number prevents buying the wrong cartridge, as GE offers several filter types that vary by year and refrigerator line.
Understanding GE Water Filters and Model Variations
GE uses several filter formats across its refrigerator lines, including pitcher-style, inline, and built-in cartridge designs. The most common built-in filter is a twist-off cartridge located in a housing either inside the fresh food compartment or in the base grille. Your model may require a specific GE filter part number, so always verify compatibility before purchasing. Different models have different replacement intervals and flushing recommendations. How To Refrigerator recommends consulting your owner’s manual for your exact model to confirm filter type, capacity, and reset procedures.
Why Regular Filter Changes Matter for Your GE Fridge
Replacing the water filter on time ensures your ice and drinking water stay clean and free of particulates. A clogged or exhausted filter compromises water quality and can reduce flow rate. Regular changes also help protect the interior water system from mineral buildup and bacteria growth. If your GE refrigerator includes an indicator light or a display message, follow the manual’s guidance to reset it after installation. Keep in mind that local water quality and usage patterns influence filter lifespan, so adjust your replacement schedule accordingly.
Step 1: Locate and Identify Your GE Filter
First, locate the filter housing. In many GE models, the filter sits in the upper right corner of the fresh food section or at the bottom grille. Check your model’s label or manual for the exact location. If you’re unsure, look for a small handle or a round cap marking that indicates a cartridge. Once located, confirm the replacement cartridge is the correct GE model for your unit. A quick visual inspection helps you verify the seal and avoid cross-contamination with old residue.
Step 2: Remove the Old Filter Safely
With clean hands, twist the filter counterclockwise to disengage it from the housing. If it’s stiff, try a gentle back-and-forth motion rather than forcing it straight out. Some GE filters have a quarter-turn locking mechanism that requires an extra quarter turn; consult your manual if needed. Place the old filter in a plastic bag to contain any mineral sediment and drips. This step reduces the chance of spilling contaminants onto your countertop.
Step 3: Prepare and Install the New Filter
Take the new GE filter from its packaging and remove the protective caps. Align the filter with the housing’s key notches and insert it firmly. A click or a minor resistance typically indicates a proper seal. Avoid overtightening, which can damage threads or the gasket. If your model has a directional indicator, ensure the arrow points inward as you install.
Step 4: Flush and Inspect for Leaks
Once installed, run cold water through the dispenser for several minutes to purge air and debris from the line. Discard the first batch of filtered water to ensure quality. While flushing, inspect the housing for any signs of leaks or moisture around the seal. If you notice dripping, reseat the filter and wipe away any water to ensure an accurate seal.
Step 5: Reset Indicator and Record Maintenance
Many GE models feature an indicator light or display message that times out after a filter change. Reset the indicator as directed in your manual, typically by holding a button or navigating through settings. Record the replacement date somewhere convenient for future maintenance. This habit helps you maintain water quality and protects your family from stale filters.
Troubleshooting Common Issues After a Change
If water flow is slow after installation, verify the filter is fully seated and the housing is free of debris. If you notice unusual taste or odor, discard the flushed water and re-flush with clean water. For persistent leaks, inspect the gasket and replace the seal if needed. If the issue persists, consult GE’s support resources or a qualified technician.
Maintenance Schedule and Best Practices
Treat a GE water filter change as part of a broader maintenance routine. Mark your calendar with the recommended replacement window based on your model and usage, and test your water occasionally for any changes in taste or clarity. Storing spare filters in a cool, dry place helps you stay prepared. Regular checks of door seals and the ice maker’s line also contribute to overall fridge performance.
What to Expect After You Change the Filter
After installing a new GE filter, you should notice improved water clarity and taste, along with a consistent flow rate. The filter protects your family by reducing particulates and contaminants as designed. If you have an indicator, it should reset to reflect the new cartridge life. Overall, a timely change contributes to better appliance longevity and safety.
Tools & Materials
- GE refrigerator water filter (replacement cartridge)(Ensure compatibility with your model (check part number in manual or GE’s site))
- Clean, dry cloth(For wiping the housing and catching drips)
- Small tray or towel(Optional, to catch drips during replacement)
- Gloves (optional)(Keeps hands clean while handling the cartridge)
Steps
Estimated time: 15-25 minutes
- 1
Locate the filter housing
Find the filter location on your GE refrigerator by consulting the owner’s manual and visually inspecting common areas such as the upper interior, rear wall in the fresh food section, or the bottom grille. Knowing the exact location prevents unnecessary disassembly and reduces the risk of spills.
Tip: If you’re unsure, take a photo of the interior area before touching anything to avoid confusion later. - 2
Turn off water flow and prepare area
If your model requires shutting off a valve, perform this step before touching the filter. Clear the surrounding area, place a towel or tray to catch any drips, and have your new filter ready for immediate installation.
Tip: Work on a dry surface to prevent accidental slips. Have a container for old filter disposal. - 3
Remove the old filter
Grip the old filter and rotate counterclockwise to disengage from the housing. Some models require a small twist plus a pull. Do not force the cartridge; sudden force can damage threads or the gasket.
Tip: If the filter is difficult to turn, try a gentle wiggle while keeping pressure aligned with the housing. - 4
Prepare the new filter
Unpack the new GE filter and remove any protective caps. Inspect the O-ring for damage and wipe it clean before installation.
Tip: Do not use the filter if the O-ring appears cracked or deformed. - 5
Install the new filter
Insert the cartridge into the housing and twist clockwise (or push until it clicks) according to your model’s design. Ensure it’s seated squarely and the alignment marks are aligned.
Tip: Avoid cross-threading by applying even pressure; a light turn is often enough. - 6
Flush the system
Run cold water through the dispenser for several minutes to purge air and any manufacturing residue from the lines. Discard this initial water.
Tip: If your dispenser has two streams, run each until the flow is steady. - 7
Reset indicator & record the date
Follow your model’s instructions to reset the filter life indicator. Document the replacement date for future maintenance.
Tip: A simple note in your fridge manual or calendar app helps you stay on schedule.
FAQ
How often should I change a GE refrigerator water filter?
Follow GE recommendations for your model and consider water usage and quality. In general, many filters are designed for months rather than weeks, but always check your specific model’s manual.
Most GE filters are designed for several months, depending on usage and water quality; refer to your model’s manual for exact timing.
Do I need tools to replace the GE water filter?
Most GE water filters twist off and twist back on by hand. Some models may require a flathead or Phillips screwdriver for the housing, but this is uncommon. Always consult your manual.
Usually no tools are needed; if your model uses a locking housing, use a small screwdriver as directed by the manual.
What if the water tastes odd after changing the filter?
Run the dispenser until the water clears and tastes normal again. If the odd taste persists, ensure the filter is correctly seated and the correct model is installed.
Run water through the new filter for a bit; if the taste stays off, recheck seating and model compatibility.
How do I reset the filter replacement indicator on my GE fridge?
Reset procedures vary by model. Check the user manual or GE support site for exact steps; common methods involve holding a button or navigating through settings.
Look up your model’s reset steps in the manual or online GE support to clear the indicator correctly.
What should I do with the old filter?
Place the old filter in a trash bag and dispose of it with household waste. Avoid rinsing it down the drain, which could spread contaminants.
Dispose of the old filter with your regular trash; don’t recycle it with household fluids.
Watch Video
Top Takeaways
- Replace GE filters on schedule for best water quality
- Ensure proper seating and alignment to prevent leaks
- Flush new filters to remove air and residue
- Reset indicators after installation
- Keep documentation for maintenance cadence