Replace Filter Refrigerator: A Homeowner's Step-by-Step Guide
Learn to replace the refrigerator filter with a clear, homeowner-friendly approach. Identify the right model, install correctly, flush, and reset indicators for clean-tasting, safe water.

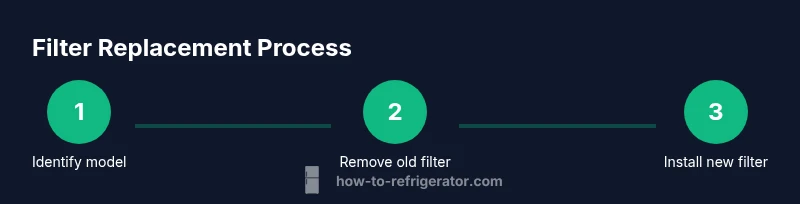
To replace a refrigerator water filter, locate the filter compartment, confirm the correct filter model, and gather a cup for drips. This quick guide shows how to identify filter type, remove the old cartridge, install the new one, and run water to clear air before use. Having the model handy helps ensure you don’t force-fit a wrong filter.
What replacing a filter refrigerator means and why it matters
Replacing the water filter in your refrigerator is a small maintenance task with a big impact. A fresh cartridge removes sediment, chlorine, and other tastes that can affect daily drinking water and ice. When the filter gets clogged, flow rates drop and the dispenser may deliver water slowly or poorly. Regularly replacing the filter refrigerator helps ensure consistent water quality, safeguards the ice maker, and reduces the risk of bacterial growth in the filtration media. According to How To Refrigerator, sticking to a predictable replacement cadence minimizes flavor changes and keeps your system running smoothly. If you notice unusual tastes, smells, or reduced ice production, it’s a strong signal that the filter needs changing. This straightforward task fits into routine kitchen maintenance and is approachable for most homeowners working with standard refrigerator configurations. Keep your water clean by treating filter replacement as a regular, proactive step rather than a rare repair. Your future self will thank you for not letting taste drift or flow slow.
Understanding filter types and compatibility
Most modern refrigerators use one of several filter types, with common cartridges including basic carbon blocks, multi-stage carbon-adsorption filters, and specialized RO-compatible cartridges. Each type has a specific fit, a particular orientation (arrow markings or gasket shape), and a nominal filtering capacity. Before you buy, confirm the exact model and part number by checking the owner's manual or the existing filter for a model code. Compare the replacement against the original filter to ensure proper size and thread style, as an ill-fitting filter can leak or underperform. The phrase replace filter refrigerator should guide your search, but the critical step is to match model compatibility. If your model uses a two-stage or advanced filter system, consider the maintenance schedule recommended by the brand. In practice, many households opt for a carbon-based cartridge that balances cost and performance while meeting safety standards. For homes with water quality issues, a high-efficiency filter may be worth the investment. The goal is reliable filtration without compromising flow or seal integrity, so always verify compatibility first.
How to identify your filter model
Identifying the right filter model is the most important step in a successful replacement. Start by locating the model code, which is usually printed on the filter housing, the end of the cartridge, or the inside wall near the filter area. If you can’t find it on the filter itself, consult the refrigerator’s owner’s manual or the quick-start label inside the door frame. Some brands print the model number on the water inlet valve under the sink or behind the grille cover. Photograph the label and compare it to manufacturer guides online to confirm the exact part number. If you have the old filter, you can often read the model code stamped on its side. Once you’ve identified the correct model, search for an approved replacement from the same brand to avoid compatibility issues. When in doubt, contact customer support or visit a licensed service center for confirmation. Remember, using an incorrect filter can cause leaks or poor filtration performance, so take the time to verify.
Tools and prep you need before replacing
Before starting, assemble the minimal toolkit and any safety gear you might want. A small cup or towel helps catch drips, and a soft cloth keeps the housing area clean during replacement. You’ll typically need: a new refrigerator water filter of the correct model, a paper towel or rag, and optional rubber gloves if you want to keep your hands dry. In many cases, no special tools are required since many filters twist out and twist in by hand. If your model has a tool-free cap, you can remove it with a gentle twist. Ensure the area around the filter is dry and free of loose debris, and have a flashlight handy to inspect the filter housing. If the water supply valve is difficult to reach, a small adjustable wrench can help—but avoid overtightening, which could crack fittings. By preparing ahead, you minimize the chance of spills and misfit parts.
Step-by-step replacement process (narrative)
Replacing the filter refrigerator is a straightforward sequence, but performing it carefully prevents leaks and ensures optimal filtration. Begin by turning off the water supply at the valve to avoid drips while you remove the old cartridge. Access the filter housing by opening the grille or removing the housing cover, depending on your model. Remove the existing filter by twisting counterclockwise or pulling straight out if it’s a push-in design. Compare the new cartridge to confirm orientation and gasket position; many filters have a clearly marked arrow or alignment notch. Insert the new filter, turning it clockwise until it clicks or seats firmly in place. Re-seat the cover or grille and re-engage the water supply valve. Finally, run water through the dispenser for several minutes to flush air and any loose carbon fines from the new cartridge. If your fridge includes a water filter indicator, reset it according to the manual. With the steps completed, you should notice improved taste and a free-flowing dispenser.
Flushing, testing, and safety checks after installation
After installation, flush the new filter by dispensing water for 2-3 minutes or until it runs clear of air and particles. This step removes any trapped air and carbon dust that can accumulate when a new cartridge is installed. While flushing, check for drips around the filter housing and the valve fittings—tighten gently if you see seepage. If you notice ongoing leaks or a strong odor, stop and re-check the filter orientation and gasket seating. It’s also a good idea to wipe down the area and inspect the door seals and grille for moisture that might indicate a leak path. Finally, reset any indicator on the dispenser or control panel to track the next replacement date. Routine flushing helps maximize filter effectiveness and water quality, supporting overall appliance performance.
Maintenance tips to extend filter life and performance
To maximize the life of your replacement filter refrigerator, schedule replacements at the manufacturer’s recommended interval and adhere to local water quality considerations. Keep a log of replacement dates, so you know when to plan for the next change, and mark your calendar to avoid gaps in maintenance. Store spare filters in a cool, dry place to prevent degradation of the gasket materials. Consider running a quick maintenance check every few months: inspect the housing for cracks, test the dispenser flow, and confirm the water tastes clean. If your home uses harder or higher-chlorine water, you might benefit from more frequent replacements. A simple reminder strategy can be effective: set an alert on your phone or calendar at the halfway point between the suggested replacement times.
Troubleshooting common issues after replacement
If you experience slow flow after replacing the filter, confirm the filter is fully seated and the valve is fully open. Leaks indicate a misfit gasket or improper seating; re-seat the filter and inspect for any damage to the housing or O-ring. A persistent bad taste or odor may suggest the wrong filter type or insufficient flushing. In some cases, air pockets in the line can cause temporary taste or flow issues that improve after a longer flush. If the dispenser still underperforms after following these steps, consult the manufacturer’s troubleshooting guide or contact a qualified technician. Remember, always verify compatibility before buying a replacement to avoid waste and frustration.
Tools & Materials
- New refrigerator water filter (correct model)(Check exact model number on filter packaging or inside the fridge manual)
- Cup or container for drips(Small capacity; 8 oz is usually enough)
- Towel or cloth(For quick cleanup and to protect surfaces)
- Soft gloves (optional)(Keeps hands clean and dry; not essential)
- Owner’s manual or model guide(Used to verify filter type and reset procedure)
Steps
Estimated time: 10-15 minutes
- 1
Shut off water supply
Locate the under-sink shutoff valve or the refrigerator’s dedicated valve and turn it clockwise until firmly closed. This prevents spills while you remove the old filter. If the valve is stiff, apply gentle pressure with a cloth and avoid forcing.
Tip: Having a towel under the fridge helps catch any accidental drips during removal. - 2
Access and remove the old filter
Open the filter housing cover or grille. Depending on the model, twist counterclockwise or pull the cartridge straight out. Note the orientation marker on the filter housing so you can install the new one correctly.
Tip: Take a quick photo of the old filter position to guide installation. - 3
Prepare the new filter
Remove packaging and inspect the gasket for damage. If the manual suggests lubrication, lightly moisten the gasket with water. Ensure the new filter is clean before insertion.
Tip: Do not force a filter with a misaligned gasket; re-check the model compatibility. - 4
Install the new filter
Insert the new cartridge and twist clockwise until it seats securely or until you hear a click. Align arrows or indicators as required by the model.
Tip: Double-check that the filter is fully seated to prevent leaks. - 5
Restore water supply and flush
Turn the valve back to open. Run water through the dispenser for 2-3 minutes or until the water runs clear. This clears air and any loose carbon from the new cartridge.
Tip: Place a cup under the dispenser to capture water during the initial flush. - 6
Reset indicator and inspect
If your model has a filter indicator, perform the reset exactly as described in the manual. Watch for leaks around the housing during the first few minutes of operation.
Tip: If you’re unsure of the reset procedure, consult the user guide for model-specific steps. - 7
Final check and cleanup
Wipe any drips from the housing and grille. Ensure the storage area around the fridge is dry and reassemble any panels you removed. Verify water flow remains steady after the initial flush.
Tip: Keep a small towel nearby for the first days after replacement to manage minor spills.
FAQ
How often should you replace a fridge water filter?
Most refrigerators suggest replacing every 6 months, but actual frequency depends on usage and water quality. If you notice slower flow or taste changes, replace sooner. Always follow the manufacturer’s guidance for your model.
Most fridges require a filter replacement every six months, but check your manual for model-specific guidance.
Do I need to turn off the water supply when replacing the filter?
Yes. Shut off the water supply before removing the old filter to prevent spills. Reopen the valve slowly after installation and check for leaks.
Yes. Turn off the water first, then re-check for leaks after installing the new filter.
Can I replace the filter without tools?
Many filters are designed for hand removal and installation, but some models may require a small amount of force or a wrench for tighter housings. Always follow your model’s instructions.
Often you can do it by hand, but some tight housings may need a tool. Check your manual.
What happens if I install the wrong filter?
Installing an incorrect filter can cause leaks, poor filtration, or reduced water quality. Always verify model compatibility before purchasing and installing.
Using the wrong filter can lead to leaks and poor filtration, so verify compatibility first.
How can I tell if a filter is exhausted?
Common signs include slow flow, off taste or odor, and more frequent headaches from contaminants. If you notice these, replace the filter promptly.
If water flow slows or taste changes, consider replacing the filter.
How do I reset the filter indicator?
Consult your model’s manual for exact steps; typically you hold a reset button for several seconds, or navigate through the control panel. After replacement, reset to track the next change.
Check your manual for the reset steps; many models require holding a button for a few seconds.
Top Takeaways
- Identify the correct filter model before purchase
- Shut off water and access the filter housing safely
- Install the new filter with proper orientation
- Flush and test the system to remove air and verify flow
- Reset indicators to track next replacement