Replacing Refrigerator Filter: A Practical Step-by-Step Guide
Learn how to replace your refrigerator filter safely and efficiently. This guide covers filter types, selecting the right replacement, step-by-step instructions, tips, and maintenance to keep your fridge running clean and fresh in 2026.

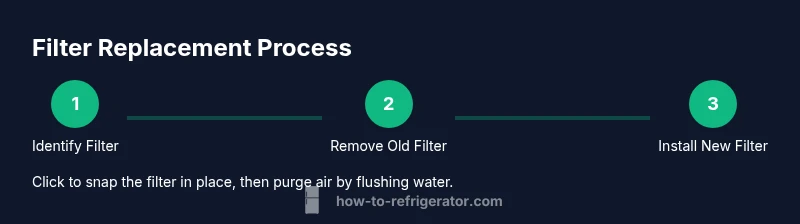
Replacing refrigerator filter involves locating your model’s compatible filter, removing the old unit, installing a new filter until it clicks, and flushing the water line to purge air. Have a replacement filter and a towel ready. This straightforward maintenance improves water taste, ice clarity, and overall fridge performance while extending filter life.
Why replacing refrigerator filter matters
Filters in every refrigerator reduce contaminants and improve taste, odor, and overall water quality. Regular replacement helps maintain optimal water flow to the dispenser and ice maker, lowers the risk of microbial growth in the filter, and protects internal components from buildup. The How To Refrigerator team emphasizes that neglecting filter maintenance can lead to slower flow, diminished filtration efficiency, and less effective ice formation. How To Refrigerator Analysis, 2026, notes that homeowners who follow a proactive replacement schedule report fewer taste and odor issues and clearer ice, contributing to a better daily user experience. In practice, think of the filter as a frontline barrier: replace it on schedule, store the spare in a cool, dry place, and always verify compatibility with your fridge model.
How the filtration process works in most fridges
Most residential refrigerators use a carbon-based cartridge that traps chlorine taste, sediment, and some organic compounds as water passes through. The process has multiple stages: initial filtration to remove particulates, adsorption of odorous compounds, and ongoing neutralization of common contaminants. A clean filter reduces taste and odor issues and preserves the efficiency of the ice maker. Because flow is driven by the water valve and the filter’s porosity, a clogged or poorly seated filter can reduce water pressure and cause inconsistent ice production. Keeping the filter in good condition helps protect the appliance’s water system and ensures the filtered water remains safe for drinking. If you notice a change in taste, smell, or flow, it’s time to replace.
Filter types commonly used in residential fridges
There are several common configurations. Many fridges use a replaceable carbon cartridge that sits in a labeled housing inside the fresh water compartment or near the ice maker. Some models use inline filters connected to the water line, while others rely on a built-in filter module integrated into the door or the back of the unit. Regardless of design, the goal is the same: remove chlorine taste, sediment, and some contaminants while preserving water pressure. Always check your model’s manual or label for the exact filter type and size, since compatibility matters for performance and warranty coverage.
Signs you need to replace the filter now
If you notice a drop in water pressure, a noticeable change in taste or odor, cloudy ice, or an indicator light on the dispenser panel, these are strong signals the filter may be near the end of its useful life. Some fridges include a change-of-filter reminder that starts timing on installation; if your unit lacks a light, rely on a regular replacement interval based on manufacturer guidance. Replacing the filter promptly helps maintain water quality and prevents buildup that could affect the ice maker.
How to determine the right replacement filter
Start by locating the model number on the inside wall, ceiling, or door frame of your refrigerator and check the user manual or manufacturer’s site for the exact filter size. Look for a part number stamped on the existing filter or in the specs in your owner’s manual. If you are unsure, visit the manufacturer’s support page or the retailer where you purchased the fridge; many offer compatibility checks by entering the model number. Using the wrong filter can reduce filtration efficiency and void warranties, so double-check compatibility before purchasing.
Tools and preparation before you start
Before you begin, assemble basic supplies: a replacement refrigerator water filter, a clean cloth for wiping up drips, a shallow tray or container to catch spills, and paper towels for quick cleanup. Clear the area around the filter housing to avoid knocking things over, and ensure you have good lighting. If your model requires shutting a downstream shutoff valve, locate and gently close it to minimize water leakage during replacement. A dry, organized workspace helps you work faster and reduces the chance of dropping parts.
Step-by-step overview
This section provides a high-level summary of the replacement process. First, confirm the exact filter model for your fridge. Next, prepare the area and have a container ready to catch water. Then, remove the old filter by turning it counterclockwise or following the model-specific method. Insert the new filter until it clicks, then run cold water through the dispenser to purge air. Finally, reset any indicator light or filter life tracker according to the manual. For a detailed, model-specific walkthrough, see the dedicated Step-by-Step section.
After replacing: flushing and validating water quality
After installation, run cold water through the dispenser for 1–2 minutes to purge air and flush out any loose carbon fines from the new filter. Check for leaks around the filter housing and gaskets—tighten carefully if needed, but avoid overtightening. Taste and odor should improve within a few minutes; if not, allow the system to run for a bit longer and verify that the filter is seated correctly. Keeping notes on the replacement date helps with future planning and maintenance.
Common mistakes to avoid
Avoid using an ill-fitting or expired filter, which can reduce filtration efficiency and void warranties. Do not force a filter that doesn’t seat properly; misalignment can crack housings or cause leaks. Don’t ignore the area around the filter—wipes and drips can accumulate, creating mold or odors if left unattended. If your water supply is off during replacement, ensure you reopen valves slowly to prevent a pressure surge.
Maintenance tips to extend filter life
Create a routine: replace the filter every 6–12 months or as recommended by the manufacturer, depending on water quality and usage. Keep a spare compatible filter on hand and store it in a cool, dry place. Document the replacement date on the filter or a label on the fridge to stay on schedule. Periodically inspect gaskets and housings for wear, and clean the exterior of the filter housing to prevent buildup that could affect seating.
Recycling and disposal of old filters
Most used fridge filters are recyclable through local programs or with mail-back options offered by filter brands. Check your city’s guidelines or retailer take-back programs to recycle the cartridge responsibly. Remove any cartridges from their external packaging and place them in your recycling stream if accepted, or dispose of them per local waste guidelines. Proper disposal reduces environmental impact and aligns with best practices for home maintenance.
Tools & Materials
- Replacement refrigerator water filter(Ensure compatibility with your model (check the label or manual).)
- Clean cloth or microfiber towel(Use to wipe spills and dry housing after replacement.)
- Small basin or tray(Catch water that escapes during removal/installation.)
- Paper towels or wipes(Clean the housing and surrounding area before and after.)
- Gloves (optional)(Keep hands clean when handling dirty filters.)
- Label or marker(Label replacement date on the cartridge or nearby.)
Steps
Estimated time: 10-15 minutes
- 1
Identify filter type and location
Check your fridge’s model number and consult the manual or manufacturer site to confirm the exact filter type. Many models use a cartridge in the front-door area or inside the fresh-water compartment. This step ensures you buy the correct replacement and avoid compatibility issues.
Tip: If you can’t locate the manual, record the model number and search the manufacturer’s support page for a filter finder. - 2
Prepare the workspace
Clear the area around the filter housing, lay down a towel, and place a shallow tray to catch any drips. This minimizes mess and helps you see all parts clearly as you work.
Tip: Having a clean, well-lit space reduces the risk of dropping the filter or losing small parts. - 3
Remove the old filter
Gently turn the old filter counterclockwise (or follow your model’s removal method) until it frees from the housing. Keep the tray under the area to catch water or carbon fines that may spill.
Tip: Avoid forcing the filter; if it’s resisting, pause and verify you’ve followed the correct removal direction for your model. - 4
Install the new filter
Align the new filter with the housing’s notches and push it in until it clicks or seats as directed by your model. Ensure there is a snug fit with no gaps around the gasket.
Tip: Do not over-tighten; cross-threading can damage the housing and cause leaks. - 5
Flush and purge air
Run cold water through the dispenser for 1–2 minutes (or as recommended by the manufacturer) to purge air and clear any loose carbon debris. This step ensures clean, fresh-tasting water from the first use after replacement.
Tip: During flushing, watch for leaks at the housing; if you see moisture, power off and recheck seating. - 6
Reset indicator and finalize
If your fridge has a filter life indicator, reset it per the manual once the water flow is steady. Wipe the area dry and dispose of packaging appropriately.
Tip: Keep a note of the replacement date to schedule the next change in a timely fashion.
FAQ
How often should I replace a refrigerator water filter?
Most manufacturers recommend replacing every 6–12 months, depending on usage and water quality. If you notice taste, odor, or flow changes sooner, replace earlier.
Most fridges need a filter change about every 6 to 12 months, but listen for taste or flow changes and replace sooner if needed.
Do I need to buy the exact model replacement filter?
Yes. Filter compatibility is model-specific. Check your fridge’s user manual or the manufacturer’s filter finder to ensure correct fit.
Yes. Use the exact model replacement recommended for your fridge to ensure proper filtration.
Can I replace the filter without turning off the water supply?
Some models allow replacement without shutting off the main supply, but many require closing a shutoff valve first. Always consult your manual and proceed with caution.
Some fridges don’t require shutting off water, but many do. Check your manual and follow the safe steps.
What signs indicate a clogged filter besides taste changes?
Look for reduced water flow, slower dispenser performance, or unusual sounds from the filter housing. These can signal a filter that needs replacement.
Watch for reduced flow or odd sounds that suggest the filter is clogged.
Are there filters for water dispensers and ice makers separately?
Some models use the same cartridge for both dispenser and ice maker, while others have separate filters. Check your model’s specs to be sure.
Some fridges share one filter for both dispenser and ice maker; others use separate ones—verify your model.
What should I do if water quality doesn't improve after replacement?
If taste or odor persists after replacement, recheck filter seating, purge longer, or consider a different filter if your water has unusually high contamination levels. If needed, contact the manufacturer or a service professional.
If water quality doesn’t improve, check seating, purge longer, and consider model compatibility or expert help.
Top Takeaways
- Replace filters on schedule to maintain water quality.
- Always verify model compatibility before buying a filter.
- Purge air after installation to ensure clean water.
- Reset indicators to track future changes.