Water Filter Refrigerator Replacement Guide
Learn how to replace your water filter refrigerator, flush the line, reset indicators, and maintain clean ice and water with our expert, step-by-step guide for homeowners.

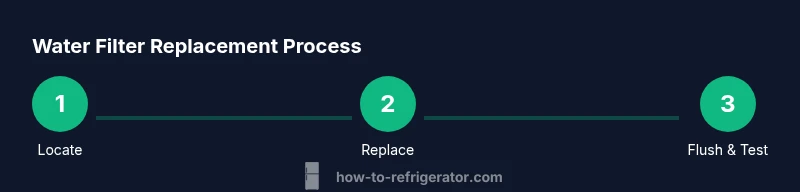
Replace a water filter in a refrigerator quickly and safely to ensure clean-tasting ice and water. You’ll need a compatible replacement filter, a towel to catch drips, and a few minutes to complete the task. The quick steps cover locating the filter, removing the old unit, installing the new one, flushing until clear, and testing for leaks.
Introduction to Water Filter Refrigerator Maintenance
Keeping a water filter refrigerator in good working order protects your family from contaminants and ensures ice and chilled water taste fresh. The How To Refrigerator team emphasizes that a well-maintained filtration system is a simple, cost-effective part of everyday appliance care. When you replace a fridge water filter promptly and correctly, you reduce the risk of bad odors and particulate buildup that can affect other parts of the ice maker and water line. In this guide, you’ll learn how to identify the right filter, remove an exhausted cartridge, install a fresh one, and complete a quick flush to clear air and debris. The steps are designed for homeowners troubleshooting issues, with practical tips that fit most standard refrigerators. By following these recommendations, you’ll maintain water quality and extend the life of your cooling system.
How a Refrigerator Water Filter Works
Most refrigerator water filters use activated carbon or a multi-stage media to remove chlorine, sediment, and certain contaminants from tap water. The filter sits in the line feeding the ice maker and dispenser, so clean water reaches your glass directly after passing through the media. Over time, accessibility and pressure through the system can cause taste, odor, or flow changes. A fresh filter restores flow performance and preserves the appliance’s overall water quality without altering the heating or cooling cycles of the refrigerator.
Filter Types Common in Home Refrigerators
Home refrigerators commonly use replaceable cartridge filters that slot into a dedicated housing. Some models feature filters integrated into the door or the base grille, while others require you to twist a cartridge to remove and install it. Regardless of placement, the core idea remains the same: select a filter compatible with your model, ensure the media matches the contaminant profile you want to address, and verify the installation mechanism is secure to prevent leaks.
Signs It’s Time to Replace the Filter
Taste changes, odors in water or ice, and a visible indicator light are typical signals that a filter needs replacement. If you notice slower water flow from the dispenser, the filter may be clogged. Some models may alert you with an electronic indicator, while others rely on maintenance schedules noted in the user manual. In any case, replacing the filter promptly helps maintain water quality and prevents buildup downstream in the ice maker.
Check Compatibility and Choose a Filter
Before purchasing, locate the refrigerator’s model number and refer to the manufacturer’s recommended filter type. Filters are designed for specific housing dimensions and media configurations, so using the wrong cartridge can cause leaks or reduced filtration efficiency. When in doubt, consult the owner’s manual or the manufacturer’s website for a compatible list. The How To Refrigerator team recommends verifying both the model number and filter family to ensure a precise fit and reliable performance.
Tools and Safety Considerations
Safety comes first when handling any water filtration task. Turn off the water supply if your model has a shut-off valve. Use a towel to catch drips and place a container to collect any water that escapes during filter removal. Wear gloves if you prefer, and never force a filter that won’t turn or seat properly. Clean hands and a clean work surface minimize the chance of introducing contaminants into the system.
Step-By-Step Overview Before You Start
Take a moment to read the product instructions included with the new filter. Identify the housing cover, orientation marks, and any safety clips. If your model includes an indicator reset feature, note where the reset is located on the control panel. Having a plan helps reduce mistakes and speeds up the replacement process, especially if you’re doing this while maintaining other kitchen tasks.
Flushing, Testing, and Indicator Reset
After installing the new cartridge, flush the line by running water through the dispenser until the water is clear. This clears any air and loose carbon particles from the new media. If your fridge has an indicator, reset it per the manual. Finally, inspect the housing for leaks and verify that the dispenser delivers a steady flow.
Maintenance Schedule and Record Keeping
Keeping a simple maintenance log helps you stay on track with filter replacements. Note the filter type, install date, and any observations about taste or flow. Use the manufacturer’s recommended replacement interval as a baseline, and adjust based on your water quality and usage. Keeping track minimizes guesswork and ensures consistent filtration performance.
Common Mistakes and How to Avoid Them
Avoid mixing brands or models unless explicitly compatible. Do not overtighten parts, as cross-threading can cause leaks. Do not skip the flushing step, which helps remove trapped air and carbon fines that affect taste. Finally, don’t discard the old filter until you’ve confirmed the new cartridge is seated correctly and not leaking.
Environmental Considerations and Disposal
Used filters should be disposed of according to local regulations. Many filters are recyclable through manufacturer programs or household hazardous waste initiatives. Rinse off any standing residue from the old cartridge before disposal, and place the filter in a sealed bag if requested by local guidelines.
Where to Find Official Resources
Always refer to the official user manual and the manufacturer’s support site for model-specific instructions. These resources provide diagrams, proper orientation, and any required cautionary statements. How To Refrigerator recommends checking the manual first, then seeking official sources if you encounter model-specific quirks.
Tools & Materials
- Compatible water filter refrigerator cartridge(Ensure cartridge matches your fridge’s model number and filter family.)
- Towel or absorbent cloth(Place under the housing to catch drips and spills.)
- Small container or cup(Catch any water drained during filter removal and flush.)
- Gloves (optional)(For grip and hygiene during handling.)
- Screwdriver (Phillips or flathead)(Only if your model requires tool-assisted access to the filter.)
- Mild dish soap(For clean-up around the filter housing.)
- Owner’s manual or model number reference(Use to verify compatibility and steps specific to your unit.)
Steps
Estimated time: 15-25 minutes
- 1
Locate the filter access
Find where the filter sits on your refrigerator. It may be inside the fresh food compartment door, under the grille, or in the back cabinet. Confirm orientation marks to avoid improper installation.
Tip: If you can’t see the seal, check the owner’s manual for the exact location. - 2
Prepare the area
Clear the area, place a towel and container underneath, and read the new filter’s instructions before touching the housing.
Tip: Have a damp cloth handy to wipe spills after removal. - 3
Remove the old filter
Gently turn or unlock the current cartridge according to the orientation arrows. Slide it out carefully to avoid splashing.
Tip: Do not force the cartridge if it doesn’t loosen with light turning. - 4
Inspect the old filter
Check for darkened media or visible debris as a sign it’s past its life. Do not continue to use a visibly degraded filter.
Tip: If in doubt, replace the filter and discard the old one safely. - 5
Prepare the new filter
Remove packaging and inspect O-rings or seals for cleanliness. Align the cartridge with the housing’s orientation marks.
Tip: Do not skip lubrication of O-rings with a tiny amount of water. - 6
Install the new filter
Insert or twist the cartridge into the housing following the orientation marks until it sits firmly.
Tip: Ensure a snug, secure fit to prevent leaks. - 7
Flush the filter
Run water through the dispenser for a short period until the water runs clear and free of air.
Tip: Discard the initial water to avoid cloudy taste. - 8
Reset indicators
If your model has a filter indicator, reset it following the control panel instructions.
Tip: Some models auto-reset after a successful flush. - 9
Check for leaks
Inspect around the filter housing for any signs of moisture or dripping.
Tip: If you notice leaks, reseat the cartridge or replace the seal. - 10
Clean up
Wipe the area and dispose of the old filter according to local guidelines.
Tip: Keep the area dry to prevent slips. - 11
Document the replacement
Log the date, filtering media, and model in your maintenance notebook.
Tip: This helps with future maintenance planning. - 12
Verify taste and flow
Test the dispenser for a steady flow and drinkable water, ensuring the taste is clean.
Tip: If taste is off, run extra flush cycles as recommended by the manufacturer.
FAQ
What tools do I need to replace the water filter in my refrigerator?
Typically you need a compatible replacement filter, a towel, and a container to catch water. Some models require a screwdriver. Always refer to the owner’s manual for model-specific steps.
You’ll usually need a replacement filter, a towel, and a container; a screwdriver only if your model requires it.
How do I know which filter to buy for my fridge?
Check your fridge’s model number and refer to the manufacturer’s recommended filter type. Use the product packaging or the manufacturer’s website to verify compatibility.
Look up your model number and follow the manufacturer’s filter recommendations.
Can I replace the filter without turning off the water supply?
If your fridge has a separate shut-off valve, it’s safer to turn it off. Some models tolerate a quick replacement with water on, but check your manual.
It’s safer to shut off the water supply if you have a valve; otherwise, be prepared for a minor spill.
Why is water leaking after replacement?
Leaks are usually due to a mis-seated cartridge, worn O-rings, or cross-threading. Reseat the filter, replace the O-ring if needed, and ensure proper alignment.
Leaks usually come from a loose or mis-seated filter; reseat and check seals.
How often should I replace the filter?
Follow the manufacturer’s guidelines for your model. Indicators can help determine when to replace based on usage and water quality.
Check your fridge’s indicator and manual for timing guidance.
Is it safe to dispose of old filters with household waste?
Yes, in many areas old filters can be disposed of with household waste. Rinse the filter and follow local recycling or disposal rules.
Yes, dispose of the old filter as your local guidelines allow and rinse it before discarding.
Watch Video
Top Takeaways
- Replace with the correct filter to avoid leaks
- Flush until clear to remove air and fines
- Reset indicators if available for accurate maintenance
- Dispose of used filters responsibly and per local guidelines