Repair Refrigerator Water Line: Fix Leaks & Kinks Safely
Learn how to repair a refrigerator water line with a clear, step-by-step guide. Identify leaks, choose the right parts, and safely restore water flow to your ice maker and dispenser.

To repair refrigerator water line, first locate the leak source, shut off the supply, and drain the line. Then replace damaged tubing or fittings, reseal connections, and re-test for leaks with the water back on. Gather basic tools and replacement parts before you start a safe, do-it-yourself repair. This approach covers leaks at fittings, kinked lines, and small cracks in flexible hoses.
Why the Refrigerator Water Line Failure Happens
Water lines in refrigerators fail for several reasons: loose fittings, kinks in the tubing, worn seals, or a freeze-thaw cycle that splits plastic tubing. Over time, mineral buildup can also clog a line, reducing water flow and increasing pressure at joints. When you set out to repair refrigerator water line, start by identifying whether the issue is mechanical (a loose nut), physical (a kink), or material (cracked tubing). This knowledge helps you choose the right fix and minimizes the chance of recurring leaks. In many homes, compact kitchen spaces mean snug connections and limited access, so plan your repair with adequate lighting and a clean workspace. Remember: accurate diagnosis saves time and protects your appliance and your floors. (Note: Throughout this guide, the How To Refrigerator team emphasizes practical, step-by-step approaches you can perform with basic tools and common replacement parts.)
Diagnosing Leaks: Visual Checks and Pressure Tests
Begin with a careful visual inspection of the entire water line from the shutoff valve to the fridge connector. Look for damp spots, small puddles, or crusty mineral deposits that indicate a slow leak. Use a flashlight to inspect under the fridge where lines bend or pass through tight gaps. Wipe the line and fittings with a dry cloth, then run a short test to watch for drips. If you see moisture around a compression nut or fitting, tighten slowly in small increments while the line is pressurized, stopping if you hear cracking or see more leakage. For persistent leaks, you may need to replace a segment of tubing or the entire line. This diagnostic phase helps you decide whether a simple reseal, a replacement of a short run, or a full line swap is appropriate.
Safety First: Power, Water, and Tools
Always start by unplugging the refrigerator and turning off the cold-water supply at the shutoff valve. Water and electricity are a dangerous combination; empty the line into a bucket and keep the area dry. Wear gloves to protect your hands from sharp metal fittings and use eye protection when working with tools. Make sure you have good lighting and a stable work surface. If you encounter a stubborn valve or a corroded fitting, pause and reassess; forcing components can cause bigger leaks or damage.
Understanding Water Line Types: Braided, Plastic, Copper
There are several common configurations for refrigerator water lines. Braided stainless steel lines are durable and flexible, often with compression fittings at both ends. Plastic or reinforced plastic lines are cheaper but can crack under pressure or if bent sharply. Copper tubing is sturdy but requires fittings that adapt to the fridge’s connections. Matching the correct size and type of line with the corresponding fittings ensures a reliable repair. If you’re unsure which type you have, remove a small section and take it to a hardware store for size confirmation. The right choice reduces future maintenance and helps prevent leaks.
When to Repair vs Replace: Assessing Damage
If the line shows minor wear at a connector and the leak ceases after resealing with fresh compression nuts and Teflon tape, a repair is often sufficient. However, if you observe multiple crack points, corrosion on connectors, or a line that has already been repaired several times, replacement is the safer, long-term solution. Consider the length of the run and the accessibility of both ends: a tight crawl space may complicate a full replacement, but a damaged section near the valve is usually worth swapping. In some cases, replacing with a braided line provides better durability and fewer kinks.
Post-Repair Testing and Maintenance
After completing the repair, slowly turn the water back on and watch for leaks at both ends of the connection. Check for several minutes to ensure there are no drips as pressure stabilizes. Wipe away any water and reseal if necessary. Run the ice maker and water dispenser to confirm proper flow and ice production. Regular maintenance includes inspecting the line every 6–12 months and replacing brittle lines proactively before leaks develop. Keep a small kit of spare fittings handy so you can perform quick fixes without a full teardown.
Common Mistakes and How to Avoid Them
Common errors include overtightening fittings, which damages threads, using the wrong sized tubing, and ignoring a slow drip that becomes a flood. Always start with the valve off and test with a controlled flow. Do not mix metal and plastic fittings without the proper adapters, and avoid bending plastic lines beyond their natural radii. Finally, never work on live electrical components without unplugging the appliance — safety first.
How to Prevent Future Leaks: Proactive Maintenance
Create a simple maintenance routine to extend the life of your fridge’s water line. Inspect hoses and fittings quarterly, replace cracked lines promptly, and keep the area behind the fridge dry to prevent mold. If your home has low water pressure, consider replacing a long, narrow line with a shorter, sturdier braided option to reduce strain. By staying proactive, you’ll minimize disruptions and maintain consistent water flow to your ice maker and dispenser.
Tools & Materials
- Adjustable wrench(Useful for loosening/tightening compression nuts on connectors)
- Nut driver set (e.g., 1/4 inch)(Fits small fittings on most refrigerator lines)
- Pliers(Grip tubing and prevent rotating fittings)
- Screwdriver set (Phillips and flat-head)(Clamp removal and mounting screws)
- Tubing cutter(Clean, square cuts for plastic or copper lines)
- Replacement water line kit(Braided or reinforced line with compatible fittings)
- Compression fittings and ferrules(Match line size (1/4" or 3/8"))
- Teflon tape(White tape for threaded connections)
- Bucket and rags(Catch drips and keep area clean)
- Flashlight(Inspect tight spaces and behind the fridge)
- Replacement insulation or sleeve(Optional to prevent freezing in cold kitchens)
- Marker or tape measure(Mark cut length and alignments)
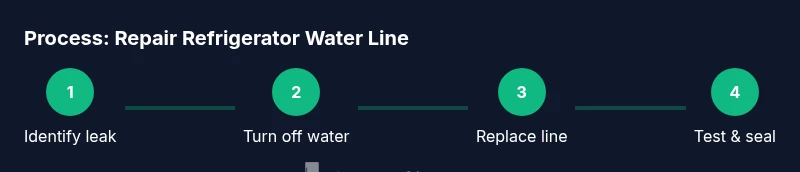
Steps
Estimated time: 45-90 minutes
- 1
Power down and shut off water
Unplug the refrigerator and shut off the cold-water supply at the dedicated valve. This prevents accidental shocks and stops water flow while you work. Place a bucket under the line to catch any residual water.
Tip: Verify the valve is fully closed before you disconnect anything. - 2
Locate the leak source
Inspect the line from the valve to the fridge using a flashlight. Look for damp spots at fittings, joints, and along the tubing. Note the exact location to guide the repair.
Tip: Use tissue or paper towels to detect very small drips that may not be immediately visible. - 3
Disconnect and prepare the replacement
Carefully loosen the nuts at both ends with the appropriate wrench. Remove the damaged segment or worn fittings and prepare the replacement line by cleaning cut ends and ensuring fittings match.
Tip: Take a quick photo of existing connections for reference. - 4
Install the new line and fittings
Attach the new line to the valve and the fridge, tightening fittings snugly. Use Teflon tape on threaded connections and avoid overtightening, which can damage threads.
Tip: Work slowly in tight spaces to prevent cross-threading. - 5
Restore water and check for leaks
Turn the water back on slowly and observe both ends for several minutes. If you see a drip, tighten a little more but stop at the first sign of resistance. Wipe dry and recheck after 5 minutes.
Tip: Do not rush the initial pressurization; a slow restart reduces the risk of leaks. - 6
Test functionality and finish
Run the ice maker and water dispenser to confirm proper flow. Reclaim the area behind the fridge and store tools neatly. If leaks recur, reassess the fittings or consider replacing with a braided line.
Tip: Keep extra fittings on hand for a quick future fix.
FAQ
What are the signs you need to repair a refrigerator water line?
Look for water pooling on the floor, damp spots around the line, reduced water or ice maker flow, or hissing sounds near fittings. If you notice any of these, plan a repair or replacement.
Watch for pooling water, damp spots, and reduced ice maker flow as signs you may need to repair the refrigerator water line.
Can I fix a water line leak myself?
Yes, many leaks can be repaired with basic tools and common parts. Complex leaks behind walls or cracked lines may require a pro.
Yes, if you have the right tools and the leak is accessible, you can fix it yourself; for hidden or cracked lines, call a pro.
What safety steps should I follow before starting?
Disconnect power, shut off the water supply, wear gloves and eye protection, and have a bucket ready to catch drips.
Power off, shut off water, wear gloves, and have a bucket ready before you start.
How do I know if the line needs replacement rather than repair?
If the line is cracked, heavily corroded, or leaks persist after resealing, replacement is the safer long-term option.
If the line is cracked or keeps leaking after attempts to seal, replace it.
How long does a typical repair take?
Most repairs take 30-90 minutes depending on access and line length.
Most repairs take under two hours, depending on the setup.
Are braided lines more reliable than plastic?
Braided stainless steel or reinforced plastic lines are generally more durable and kink-resistant than plain plastic lines.
Braided lines are typically tougher and longer-lasting.
What should I do if I see water behind the refrigerator after repair?
Stop and check the drain pan and the floor. Ensure there are no additional leaks from other connections and consider professional inspection if water persists.
If water appears behind the fridge after repair, re-check connections and monitor for any other leaks; seek a pro if it continues.
Is it necessary to replace both ends of the line at once?
Not always. Replace only the leaking segment if both ends are sound; replace the entire line if multiple issues exist.
Usually you can replace just the faulty section, unless both ends show wear.
Watch Video
Top Takeaways
- Identify leak source before disassembly.
- Use correct size fittings and durable line.
- Test for leaks after repair and allow pressure to stabilize.
- Keep spare parts handy for quick future fixes.