Refrigerator With No Freezer: Urgent Troubleshooting
A practical, step-by-step guide to diagnose and fix a refrigerator with no freezer. Learn quick checks, common causes, and safe fixes to restore freezing and protect food.

Most often, a refrigerator with no freezer is caused by a clogged defrost drain, evaporator frost, or a faulty thermostat. Begin with quick checks: verify freezer temperature, inspect door seals for gaps, and reset the control by unplugging for 5 minutes. If cooling doesn’t resume, use the diagnostic flow below. According to How To Refrigerator, avoid risky repairs if you’re unsure about safety.
What a no-freezer state means for your refrigerator
When the freezer compartment isn’t getting cold but the refrigerator section still runs, your appliance is in a no-freezer state. This can threaten food safety and raise energy costs. In many cases, the underlying issue is a simple one you can verify with basic checks. The How To Refrigerator team emphasizes starting with safety-focused diagnostics and avoiding deep repairs unless you’re confident in handling electrical components. In a typical home setup, the freezer relies on proper airflow from the evaporator; a disruption here can quickly cascade into a full freeze failure. By understanding the basics of how a freezer works, you’ll be better prepared to troubleshoot without risking damage to the unit.
Common causes at a glance
- Defrost drain blockage: Water from the defrost cycle can back up, freezing the evaporator and blocking airflow.
- Faulty defrost timer or heater: If the defrost cycle doesn’t run, frost builds up and blocks cooling paths.
- Incorrect thermostat setting or sensor fault: The thermostat may not signal the compressor to run long enough to freeze.
- Door seals or gaskets failing: Leaks allow warm air to enter, making the freezer work harder or not reach freezing temperatures.
- Dirty condenser coils: Reduced heat exchange can cause overall poor cooling, including the freezer.
Quick safety checks before you begin
- Unplug the fridge before any internal inspection to prevent shocks.
- Remove items from the freezer and fridge; keep doors open only as needed for access.
- Check the freezer temperature setting; if it’s higher than recommended, reset to -18°C (-0°F).
- Inspect door seals for gaps; clean the gasket with warm soapy water and check for tears.
- Look for unusual frost buildup on the evaporator; if you see thick frost, don’t scrape it raw—defrost with patience.
- Ensure the condenser coils are clean and unobstructed; vacuum dust buildup carefully.
- After basic checks, plug back in and monitor for 24–48 hours to see if freezing returns.
Diagnostic approach: symptom to solution (overview)
This section walks through a structured diagnostic flow. Start with observable symptoms, assess obvious culprits, and progressively move toward targeted fixes. The goal is to identify the root cause without unnecessary parts replacement. Keep a simple log of what you test and the outcomes. As you progress, prioritize safety and note when professional help is needed—especially if you suspect a sealed-system issue or refrigerant leak, which requires licensed service.
Step-by-step fix: defrost drain and airflow restoration (most common cause)
- Power off and unplug the unit; remove food from the freezer, and locate the defrost drain at the rear of the freezer.
- If you see standing water or frost along the drain, gently clear the drain opening using warm water and a flexible pipe cleaner.
- Flush the drain with warm water until the flow is clear and test for proper drainage into the drain pan.
- Inspect the evaporator fan in the freezer; listen for a steady hum when the door is opened and closed. If it’s obstructed or noisy, clear debris or replace the fan if needed.
- Reassemble panels and plug the unit back in. Allow 24–48 hours for the freezer to stabilize at -18°C.
- If frost continues to reappear, test the defrost thermostat or timer; a malfunction here means a professional diagnosis is advised.
- Recheck door seals and ensure the freezer door closes tightly without gaps. A loose seal can prevent frost-free operation and freeze buildup from dissipating.
- Verify that the temperature sensor and control board are responding; if there’s an intermittent signal, a service call may be required.
- Monitor performance and avoid overloading the freezer during stabilization; this can hinder airflow and prolong cooling times.
- If the freezer still won’t freeze after these steps, escalate to a professional technician for a compressor, refrigerant, or sealed-system inspection.
Testing and calibration after a fix
After performing the fixes, run a controlled test: let the fridge reach full cycling, monitor freezer temperature for 24–48 hours, and check that the freezer remains at or near -18°C (-0°F). Use a thermometer to confirm accuracy if your unit doesn’t display precise readings. If temperatures drift or the freezer never reaches freezing, document the symptom and call a technician. According to How To Refrigerator analysis, persistent issues after defrost repairs often indicate deeper problems that require professional service.
Prevention tips to avoid future freezer problems
- Schedule regular condenser coil cleanings every 6–12 months, or more often in dusty environments.
- Keep the fridge in a cool, dry location and away from heat sources that can alter cooling performance.
- Check door seals weekly for cracks or tears; replace worn gaskets promptly to maintain proper air seals.
- Avoid placing hot foods directly into the freezer; allow foods to cool to room temperature before storage to reduce strain on the compressor.
- Periodically test the defrost drain by pouring a small amount of warm water into the drain pan to ensure it drains properly.
When to call a professional
If you’ve completed the above checks and the freezer still won’t freeze, it’s time to call a pro. Frost pattern changes, unusual noises from the compressor, refrigerant smells, or a continuous ice buildup indicate a sealed-system issue that requires licensed refrigeration technicians. The How To Refrigerator Team recommends seeking professional help early to prevent food spoilage and avoid unsafe handling of refrigerants.
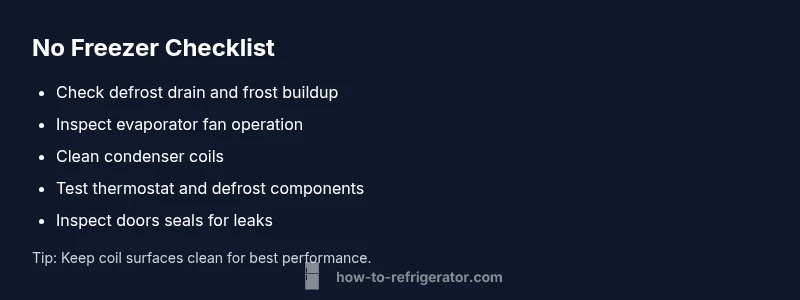
Maintenance checklist you can trust
- Monthly: Inspect door seals for wear and ensure a tight seal.
- Quarterly: Vacuum condenser coils and check fans for obstructions.
- Biannual: Verify thermostat settings and run a temperature test in both compartments.
- Annually: Schedule a professional inspection if cooling performance declines or you hear unfamiliar noises.
Steps
Estimated time: 60-120 minutes
- 1
Power down and safety check
Unplug the unit and remove nearby items. Confirm your hands are dry and you’re using insulated tools where needed.
Tip: Always start with safety—electric shocks can occur if you’re not careful. - 2
Access the defrost drain
Open the freezer panel to locate the defrost drain. Look for standing water or frost around the drain opening.
Tip: Use a flashlight to spot hidden frost that can block the drain. - 3
Clear and flush the drain
Carefully remove frost and flush the drain with warm water. Use a pipe cleaner to remove stubborn buildup.
Tip: Do not use sharp tools that could puncture tubing. - 4
Inspect the evaporator fan
Check the fan in the freezer compartment. Make sure it spins freely and isn’t blocked by ice or debris.
Tip: If the fan is noisy, it may need replacement. - 5
Test defrost components
Test the defrost thermostat and timer if you have access to a multimeter; replace if readings are out of spec.
Tip: Defrost components can fail silently; test with proper equipment. - 6
Check air flow and seals
Ensure vents aren’t blocked and door gaskets seal tightly. A cold air path must exist between compartments.
Tip: A poor seal can cause frost and improper freezing. - 7
Condenser and coils check
Inspect condenser coils for dust and debris. Clean gently to improve heat dissipation and cooling efficiency.
Tip: Use a vacuum with a brush attachment for best results. - 8
Reassemble and power up
Reconnect power, load items back, and monitor temperatures for 24–48 hours.
Tip: Avoid opening the doors too often during stabilization. - 9
Monitor and reassess
If temperatures don’t stabilize, reassess major components or call a pro for deeper diagnostics.
Tip: Document symptoms to help the technician diagnose quickly.
Diagnosis: Refrigerator runs but freezer does not get cold
Possible Causes
- highDefrost drain clog causing evaporator frost and blocked airflow
- mediumFaulty defrost timer or defrost heater
- lowThermostat setting incorrect or sensor fault
Fixes
- easyUnclog defrost drain and verify drainage to pan
- hardReplace defrost timer/heater or thermostat as needed
- easyCheck temperature settings and door seals; reseat wiring if needed
FAQ
Why is my freezer not freezing even though the fridge is running?
A freezer that won’t freeze while the fridge runs often points to a defrost issue, frost buildup that blocks airflow, or a faulty thermostat. Start with quick checks of the temperature setting and door seals, then progress through the diagnostic steps. If the issue persists, deeper testing may be required.
If your freezer won’t freeze even when the fridge is running, start with simple checks like temperature settings and door seals. If it doesn’t improve, follow the diagnostic steps or call a professional for deeper testing.
How do I fix a defrost drain clog?
To fix a defrost drain clog, unplug the appliance, locate the drain, and flush it with warm water. Use a flexible wire or pipe cleaner to remove any remaining blockage. Re-test after reassembly and monitor performance for 24–48 hours.
Unplug the fridge, locate and flush the defrost drain with warm water, clear any blockage, and re-test over the next day or two.
Is it safe to unplug and reset the fridge frequently?
Resetting can help reset electronics, but frequent resets aren’t a solution for a failing cooling system. If resets don’t restore freezing, proceed with the diagnostic flow or consult a pro to avoid hidden damage.
Resetting can help, but if it doesn’t restore freezing, keep to the diagnostic steps or contact a pro.
When should I replace the thermostat?
Thermostat replacement is warranted if tests show incorrect readings or if the control board isn’t signaling the compressor correctly. This usually requires a professional assessment and proper replacement parts.
If the thermostat readings are off or the compressor isn’t signaling properly, replacement by a pro is usually needed.
Can a dirty condenser cause no freezer?
Yes. A dirty condenser restricts heat rejection, reducing cooling capacity. Clean the coils and ensure airflow around the unit to improve performance. If problems persist, a professional check is advised.
A dirty condenser can reduce cooling; cleaning helps, but persistent issues may need a pro.
Watch Video
Top Takeaways
- Follow safety first before any repair.
- Defrost drain and evaporator issues are common culprits.
- Keep coils clean to maintain cooling efficiency.
- If unsure, contact a pro for sealed-system problems.