What Causes Refrigerator to Freeze: Troubleshooting Guide
Learn the common reasons refrigerators freeze, how to diagnose quickly, and practical fixes homeowners can perform safely. Clear steps from How To Refrigerator to restore proper cooling.

The most common reason a refrigerator freezes is an imbalance in cooling caused by a faulty thermostat or defrost system, often combined with restricted airflow. Start by verifying temperature settings, inspecting the defrost cycle, and checking door seals for tightness. If simple checks don’t fix it, seek professional diagnosis to avoid potential refrigerant or compressor issues.
Why Freezing Happens in Refrigerators
When a fridge starts freezing items, it signals a cooling imbalance that often traces back to thermostat or defrost system problems, airflow issues, or door seal faults. The root question is: what causes refrigerator to freeze? In most homes, the culprit is either the thermostat telling the compressor to run too aggressively, or the defrost cycle failing to clear frost from the evaporator. Poor airflow from blocked vents, or inadequate space around the coils, can compound the problem by creating localized cold spots. Surfaces inside the fridge might feel icy, and the back wall could be frosted. This guide from How To Refrigerator will walk you through a practical, safety-first diagnostic that you can perform without specialized tools. If you encounter a refrigerant leak or a failed compressor, this is beyond DIY scope and professional help is required. According to How To Refrigerator, frost-related freezing is one of the most common fridge issues homeowners face and a quick diagnostic can save a costly service call.
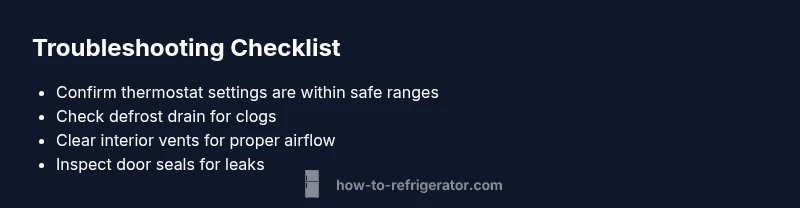
Common Causes of Freezing: The Big Five
There are several frequent culprits behind unexpected freezing. Start with the easiest checks and progressively move to the more involved components:
- Thermostat setting too low or a faulty temperature sensor that makes the compressor run longer than needed.
- Defrost system failure, including a faulty defrost timer, heater, or control board that allows frost to build up on the evaporator.
- Blocked air vents or poor airflow inside the refrigerator, often caused by overpacking or storing hot foods improperly.
- A worn or loose door gasket that lets cold air escape and moist air enter, causing frost to form on internal surfaces.
- Frost buildup from humidity or a clogged defrost drain, leading to ice accumulation on the evaporator and shelves.
If you notice frost on the back wall, frozen shelves, or food freezing in ice trays, these are classic signs to start with the above checks. How To Refrigerator emphasizes a methodical approach so you don’t miss the simple fixes that restore normal operation.
Checkpoints: Thermostat and Temperature Settings
A misread or malfunctioning thermostat is a common trigger for overcooling. Begin by locating the temperature dial or digital control panel and confirm the fridge is set within the commonly recommended range for fresh foods (around 37–40°F or 3–4°C) and the freezer around 0°F or -18°C. If the readings don’t align with the display or you notice temperature variance from shelf to shelf, calibrating or replacing the sensor may be necessary.
Some models have multiple sensors; if a sensor is unplugged or has shifted position behind shelves, it can misreport temperature. After adjustment, allow 4–24 hours to see if frost recurrence declines. If you cannot access the sensor or the issue persists after setting adjustments, plan for a more in-depth check of the control board or thermostat circuit.
Defrost System Essentials: Drain, Timer, and Heater
A failing defrost system is a frequent cause of frost buildup and ice formation. The defrost timer cycles and the defrost heater should intermittently melt frost on the evaporator coil. When these parts fail, frost accumulates and can start moving into the refrigerant lines or food compartments. Locate the defrost drain and ensure it’s clear; a clogged drain can cause water to refreeze inside the fridge rather than exit through the drain.
If you observe heavy frost, especially near the back wall or evaporator cover, test or visually inspect the defrost heater element, timer, and related wiring (only if you are comfortable with basic electrical testing). Replacement of these components is typically a task for a professional, but some models allow homeowner maintenance under safety guidelines.
Airflow and Coils: The Path to Efficient Cooling
Poor airflow is a hidden cause of frost because blocked vents prevent air from circulating evenly. Ensure interior vents are not obstructed by overly large containers, doors left open, or stacked items. Clean dust and lint from condenser coils if accessible (usually behind a rear panel or beneath the unit). Clean coils improve heat exchange and reduce the likelihood of frost on the evaporator and door seals failing under heavy cooling loads.
If airflow remains restricted after clearing vents and coils, performance drops and frost can redevelop. In this case, a more thorough diagnostic may be required to verify the fans and sensor feedback are functioning correctly.
Doors, Seals, and Positioning: Guarding Against Cold Leaks
A misaligned door or worn gasket is a common, easily overlooked cause. A leaky seal lets humid air in and cold air out, causing frost to form along the door frame or inside the cabinet. Inspect gaskets for cracks, stiffening, or tears; close the door on a piece of paper to test suction at corners. If the door doesn’t seal tightly, replace the gasket or adjust the hinge alignment as needed.
Additionally, ensure your refrigerator isn’t pushed too close to walls or kitchen cabinets, which can restrict airflow around the coils and/or airflow through the doors—this can unexpectedly magnify frost formation.
Quick Fixes You Can Try Today (Safety First)
Before attempting any interior work, unplug the unit or switch it off if you are dealing with electrical components. Remove items from shelves and wipe any visible frost; for light frost, you can use towels to wick away moisture. Do not use sharp tools to scrape frost; instead, allow a controlled defrost cycle to melt it, or follow manufacturer guidelines for manual defrost. If your model permits, run a diagnostic self-test from the control panel to identify sensor or circuit issues.
Remember: never discharge refrigerant yourself. If you suspect a refrigerant leak, a licensed technician must handle it. Regular maintenance, including cleaning condenser coils and checking seals, reduces frost recurrence and extends life.
Preventive Maintenance and When to Seek Help
Consistency is key. Schedule periodic checks: inspect seals quarterly, clean coils biannually, and verify temperatures monthly with a thermometer. If frost returns after performing the above steps, or if you observe hissing, buzzing, or excessively warm compartments, it’s time to call a professional. A trusted technician can test for refrigerant leaks, compressor problems, or faulty control boards that DIY steps cannot safely resolve.
Steps
Estimated time: 60-90 minutes
- 1
Confirm power and basic settings
Unplug the fridge, wait 1–2 minutes, then plug back in. Verify the control panel shows the correct fridge and freezer temperatures. If the display reads abnormally, reset to defaults or consult the manual.
Tip: If your model has a quick reset function, use it before proceeding to avoid misreading sensors. - 2
Inspect the door seals
Check gaskets for cracks, tears, or stiff sections. Close the door on a piece of paper; if you can pull the paper out easily at any edge, the seal may be failing.
Tip: Replace worn gaskets promptly to restore airtight sealing. - 3
Check defrost components
If accessible, locate the defrost timer and heater; listen for a faint hum during the defrost cycle. Look for frost buildup on the evaporator coil after powering the unit on for a while.
Tip: Only test defrost components if you are comfortable with basic electrical checks. - 4
Assess airflow and venting
Ensure interior vents aren’t blocked by items and the freezer/freezer doors aren’t overfilled. Clean dust from condenser coils if accessible; blocked coils reduce heat dissipation and can influence frost.
Tip: Rearrange shelves to encourage cold air circulation around food. - 5
Calibrate thermostat/sensor
If temperatures vary by zone, recalibrate the thermostat or replace a faulty sensor. Test readings with an external thermometer and compare with the panel.
Tip: Do not set temperatures to ‘coldest’; forces more work and can worsen frost. - 6
Run a controlled defrost and monitor
If frost is still present after initial checks, allow a controlled defrost cycle (per manual) and monitor for recurrence for 24–48 hours.
Tip: Document the times you see frost to help a technician diagnose later.
Diagnosis: Refrigerator is freezing food or frosting appears on shelves/back wall.
Possible Causes
- highDefrost system failure (timer/heater) causing frost buildup
- mediumThermostat setting too low or faulty temperature sensor
- mediumPoor airflow due to blocked vents or overpacking
- lowDoor gasket leaks or door misalignment
Fixes
- hardTest/replace defrost timer or heater as needed
- easyCalibrate or replace faulty thermostat/sensor
- easyClear interior vents and reorganize for proper airflow
- mediumInspect and replace door seals; adjust hinges if needed
- easyClean condenser coils; ensure unobstructed airflow to outside
FAQ
Why is my fridge freezing food even at a normal temperature?
This is often caused by an overcooling thermostat, a faulty sensor, or a malfunctioning defrost cycle. Check the thermostat settings, inspect the evaporator for frost buildup, and ensure the defrost timer is functioning. If the problem persists, a professional evaluation may be needed.
If your fridge is freezing food even at normal temps, start with the thermostat, defrost cycle, and airflow checks; call a pro if it continues.
Can a faulty defrost timer cause freezing?
Yes. A failed defrost timer or heater can allow frost to accumulate on the evaporator, leading to freezing inside. Inspect the timer and heater, and replace if necessary following manufacturer instructions.
A bad defrost timer can cause frost buildup and freezing; check the timer and heater and replace if needed.
Will a dirty door gasket cause freezing inside?
A deteriorated gasket can let humid air in and cold air out, forming frost along the door frame. Check for cracks and replace the gasket if needed to restore a proper seal.
Yes, a worn door gasket can cause frost; inspect and replace if cracked or loose.
Is overloading the fridge a cause of freezing?
Overpacking can block vents and disrupt air circulation, creating cold spots that frost can form on. Rearrange items to improve airflow and avoid blocking the internal pathways.
Overloading can trap cold air and frost shelves; fix by reorganizing for airflow.
What safety steps should I take before DIY fixes?
Unplug the unit before inspecting any components. Wear safety gloves if handling sharp edges and avoid touching refrigerant lines. If unsure, stop and contact a professional.
Always unplug first, wear gloves, and don’t tamper with refrigerant lines.
When should I call a professional?
If frost persists after basic checks, you suspect a refrigerant leak, or you hear unusual noises, contact a licensed technician. They can diagnose refrigerant systems, compressors, and control boards safely.
If frost keeps coming back or you hear odd noises, call a pro.
Watch Video
Top Takeaways
- Check thermostat and sensor settings first
- Inspect defrost system and drain for blockages
- Ensure vents and coils are clear for proper airflow
- Test door seals and alignment to prevent cold air leaks
- Call a pro if frost recurs after DIY steps