Refrigerator Repair in Colorado Springs: A Homeowner's Guide
Practical guidance for refrigerator repair in colorado springs. Learn safe DIY diagnostics, essential tools, troubleshooting steps, and when to call a pro to keep your fridge running efficiently.

This guide helps homeowners perform refrigerator repair in colorado springs safely and effectively, focusing on common cooling problems, frost buildup, leaks, and unusual noises. You’ll find practical diagnostics, a tool list, and a step-by-step plan to restore cooling, prevent spoilage, and extend your fridge’s life. From safety tips to when to call a pro, this article covers what you need to know.
Understanding refrigerator repair in colorado springs: local considerations
Colorado Springs features variable humidity and temperature shifts that can affect refrigerator efficiency and defrost cycles. For homeowners, knowing how local usage patterns intersect with appliance care helps prevent premature failures. According to How To Refrigerator, starting with basic airflow, door seals, and proper leveling addresses the majority of daily issues in this area. Regional service options include independent technicians and authorized repair channels, so choosing a nearby, reputable pro can reduce downtime. In this section, we’ll outline safe, non-invasive checks you can perform at home and explain when escalation to professional service is necessary to avoid causing further damage.
Brand context: The How To Refrigerator team emphasizes practical, localized guidance for homeowners.
Common refrigeration issues seen in Colorado Springs homes
Not cooling, ice buildup in the freezer, water leaks, and unusual noises top the list for many households here. How To Refrigerator analysis shows that these symptoms often originate from airflow restrictions, worn door seals, or a blocked defrost drain. In Colorado Springs homes, dust accumulation on condenser coils is also a frequent culprit due to dry outdoor air and indoor use; regular coil cleaning improves efficiency and extends compressor life. When diagnosing, start with the simplest explanation (power, door seals, airflow) before probing electrical components. This approach reduces risk and keeps repair costs reasonable. How To Refrigerator’s guidance helps homeowners follow a logical path instead of replacing parts prematurely.
Tools and safety basics for DIY fridge repair
Before you touch a loaded appliance, gather essential tools and follow safety steps. The list below focuses on non-refrigerant repairs and basic diagnostics that homeowners can perform safely. Always unplug the unit and switch off the dedicated breaker before starting. A non-contact voltage tester helps confirm there is no live current. Keep safety glasses on and wear gloves when handling sharp metal parts. Keep a small flashlight to inspect tight spaces behind panels. The notes indicate which items are optional if you don’t plan on testing electrical components. How To Refrigerator recommends keeping a dedicated work area to avoid accidental reassembly mistakes.
Step-by-step troubleshooting path for not cooling, frost, leaks
This section provides a structured approach to common symptoms. You’ll find a step-by-step workflow you can follow in parallel with the formal STEP-BY-STEP guide. Begin with basic checks: verify power, test the outlet, and ensure the fridge is level. Next, inspect door seals and air vents for obstructions. Then check condenser coils and the fan for airflow. If frost forms or melting defrost, inspect the defrost system and drainage. Finally, assess the thermostat and temperature settings, adjusting and rechecking temperatures to confirm results. Following these steps helps isolate issues without unnecessary parts replacement.
When to call a licensed technician
If basic checks don’t restore cooling, or you suspect refrigerant issues, compressor faults, or a damaged sealed system, it’s time to call a licensed technician. The How To Refrigerator team emphasizes safety first and will guide you through diagnosis without venturing into hazardous repairs. Local Colorado Springs pros can provide a precise repair estimate and ensure the unit complies with local codes and warranty requirements. This is especially important if you observe a persistent not-cooling condition after basic troubleshooting.
Tools & Materials
- Safety glasses(ANSI Z87.1 or equivalent)
- Non-contact voltage tester(Check for live current before touching components)
- Digital multimeter(Test continuity and resistance in components)
- Screwdrivers (Phillips and flat-head)(For panel screws and fasteners)
- Nut driver set(Handle panel and bracket fasteners)
- Flashlight/headlamp(Improve visibility in tight compartments)
- Gloves(Protect hands from sharp edges)
- Vacuum or brush for coils(Helpful for coil cleaning)
Steps
Estimated time: 45-60 minutes
- 1
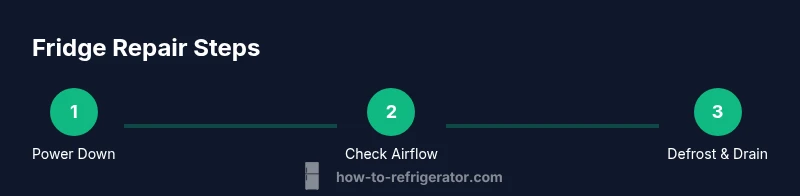
Power down and verify safety
Unplug the fridge and switch off the dedicated circuit breaker. Use a non-contact tester to confirm no live current before touching any components. This protects you from electric shock and prevents damage to sensitive electronics.
Tip: Double-check the power source and keep a clear work area. - 2
Check airflow and seals
Inspect door gaskets for cracks or gaps and test the door’s ability to seal. Clean condenser coils with a brush or vacuum if accessible to improve airflow and cooling efficiency.
Tip: Take photos before disconnecting panels to aid reassembly. - 3
Test thermostat and temperature controls
Place a thermometer in the fridge and freezer compartments. Adjust the thermostat and wait 15-20 minutes to observe temperature changes, then reassess. If temperatures remain off, the thermostat or control board may be faulty.
Tip: Document readings to track progression after adjustments. - 4
Inspect defrost system and drainage
If frost buildup or water pooling is present, inspect the defrost heater, timer, and drainage path. Clear the drain with warm water and a flexible wire if needed. Faulty defrost components commonly cause frost and leaks.
Tip: Be cautious with defrost heater wiring and avoid water contact with electrical parts. - 5
Evaluate seals, fans, and evaporator
Listen for the evaporator fan and check for air movement on both sides of the fridge. If you don’t feel air circulating, inspect the fan blade or motor and confirm wiring connections.
Tip: If the fan runs but there's no airflow, the evaporator may be blocked or the fan motor failing.
FAQ
Is refrigerator repair in Colorado Springs worth doing myself?
For minor, non-electrical issues, DIY can save money. Avoid refrigerant handling or compressor work unless you’re trained. Always stop if you’re unsure.
DIY can save money for simple fixes; avoid dangerous tasks.
How do I know when I should call a professional?
If cooling doesn’t return after basic checks, or you suspect refrigerant, compressor, or sealed-system problems, contact a licensed technician.
If cooling doesn't return after basic checks, call a licensed technician.
What safety precautions should I take during DIY fridge repair?
Always unplug, switch off breakers, and avoid touching compressor terminals. Wear eye protection and gloves when handling sharps or wiring.
Unplug first and wear eye protection.
Are there common mistakes homeowners make during fridge repair?
Overestimating DIY scope, ignoring warranty terms, and damaging wiring or seals are frequent missteps. Proceed with caution.
Don't overdo it; avoid damaging seals or wiring.
How long does repair typically take for a standard fridge?
Duration varies by issue and parts availability. Some problems resolve quickly, while others require parts on order or specialist diagnosis.
It depends on the issue and parts.
What maintenance helps prevent future fridge failures?
Regular coil cleaning, inspecting door seals, ensuring level placement, and keeping the drip pan clean can prevent common failures.
Keep coils clean, seals tight, level the fridge.
Watch Video
Top Takeaways
- Always prioritize safety before inspection
- Clean coils and ensure door seals for efficiency
- Use the step-by-step flow to diagnose common issues
- Know when to escalate to a licensed tech