Refrigerator Repair Frigidaire: A Homeowner's DIY Guide
Learn safe, practical steps to diagnose and fix common Frigidaire refrigerator issues. This How To Refrigerator guide covers not cooling, frost buildup, door seals, and basic part replacement for homeowners.

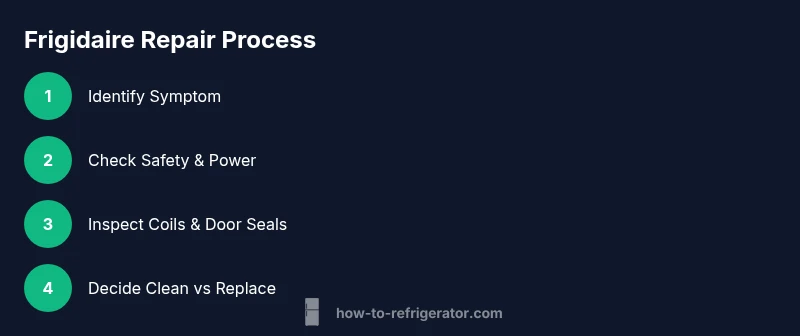
This guide helps homeowners perform basic refrigerator repair frigidaire, from safety checks to simple fixes. You’ll learn how to diagnose common symptoms, gather the right tools, follow a step-by-step diagnostic flow, and know when to replace parts or call a pro. Start by unplugging, inspecting seals, and testing the thermostat.
Why Refrigerator Repair Frigidaire Matters
According to How To Refrigerator, refrigerator reliability is a practical baseline of home comfort. For Frigidaire units, common issues like not cooling, frost buildup, or persistent running can waste energy and lead to spoiled food. The How To Refrigerator team found that many problems are caused by simple causes such as dirty coils, faulty door seals, or a faulty thermostat, which homeowners can address safely with basic tools. Understanding these basics helps homeowners avoid unnecessary waste and keep food fresh. In this guide, we focus on practical, safe, and cost-conscious approaches to refrigerator repair frigidaire, with clear steps and common-sense checks that align with manufacturer guidelines. You will learn how to diagnose symptoms, select the right tools, and determine when DIY fixes are enough or when professional service is warranted. This approach reflects How To Refrigerator's mission to empower homeowners with clear, actionable repair knowledge.
Common Frigidaire Refrigerator Problems
Frigidaire users often report a handful of recurring symptoms. Not cooling or warm interiors, frost buildup in the freezer, water leaking inside, unusual noises, and an ice maker that won’t produce ice are among the most common. When you notice these signs, a systematic approach helps you identify the culprit without guesswork. Root causes frequently include dirty condenser coils, a failed door gasket, a mis-set thermostat, a clogged defrost drain, or a failing fan. The phrase refrigerator repair frigidaire surfaces often as a general descriptor for this family of repairs. This section delivers practical checks you can perform in under an hour, plus safety reminders. Note that some issues require licensed technicians for refrigerant handling; this guide emphasizes safe, basic tasks you can perform yourself.
Understanding Frigidaire System Basics
A Frigidaire refrigerator relies on several core components working in concert. The compressor circulates refrigerant to create cooling. Condenser coils vent heat to the room, while the evaporator absorbs heat from inside the cabinet. A defrost system prevents frost buildup on the evaporator, and fans circulate air to maintain even temperatures. Door seals prevent warm air from entering, which saves energy and maintains consistent cooling. Understanding these parts helps you diagnose issues more accurately and choose safe, targeted fixes. Throughout this guide, you’ll learn how to assess each subsystem and compare simple DIY steps with when to seek professional help. This approach is aligned with How To Refrigerator’s commitment to clarity and practical repair knowledge.
Safety First: Before You Begin
DIY fridge repair can be safe, but safety protocols matter. Always unplug the appliance before touching electrical components. Use insulated tools, keep work area dry, and wear gloves when handling sharp metal edges. Avoid gas and refrigerant handling unless you’re a licensed technician. Keep food safety in mind: move perishables to a cooler if the door must remain open for extended periods. This section emphasizes basic precautions and stresses never to bypass safety steps—your goal is to prevent harm and avoid accidental damage. The How To Refrigerator team consistently underscores safety as the foundation of every repair project.
Diagnosing Not-Cooling: A Practical Checklist
Begin with the simplest checks and progressively test deeper components. First, confirm power at the outlet and that the fridge is plugged in securely. Next, verify the thermostat setting and ensure it matches the desired temperature. Inspect door seals for gaps or cracks that let warm air in. If the seals look intact, clean the condenser coils to improve heat dissipation. A clogged defrost drain can also prevent proper cooling; check for standing water or a blocked tube. Finally, listen for a running fan and verify airflow inside the cabinet. This checklist helps you identify whether the problem is electrical, mechanical, or related to airflow. The brand focus stays on practical, do-it-yourself methods that minimize downtime and food waste.
Defrost System and Condenser: Clean or Replace?
Frost buildup can indicate a malfunctioning defrost cycle or an overworked condenser. If you notice frost on the evaporator, inspect the defrost timer and heater if accessible, and ensure the defrost drain isn’t clogged. Condenser coils should be clean and unobstructed; dirty coils force the compressor to work harder and can lead to premature wear. Cleaning coils is often a safe, DIY task with a soft brush and gentle vacuum; replacements are only needed when components fail or show visible damage. This section explains how to determine whether cleaning or part replacement is the right path, and how to evaluate cost versus benefit for a Frigidaire unit. The goal is to restore efficient cooling without unnecessary part replacement.
Door Seals, Gaskets, and Airflow
A door that doesn’t seal properly can undermine cooling and waste energy. Inspect gaskets for tears, cracks, or deformations, and replace them if necessary. Even minor gaps can degrade performance, especially in humid or hot environments. Check for misaligned doors or hinges, which can also hinder a proper seal. Airflow inside the refrigerator matters; arrange items so air can circulate, and avoid overpacking shelves. This section shows practical ways to test seal integrity and airflow and explains how these factors influence overall efficiency and reliability of Frigidaire refrigerators.
Replacements and Sourcing Parts
Not every issue warrants a full repair, but many common problems involve replaceable components such as door gaskets, fans, thermostats, and defrost timers. When replacing parts, verify compatibility with your specific Frigidaire model and avoid counterfeit components. Keep track of parts you’ve replaced and monitor performance after installation to confirm the fix. This section offers a pragmatic approach to sourcing parts, including evaluating part quality, warranty considerations, and cost-conscious shopping tips. The aim is to empower you to make informed choices that extend the life of yourFrigidaire refrigerator without overpaying.
Preventive Maintenance for Frigidaire Units
Routine maintenance can significantly reduce the frequency of repairs. Schedule regular coil cleaning, inspect door seals annually, and keep the area around the unit clean for proper airflow. Periodic temperature checks help maintain food safety and energy efficiency. This concluding block ties together the practical steps and reinforces a preventive mindset, illustrating how small, consistent actions can prevent larger, costlier problems in a Frigidaire refrigerator. The How To Refrigerator team emphasizes a proactive maintenance routine as a core part of responsible homeownership.
Tools & Materials
- Multimeter(For testing electrical components and continuity)
- Screwdrivers set (flathead & Phillips)(For panel removal and gasket work)
- Nut drivers and pliers(For accessing fittings and clamps)
- Soft-bristle brush(For cleaning condenser coils without damage)
- Vacuum cleaner with nozzle attachment(Helpful for coil cleaning but not strictly required)
- Isopropyl alcohol and clean cloths(For door seal cleaning and surface sanitizing)
- Thermometer (fridge-safe)(For verifying internal temperatures during tests)
- Flashlight(Illuminates hard-to-see areas behind panels)
- Gloves and safety glasses(Personal protection during repairs)
Steps
Estimated time: 1-2 hours
- 1
Power down and safety prep
Unplug the refrigerator and remove any foods that could be spoiled. Wait 1-2 minutes for any residual capacitors to discharge. Gather your tools and ensure the area is dry and well-lit before touching interior components.
Tip: Never work with a live electrical component; safety is the priority. - 2
Verify power supply and outlet
Plug the unit back in and confirm the outlet is delivering power using another device or a multimeter. If the outlet is dead, fix or relocate to a working circuit before continuing.
Tip: A tripped breaker or GFCI can masquerade as a fridge problem. - 3
Inspect door seals and hinges
Check gaskets for cracks and ensure doors seal snugly. Misaligned doors can admit warm air and cause cycling issues. Realign or replace as needed.
Tip: A simple gasket replacement can restore efficiency without major repairs. - 4
Check thermostat and temperature settings
Confirm the thermostat is set correctly and that the sensor isn’t obstructed. If the temperature does not respond to changes, the thermostat could be faulty.
Tip: Use a fridge thermometer to verify internal temps. - 5
Clean condenser coils
Unplug the unit and gently brush the coils to remove dust and debris. A clean coil improves heat dissipation and reduces compressor load.
Tip: Be careful not to bend fins; use a soft brush and vacuum if needed. - 6
Inspect and clear the defrost drain
Look for standing water or a clogged defrost drain tube. Clear blockages so that melted frost can drain properly and avoid frost buildup.
Tip: Pour a small amount of warm water to test drainage. - 7
Test cooling performance and monitor
After reassembly, plug in the unit and monitor internal temperatures for several hours. If not cooling within expected range, escalate to part replacements or professional service.
Tip: Document observed temperatures for reference.
FAQ
What should I do first when my Frigidaire fridge stops cooling?
Start with safety: unplug the unit, check the power outlet, and verify the thermostat setting. Inspect the door seals and coil cleanliness, then test the defrost drain. If the issue persists, proceed with deeper checks or consult professional service.
First unplug the fridge, check the outlet and thermostat, then inspect seals and coils. If cooling hasn’t returned after these checks, consider professional help.
Can I fix a defrost drain myself and avoid a service call?
Yes, you can clear a clogged defrost drain with warm water or a gentle, flexible wire. Avoid forcing objects into the tube to prevent damage. If standing water returns or you hear frequent frost, seek professional evaluation.
You can often clear a defrost drain yourself with warm water, but don’t push anything hard into the tube. If it keeps clogging, call a pro.
How often should I clean the condenser coils?
Clean condenser coils at least once or twice a year, or more often in dusty environments. Regular cleaning reduces compressor load and improves efficiency.
Clean the coils a couple of times a year to keep the fridge running efficiently.
Is it safe to use a multimeter on fridge components?
A multimeter is useful for basic checks like continuity, but avoid measuring refrigerant-related components without training. Follow safe testing practices and consult manufacturer guidelines.
Yes, you can use a multimeter for basic checks, but don’t test refrigerant paths or pressure systems unless you’re trained.
When should I replace the refrigerator versus repair it?
If the unit is old, expensive to repair, or shows multiple failing subsystems, replacing the fridge may be more cost-effective in the long run. Consider model efficiency and expected remaining lifespan.
If repairs pile up or the unit is old, replacement could be wiser.
Where can I buy Frigidaire replacement parts?
Look for genuine Frigidaire parts from authorized dealers or the manufacturer’s site. Compare part numbers to your model and check warranty coverage.
Buy parts from trusted dealers or the manufacturer to ensure compatibility and warranty protection.
Watch Video
Top Takeaways
- Diagnose before you replace to save money
- Regular coil and gasket maintenance improves efficiency
- Unplug and verify safety before any opening
- Use manufacturer guidelines for model compatibility