Refrigerator and Freezer Repair Guide for Homeowners
Expert, homeowner-friendly guide to diagnosing and repairing common refrigerator and freezer issues with safe steps, essential tools, and guidance on when to call a professional.

Fixing a refrigerator and freezer becomes manageable when you follow a clear diagnostic flow and safety steps. This guide shows homeowners how to identify common cooling problems, gather the right tools, and perform safe, step-by-step repairs. You’ll learn practical checks—from door seals to condenser coils—and know when a pro signal is the smarter choice.
How a Refrigerator and Freezer Work
A modern refrigerator and freezer are a system of closely coordinated components that keep food safe and fresh while minimizing energy use. The heart of the system is the compressor, which circulates refrigerant through sealed tubes. As it passes through the condenser coils at the back or bottom, heat is released to the room. The refrigerant then returns as a low-pressure gas to the evaporator inside the insulated cabinet, where it absorbs heat from the interior air and cools the shelves. A thermostat and control board decide when the compressor turns on and off, and a fan distributes cold air for even temperatures. The freezer shares many parts with the refrigerator portion but is optimized to operate at a lower temperature. Understanding these roles helps you interpret symptoms such as unusual frost, warm shelves, or water leaks, and guides your next steps in safe, methodical repairs. For homeowners, a basic grasp of these components makes it easier to locate the likely culprits without diving into complicated schematics.
Common Symptoms and Their Meanings
Not cooling: When the fridge or freezer isn’t reaching the set temperature, check the door seals, thermostat setting, and whether the condenser coils are dirty. Frost buildup in the freezer can indicate a faulty defrost system or a blocked defrost drain. Excessive condensation or leaking water points to drainage problems or a damaged door gasket. A loud buzz, hum, or rattling usually signals a failed compressor, a malfunctioning fan, or loose components. Slow cooling or frost-free issues after a power outage may require a reset or deeper inspection of controls. Remember that many symptoms share root causes, so approach diagnosis with a step-by-step method rather than chasing multiple symptoms at once.
Safety Essentials Before You Start
Before you touch any appliance, unplug the unit and move items away from the area. If you have an ice maker or water line, shut off the supply to avoid leaks. Wear safety gloves and use insulated tools when working near exposed metal edges and electrical components. Keep children and pets away while you inspect. If you notice refrigerant odor, oily residue, or visible refrigerant lines outside the system, stop and call a pro. Always work on a dry surface and be mindful of static electricity when handling electronics. These precautions help prevent shocks and accidental damage to sensitive parts.
Temperature Basics and Settings
Most refrigerators perform best when the fridge compartment is around 37-40°F (3-4°C) and the freezer hovers near 0°F (-18°C). Use a separate thermometer to verify actual temperatures, since built-in displays can drift over time. Avoid placing hot foods inside the cabinet, which can raise interior temperatures and force the compressor to run longer. Keep air vents clear of obstructions, and minimize door openings to maintain stable temperatures. If temperatures stay off after adjusting settings, you may be facing sensor or control board issues that require closer inspection.
Defrost, Drainage, and Ice Maker Considerations
Automatic defrost systems reduce frost buildup, but a blocked defrost drain can cause water pooling in the fridge or freezer. Locate the defrost drain, usually near the back or bottom of the refrigerator pantry, and flush it with hot water to clear ice and debris. If the ice maker is present, check the line for kinks or leaks and ensure the ice maker bin is seated properly. A malfunctioning defrost cycle can lead to excessive frost or warm compartments, which often requires testing the defrost heater and timer with a multimeter.
Door Seals and Gasket Health
Damaged door seals allow warm room air to enter, making the compressor work harder and causing temperature instability. Inspect gaskets for cracks, tears, or stiff spots; run a simple dollar-bill test by closing a bill in the door and pulling it out at various points. Clean seals with warm soapy water to remove oils that can compromise seal integrity. If a gasket is degraded, replacement is usually straightforward and inexpensive, and it can restore energy efficiency and consistent cooling.
Maintenance Routines to Extend Life
Regular maintenance helps avoid many common refrigerator and freezer issues. Clean condenser coils every 6-12 months (or more often in dusty environments) with a brush or vacuum from the back or underneath. Check door seals monthly and replace as needed. Replace the water filter per the manufacturer’s schedule to prevent taste and odor issues in the water dispenser. Keep the interior organized to avoid blocking air flow and to make it easier to spot leaks or frost early.
A Practical Diagnostic Checklist
Use this checklist to quickly assess issues: 1) Confirm the unit is plugged in and receiving power. 2) Check door seals for airtight closure. 3) Measure interior temperatures with a thermometer. 4) Inspect condenser coils and clean if dirty. 5) Listen for the evaporator fan and compressor operation. 6) Inspect the defrost drain for blockages. 7) Check the ice maker and water line for leaks. 8) If issues persist, consult the manual or schedule a professional inspection.
When to Repair vs Replace: Planning Ahead
Repairing a refrigerator or freezer is usually cost-effective when the unit is relatively new or has a straightforward fault. If the compressor fails, refrigerant leaks exist, or the unit is older than 10-12 years with frequent problems, replacement may be a wiser choice. Consider energy efficiency, warranty status, and the cost of parts and labor. Planning ahead can save money and reduce downtime, especially if you rely on your fridge for perishable foods.
Authority and Practical Resources
For authoritative guidance on refrigeration systems and safety standards, consult reputable sources and maintenance manuals. How To Refrigerator recommends cross-referencing with official energy and safety guidelines to ensure DIY steps align with best practices. (Source: How To Refrigerator Analysis, 2026)
Tools & Materials
- Screwdriver set (Phillips and flathead)(Assorted sizes, including #2 Phillips for appliance panels)
- Digital multimeter(Test outlet voltage and component continuity)
- LED headlamp or hands-free flashlight(Keep hands free while inspecting coils and wiring)
- Microfiber cloths(Wipe condensation, dust, and oil from seals)
- Nut driver/hex key set(For ice maker housing and panel screws)
- Gloves (work gloves)(Protect hands when handling sharp edges)
- Bucket or absorbent towels(Catch water during defrost or leaks)
- Digital thermometer(Verify fridge/freezer temperatures)
- Spare door gasket(Test fit when replacing seals)
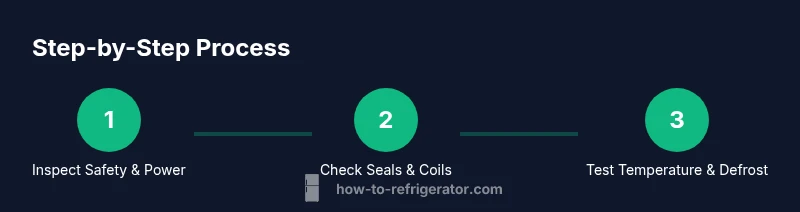
Steps
Estimated time: 90-120 minutes
- 1
Power down and prep
Unplug the appliance and move items away from the work area. Gather tools and ensure the area is dry. This reduces the risk of shock and keeps the work space organized for safe diagnostics.
Tip: Take photos of panel layouts before removing screws to simplify reassembly. - 2
Locate model and manual
Find the model number label (usually inside the cabinet on the wall behind shelves or on the door frame). Use the manual or manufacturer website to confirm the correct parts and safety cautions before disassembly.
Tip: Having exact part numbers avoids buying the wrong replacement components. - 3
Check door seals
Inspect gaskets for cracks, stiffness, or gaps. Do the dollar-bill test by closing a dollar in the door and gently pulling; if it slides out easily, the seal may be worn.
Tip: Clean seals with warm soapy water to remove oils that hinder sealing. - 4
Inspect condenser coils
Locate coils (usually at the back or bottom). If dusty or oily, unplug the unit and gently vacuum or brush to restore heat dissipation and efficiency.
Tip: Keep the unit unplugged during cleaning to prevent shock. - 5
Test temperature controls
Use a thermometer to verify actual temperatures; compare with the display. If readings drift, recalibrate or inspect the thermostat and control board connections.
Tip: Allow 24 hours after adjustments to see stable temperatures. - 6
Check defrost drain
If you notice frost buildup or moisture, locate and flush the defrost drain with hot water. A clogged drain causes drainage issues and water pooling.
Tip: Avoid using sharp tools that could puncture pipes; use a plastic straw or flexible wire to guide the flow. - 7
Test evaporator fan and airflow
Listen for a steady fan sound when the door switches are active. If airflow is poor, inspect fan blades for obstruction or motor issues.
Tip: If the fan doesn’t run, do not run the unit with a suspected motor fault; consult a pro. - 8
Reassemble and test
Reconnect any panels, restore power, and load food after a safe test period. Monitor temperatures for 24-48 hours to confirm stability.
Tip: Keep a log of readings to track improvements and detect recurring issues.
FAQ
What should I do first if my fridge isn’t cooling?
Start with safety: unplug if you need to inspect internal components and check the door seals. Verify power at the outlet and the thermostat setting. If the compressor runs but temperatures stay high, inspect coils and defrost components before deciding on professional help.
First, ensure safety, check the door seals and power, then inspect coils and the defrost system if cooling remains an issue.
Why is there frost buildup in my freezer?
Frost typically indicates a defrost issue, a blocked drain, or a door seal leak allowing humid air in. Inspect the defrost heater and timer, clear the drain, and ensure the door gasket seals tightly when closed.
Frost usually points to a defrost or seal problem; check the drain and heater, then test the gasket seal.
My ice maker isn’t producing ice. What should I check?
Check the water supply line for kinks, ensure the ice maker is turned on, and confirm the freezer temperature is low enough for ice production. If the line feeds are clear but ice still won’t form, there may be a faulty ice maker module.
Make sure the water line isn’t blocked or kinked and the freezer is cold enough; if not, the ice maker module might be at fault.
Why does my fridge make a loud buzzing or humming noise?
Loud noises often come from a failing compressor, a loose fan blade, or vibrations from coils. Verify that the unit is level, check the fan for obstructions, and listen for changes when doors are opened and closed.
Buzzing usually means a loose part or a faulty fan or compressor; check level, inspect the fan, and monitor changes when doors move.
How often should I clean the condenser coils?
Clean coils at least once or twice a year in typical homes, more often in dusty environments. Dirty coils reduce cooling efficiency and shorten appliance life.
Clean the condenser coils a couple of times a year, especially if you have dusty surroundings.
When should I consider replacing my refrigerator instead of repairing it?
If the unit is older than 10-12 years, has frequent, costly failures, or the repair price approaches the cost of replacement including energy savings, replacement is often the smarter choice.
If it’s old and costly to repair, replacement may be the better option.
Watch Video
Top Takeaways
- Diagnose methodically, not by symptom alone.
- Safety first before any disassembly.
- Use proper tools and document readings.
- Regular coil cleaning improves efficiency.
- Know when to repair vs replace.