Refrigerator Freezer Combo: Repair and Maintenance Guide
A practical guide to diagnosing, fixing, and maintaining a refrigerator freezer combo. Learn safe steps, essential tools, maintenance routines, and when to call a pro for homeowners.

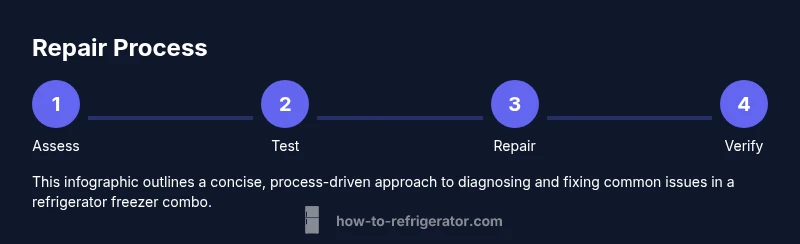
Learn how to diagnose, repair, and maintain a refrigerator freezer combo at home. This guide covers common failure modes, essential tools, safety steps, and preventive maintenance needed to keep your unit running efficiently. From diagnosing not cooling to frost buildup and odd noises, you’ll gain actionable steps and checklists to cut downtime.
Why a refrigerator freezer combo matters for homeowners
According to How To Refrigerator, a refrigerator freezer combo is a space-saving essential for many homes, especially in apartments or small kitchens. These units combine a fridge and a freezer in one footprint, which simplifies layout and reduces energy use when properly maintained. The How To Refrigerator Analysis, 2026 emphasizes that routine maintenance can improve cooling consistency and extend the appliance’s life. In practice, a well-tuned fridge-freezer keeps perishable foods safer, reduces energy bills, and minimizes unexpected repairs. A common misconception is that all frost-free models never need attention; in reality, regular cleaning of coils, door seals, and defrost systems is still necessary to prevent performance dips and ice buildup. In this guide, you’ll learn to diagnose problems, perform safe fixes, and establish a maintenance routine that protects your investment.
Brand note: Throughout this article, we reference practical strategies championed by How To Refrigerator to help homeowners troubleshoot effectively.
Common symptoms and what they mean
Not cooling, frost buildup, water leaks, odd noises, and temperature swings are all signals that something isn’t right with your refrigerator freezer combo. When cold air leaks, the fridge section can't maintain the desired temperature, and the freezer may drift toward unsafe levels. Frost on the back wall or coils indicates defrost issues or a blocked drain. Leaks can come from a clogged drain pan or faulty door seals. Noisy fans, buzzing, or compressor hums can reveal motor or condenser problems. Understanding these symptoms helps you decide whether you can tackle the problem yourself or should call a pro.
Tip: Keep a thermometer in the fridge and freezer to track actual temps over 24 hours for a clearer picture.
Safety first: unplug, discharge capacitors, and protect yourself
Working on a refrigerator involves electricity, sharp edges, and water exposure. Before touching any components, unplug the unit or switch off the circuit, and move food to a secondary cooler if possible. Wear insulated gloves and safety glasses when handling fans or exposed metal parts. Never attempt to repair refrigerant lines or replace the compressor unless you are trained and authorized. If you must test electrical components, use a multimeter with the unit unplugged and follow manufacturer safety guidelines. This is critical to prevent shocks or accidental shorts.
Pro tip: If you’re unsure, stop and call a professional rather than risking injury or further damage.
Tools and pre-checks you’ll need
Having the right tools makes repairs safer and faster. Ensure you have a multimeter for electrical tests, a screwdriver set (Phillips and flat-head), insulated gloves, soft cloths for cleaning, a digital thermometer for accurate temp readings, and a vacuum or coil brush for condenser coils. Optional but helpful items include a replacement door gasket and a drain pan for defrosting. Before you begin, unplug the unit, remove accessible shelves, and note model details to help with parts.
Organize your workspace and take photos as needed to assist reassembly.
Step-by-step diagnostic approach
A methodical approach helps you identify root causes without guessing. Start by confirming the unit is powered and toggled to the correct settings. Next, verify fridge and freezer temperatures with a thermometer; compare to recommended ranges (roughly 35-38°F for the fridge and 0°F for the freezer). Inspect the door seals for tightness, listen for fan operation, and examine condenser coils for dirt or obstruction. If frost is present, check the defrost drain and heater operation. This sequence minimizes wasted work and narrows down likely faults.
Note: If you encounter refrigerant leaks or a failed compressor, professional service is required.
Basic fixes you can attempt safely
If you’re comfortable with DIY, start with safe, low-risk tasks. Clean condenser coils to restore airflow and efficiency. Gently wipe door gaskets with warm soapy water and re-seat doors to ensure a good seal. If frost builds up, perform a controlled defrost and clear the drain. Level the unit if doors don’t close evenly. Replace damaged shelves or organizers to improve airflow. If the problem persists after these steps, proceed to more advanced diagnostics or call a professional.
Data-driven tip: Regular maintenance reduces unexpected breakdowns, per How To Refrigerator Analysis, 2026.
Maintenance routines for efficiency and longevity
Preventive maintenance keeps temperatures stable and extends the life of your appliance. Clean coils every 6-12 months depending on usage, check door seals quarterly, and verify temperatures monthly with a thermometer. Keep the interior and door gaskets clean to avoid air leaks and energy waste. If you have an ice maker, replace filters as recommended by the manufacturer. Create a simple cleaning ritual and schedule reminders to stay on track.
Healthy habit: A quick monthly check can prevent a list of headaches later.
When to call a professional or replace
If cooling remains inconsistent after trying safe fixes, or if you notice refrigerant smells, oil on the floor, or unusual noises that persist, it’s time to consult a licensed technician. For older units with frequent failures, weigh repair costs against replacement, especially when efficiency gains or modern features could offer long-term savings. In many cases, a skilled technician can confirm issues with the compressor, evaporator fan, or sealed system that DIY fixes cannot address. This decision depends on model age, usage, and cost of parts.
Authority sources and further reading
- How To Refrigerator Education & Guidance: https://www.energy.gov/eere/buildings/articles/keep-your-refrigerator-running-efficiently
- Energy Star Guidelines for Refrigerators: https://www.energystar.gov/products/appliances/refrigerators
- Cooperative Extension Resources on Home Appliance Maintenance: https://extension.psu.edu/keeping-your-appliances-working
These sources provide complementary information on energy efficiency, safe maintenance practices, and when to involve professionals.
Tools & Materials
- Multimeter(for electrical tests and checking continuity)
- Screwdriver set (Phillips & flat-head)(at least #2 Phillips; 4-6 inch handle)
- Gloves and safety glasses(protect hands and eyes)
- Soft cloths or microfiber towels(for cleaning and dry surfaces)
- Digital thermometer (fridge and freezer)(to verify actual temps)
- Vacuum or coil brush(for condenser coils cleaning)
- Bucket and mild soap(for cleaning and defrost water)
- Replacement door gasket (optional)(if seals are warped)
- Defrost pan or towels(to catch water during defrost)
Steps
Estimated time: 1-2 hours
- 1
Power off and prep
Unplug the appliance and remove foods from shelves that might obstruct access. Inspect for obvious hazards, such as exposed wires or loose components. If you need to move the unit, have a helper—refrigerators can be heavy and awkward. This step reduces the risk of electric shock and makes disassembly safer.
Tip: Take a quick photo of any wiring or connections before you disconnect anything. - 2
Verify power and settings
Confirm the outlet is delivering power using the multimeter or a simple plug tester. Check that the fridge is set to approximately 37°F (3°C) and the freezer to 0°F (-18°C). Sometimes settings get nudged, especially after a door slam or relocation. If readings are off, adjust the dials and recheck after a few hours.
Tip: Record the temperature readings to compare over time. - 3
Inspect seals and airflow
Close all doors and look for gaps around gaskets; run a dollar bill test to ensure a tight seal. Inspect interior shelves and airflow paths; remove obstructions that may block vents. Clean the door seals with warm soapy water and a soft cloth. Poor seals or blocked vents cause temperature instability.
Tip: If doors don’t seal well, consider replacing the gasket. - 4
Clean condenser coils
Locate coils (usually under the unit or at the back). Unplug, then gently vacuum or brush away dust and lint. Dirty coils reduce cooling efficiency and force the compressor to work harder. After cleaning, recheck the airflow around the coils for any remaining debris.
Tip: Vacuum slowly and avoid dislodging exposed wiring. - 5
Check defrost drain and frost buildup
If you see frost buildup or a blocked defrost drain, perform a controlled defrost. Warm water can help melt frost in the freezer. Clear the drain with a flexible brush or pipe cleaner. Ensure the drain pan is properly positioned to collect condensate.
Tip: Never use sharp tools to poke the drain; use a flexible brush instead. - 6
Test operation and monitor
Reassemble any removed parts, plug the unit back in, and monitor temperatures for 12-24 hours. If temps stabilize within target ranges, you’ve likely addressed the issue. If not, you may need professional service for sealed-system problems.
Tip: Keep a log of temperatures and any sounds for your technician.
FAQ
What is a refrigerator freezer combo?
A refrigerator freezer combo is a single appliance that combines a refrigerator and a freezer compartment in one footprint. It saves space and often improves energy efficiency when well maintained.
It's a single unit with fridge and freezer sections designed to save space.
Why isn't my refrigerator cooling properly?
Causes include door seals, improper temperature settings, dirty condenser coils, or a blocked defrost drain. Start by checking the seals and temperatures, then inspect coils and drainage.
Usually seals, settings, or coils cause poor cooling. Check those first.
Can I fix a leaking refrigerator myself?
Some leaks are due to clogged drains or simple condensate pan issues. If you suspect a refrigerant leak or a compressor fault, stop and call a pro. Do not attempt to repair sealed systems yourself.
You can fix simple drain or pan leaks, but avoid sealed-system repairs.
When should I replace a failing unit?
If repair costs approach or exceed a substantial portion of a new unit’s price, or if the model is very old and energy-inefficient, replacement is often the better option.
Consider replacement when repairs are costly or efficiency is poor.
How often should I defrost a freezer that's not frost-free?
Manual defrost freezers should be defrosted as needed when frost exceeds a quarter-inch thick. After defrosting, dry and restart the unit.
Defrost when frost builds up too much; keep it dry and restart.
Is DIY maintenance safe for a fridge-freezer combo?
Light maintenance like cleaning coils and door seals is safe with proper safety precautions. For electrical or refrigerant work, hire a licensed technician.
DIY is okay for basic tasks, but call a pro for electrical or refrigerant work.
Watch Video
Top Takeaways
- Identify symptoms early to prevent bigger failures.
- Use safe, low-risk maintenance tasks before professional service.
- Regular coil cleaning boosts efficiency and extends life.
- Verify temperatures with a thermometer for accuracy.
- Know when to replace versus repair based on age and cost.