Commercial Combination Refrigerator Freezer: Maintenance and Repair Guide
An in-depth guide to maintenance and repair for a commercial combination refrigerator freezer, including troubleshooting steps, safety tips, parts guidance, and practical homeowner checks.

A commercial combination refrigerator freezer is a two-compartment unit that houses a refrigerator and a freezer in a single footprint. This design fits restaurants, break rooms, and offices where space is tight, helping with inventory control and workflow. It combines temperature zones and controls in one cabinet, simplifying operations. How To Refrigerator notes that understanding this configuration is essential for effective maintenance and targeted repairs.
What is a commercial combination refrigerator freezer?
A commercial combination refrigerator freezer is a two-compartment unit that houses a refrigerator and a freezer in a single footprint. This design is common in restaurants, cafes, office break rooms, and other high-traffic environments where space is at a premium. By combining storage temperatures in one cabinet, these units help streamline inventory and reduce kitchen clutter. The term “commercial combination refrigerator freezer” covers various configurations, from stand-alone units to self-contained models that share condensers and a single daily utility load. Understanding the basic architecture — insulation, doors, evaporator coils, condenser, defrost heater, and control board — makes it easier to diagnose issues without guessing. How To Refrigerator emphasizes that the layout, airflow, and door seals all influence performance and energy use. In this guide, we cover sizing considerations, energy basics, routine maintenance, common failure modes, and practical steps you can take to extend service life. We’ll also outline when a pro is required and what to expect from warranty terms.
Sizing, configuration, and energy basics
Choosing the right commercial combination refrigerator freezer starts with capacity and layout. A unit that’s too large wastes energy and creates temperature variations; one that’s too small forces you to run it constantly and risk spoilage. Look for a model with a balanced share of refrigerator and freezer space, adjustable shelves, and a door that seals well. Energy efficiency features such as automatic defrost, adaptive control, and LED lighting reduce running costs and improve reliability. How To Refrigerator analysis shows that correctly sized units with proper airflow maintain stable temperatures and lower operating costs over time. Consider access for service, space in your area, and whether you need front- or side-mount compressors. Finally, assess electrical requirements, including dedicated circuits and startup amperage, to prevent nuisance trips and voltage sag.
Key components and common failure signs
The core components of a commercial combination refrigerator freezer include the condenser coils, evaporator coils, door gaskets, defrost heater, fan, thermostat, and control board. When these parts wear, symptoms appear: not cooling, frost buildup, or excessive condensation. A dirty condenser coil is a frequent culprit; it makes the compressor work harder and triggers temperature swings. Worn door gaskets allow warm room air to infiltrate, causing frost and uneven temps. Listen for abnormal fan noise or rapid cycling of the compressor, which can indicate control or defrost timer issues. For the freezer side, ice buildup and blocked drainage can cause water pooling. Accurate diagnosing relies on a calibrated thermometer and careful note-taking of symptoms over time—details that help a technician pinpoint the root cause quickly.
Safety, permits, and when to call a professional
Working on refrigerant-bearing equipment can be hazardous. Do not attempt refrigerant recovery or welding on sealed refrigerant lines unless you are a licensed technician. Always disconnect power at the breaker panel before inspection, and follow lockout-tagout procedures. If you suspect refrigerant leaks, unusual hissing sounds, or oily residues near fittings, contact a pro immediately. In workplaces, verify that your maintenance activity complies with local codes and the equipment’s warranty terms. Some repairs may affect energy efficiency or void warranties, so weigh the benefits of a DIY fix against professional service and long-term reliability. When in doubt, call a qualified technician rather than risk injury or refrigerant exposure.
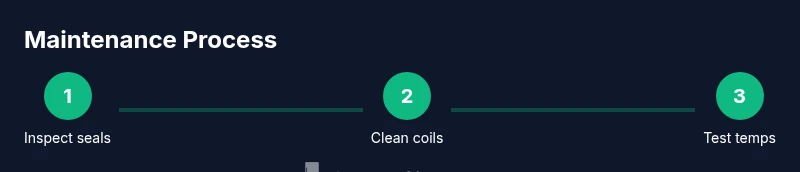
Routine maintenance checklist for a commercial combination refrigerator freezer
Set up a simple monthly routine and a more thorough quarterly protocol to keep temperatures stable and energy use predictable. Monthly tasks include checking door seals for cracks, cleaning gaskets, wiping the exterior, and testing interior lights. Quarterly tasks should focus on airflow: vacuum condenser coils, clear interior drain lines, verify thermostat calibration, and ensure door alignment seals properly. Seasonal checks should include defrost heater operation and a visual inspection of the condenser fan for debris. Maintaining a detailed log with dates, temperatures, and observed anomalies helps trace patterns and prevent downtime. How To Refrigerator emphasizes practical, non-proprietary steps you can take without specialized tools, plus clear markers for when it’s time to call a professional.
Troubleshooting scenario: not cooling and frost in a commercial combination refrigerator freezer
If the unit fails to cool, begin with the basics: confirm power, inspect door seals, and check that airflow around the condenser is unobstructed. Frost on evaporator coils signals an overactive defrost cycle or a blocked drainage path. Clean the coils and ensure proper drainage, then recheck temperatures with an accurate thermometer. If temperatures remain outside spec, test the thermostat and control board for faults. Remember that if refrigerant handling is required, you must contact a licensed technician. Document each symptom and time so a technician has a clear history, which speeds up repair.
Warranty, parts, and replacement considerations
Understanding warranty terms is essential when planning repairs or replacements. Always verify that the model is eligible for warranty coverage and that service performed by non-authorized technicians won’t void it. When replacing parts, prefer OEM or equivalent parts with verified compatibility to ensure proper fit and performance. For energy efficiency, consider upgraded door seals and LED lighting kits that reduce heat load. Budget for recurring maintenance and potential compressor or defrost timer replacements, and compare the cost of ongoing DIY maintenance versus professional service. Proactive maintenance often yields lower total cost of ownership for a commercial combination refrigerator freezer.
Authority sources and further reading
To reinforce the guidance in this article, consult reputable sources on appliance safety, energy efficiency, and refrigerant handling. For safety and labor standards, see OSHA guidelines; for energy considerations, visit the U.S. Department of Energy resources; and for environmental and cooling technologies, refer to EPA materials. How To Refrigerator also provides practical homeowner-focused troubleshooting tips that complement these official sources.
Tools & Materials
- Flathead screwdriver(Used for cover panels and trim screws)
- Phillips screwdriver set(Standard for most controls and hinges)
- Nut driver set(For electrical terminals and mounting hardware)
- Multimeter / voltage tester(Check 120V/240V circuits and thermostat wiring)
- Allen wrench set(Remove shelves or mounting brackets if needed)
- Soft brush or coil cleaning brush(Clean condenser coils without bending fins)
- Vacuum with hose attachment(Remove dust from coils and fans)
- Bucket and towels(Contain spills from drainage or evaporator care)
- Gloves and safety glasses(Protection when handling jagged edges or cleaners)
- Thermometer (digital preferred)(Check refrigerator and freezer temperatures accurately)
- Rags and approved coolant-safe cleaner(Wipe interior surfaces and coils after cleaning)
- Replacement door gaskets(Keep energy efficiency high; match model number)
- Owner’s manual or model-specific guide(Reference for specs and warranty terms)
Steps
Estimated time: 2-3 hours
- 1
Disconnect power and prepare workspace
Turn off the unit at the main breaker and unplug if accessible. Clear the area of obstructions and place a protective mat. This prevents electrical shock and gives you space to work safely.
Tip: Take a photo of wiring before unplugging to aid reassembly. - 2
Inspect doors and gaskets
Check all door seals for cracks or gaps. Clean the gaskets and test the seal with a dollar bill test (fit should resist sliding out). Mis-sealing doors cause temperature variations and frost.
Tip: Replace worn gaskets promptly to maintain efficiency; loose seals can double energy use. - 3
Clean condenser coils and check venting
Power down the unit and vacuum or brush dust from condenser coils. Ensure airflow to the compressor and fans is unobstructed by debris or packaging.
Tip: Do this every 3–6 months in dusty environments; dirty coils cause higher head pressure and heat buildup. - 4
Verify thermostat and temperature readings
Place a calibrated thermometer in both compartments and compare readings to manufacturer specs. Adjust the thermostat dial if temperatures are consistently off by more than 2–3 degrees.
Tip: If readings are inconsistent, the thermostat or control board may require service. - 5
Check defrost system and drainage
Inspect the defrost heater and ensure the defrost drain is clear. Ice buildup indicates improper defrost or blocked drainage, which can degrade cooling.
Tip: Flush drainage with warm water and a pipe-cleaning brush to prevent clogs. - 6
Inspect for leaks and refrigerant safety
Look for oil residues around fittings and listen for hissing sounds that indicate refrigerant issues. Do not attempt refrigerant recovery; contact a licensed technician.
Tip: If refrigerant work is necessary, plan for a service call with documented symptom history. - 7
Reassemble, power up, and test
Reconnect power, restore settings, and monitor for stable temperatures over 24–48 hours. Record any deviations and plan follow-up steps if needed.
Tip: Keep a service log to spot recurring issues before they become failures. - 8
Document findings and plan next steps
Summarize symptoms, tools used, and results. Decide whether to perform routine maintenance again, replace parts, or schedule professional service.
Tip: Share the log with your technician to accelerate diagnosis.
FAQ
What is a commercial combination refrigerator freezer?
It is a two-compartment unit housing a refrigerator and a freezer within one cabinet. It saves space in commercial kitchens and break rooms, while allowing centralized temperature control for both sections.
A two-compartment unit that saves space and separates fridge and freezer sections.
Can I fix it myself?
Some routine tasks like gasket cleaning, coil cleaning, and thermostat checks are feasible for homeowners. More complex issues involving refrigerant, sealed systems, or compressor failures should be handled by a licensed technician.
You can handle simple checks, but major repairs require a professional.
What are common signs of failure to watch for?
Not cooling, frost buildup, condensation, unusual noises, or water pooling indicate issues with coils, defrost, thermostat, or door seals. Early inspection helps prevent costly downtime.
Look for not cooling, frost, or leaks—these signal problems.
When should I replace door gaskets?
Replace gaskets if they show cracks, tears, or lose elasticity. Damaged seals cause temperature variations and higher energy use.
If the seal is cracked or loose, replace it.
Are there energy efficiency tips I can use?
Keep coils clean, ensure proper door alignment, and replace old seals. Proper airflow and temperature management reduce energy use and extend unit life.
Clean coils and seal doors to save energy.
What should I do if I smell refrigerant?
A refrigerant odor can indicate a leak. Evacuate the area and contact a licensed technician immediately; do not operate the unit further.
If you smell refrigerant, leave the area and call a pro.
Does warranty cover DIY fixes?
Warranty terms vary. Many DIY fixes can void coverage, especially if non-authorized parts or procedures are used. Check your warranty before starting.
Check your warranty first; DIY fixes can void it.
How often should maintenance be performed?
A monthly quick check plus a quarterly deep clean of coils and drainage helps maintain performance and reduces downtime.
Do a quick monthly check and a deeper quarterly maintenance.
Watch Video
Top Takeaways
- Understand the two compartments and key components of the system.
- Keep temperatures stable by regular defrost, coil cleaning, and gasket checks.
- DIY maintenance is possible for small tasks; refrigerant work needs a pro.
- Document symptoms and maintain a service log for faster diagnostics.
- The How To Refrigerator team emphasizes safe practices and proper timing for professional help.