How to Prevent Refrigerator Drain Line from Freezing
Learn proven steps to stop your fridge's defrost drain from freezing, with a practical inspection, cleaning, insulation, and maintenance plan you can do at home.

Learn how to prevent your refrigerator drain line from freezing with a practical, house-friendly plan. This guide covers inspection, cleaning, insulation, and safe maintenance steps you can perform without specialized tools. You’ll understand how the defrost drain works, what commonly causes ice blocks, and exactly which actions to take to keep the line clear and flowing year-round. Follow the step-by-step directions, notice warning signs, and know when to call a pro.
Understanding the drain line and freezing risk
Water from the freezer's automatic defrost cycle travels through a small drain tube to a pan underneath the refrigerator. When that drain is blocked, or when the tube runs through a particularly cold portion of the cabinet, water can freeze and block the path. A blocked drain can cause water to back up into the freezer or pool on the kitchen floor. For homeowners, learning how to prevent refrigerator drain line from freezing is a practical part of routine maintenance. In this guide, How To Refrigerator shares simple, safe methods to keep the drain clear and the path warm. You’ll gain a clear mental model of the drain system, plus practical steps you can perform without special tools.
Key takeaway: a clear drain prevents frost buildup and water damage. By addressing leaks, humidity, and insulation, you reduce the risk of a freezing drain.
Common causes and symptoms
Several factors increase the risk that a fridge drain line freezes. First, a blocked or slow drain trap allows melted ice and humidity to accumulate and refreeze as it travels toward the pan. Second, a defrost cycle that doesn't run reliably leaves more water in the line than the tube can handle. Third, long runs of the drain line through very cold spaces or along poorly insulated walls will chill incoming water and promote ice formation. Finally, door seals that are cracked or dirty allow warm, humid air to enter the freezer, increasing condensate that must pass through the drain. Symptoms include frost buildup near the defrost outlet, water on the floor in front of the fridge, or a noticeable musty or damp odor under the unit. Keeping an eye on these signs helps you catch the problem before it becomes a bigger repair.
How the defrost cycle interacts with the drain path
During the defrost cycle, heat is applied to melt frost on the evaporator coil. The meltwater is supposed to drain away through the drain hole and into the drain pan. If the drain hole is partly blocked by ice, food debris, or mineral buildup, the water cannot drain properly. As the cycle repeats, water can back up and refreeze in the tube, forming a stubborn ice plug. Understanding this interaction helps you target the right area for maintenance and prevents unnecessary disassembly. The key concept is to keep the drain clear and to ensure the defrost cycle functions reliably so it does not overwhelm the drain path.
DIY checks you can perform safely
First, inspect the freezer door seals for cracks or gaps and replace damaged gaskets. Next, locate the defrost drain line behind the back panel of the freezer and look for visible ice. If you see ice, don’t bang on it—softly thaw it with a hair dryer on a low setting, keeping the nozzle several inches away. Check that the area around the drain pan under the fridge is clean and dry. Finally, test the defrost heater by manually running the defrost cycle if your model allows; if it doesn’t, skip this step and proceed with safe maintenance. Remember: always unplug the unit when doing disassembly beyond the accessible panels.
Insulation and routing strategies to prevent freezing
Where the drain line runs matters. If the line passes through unheated or moisture-rich zones, add insulation and secure the route. Use foam pipe insulation sleeves to cover exposed drain tubing and seal joints with electrical tape or zip ties. For longer runs, you can route the tube along warmer sections of the cabinet or toward the base where ambient temperatures are more stable. In very cold environments, consider a low-power heat source such as a temperature-controlled heat tape rated for appliance use. The goal is to keep the drain line above freezing temperature during normal operation, especially in winter or in garages or basements.
Cleaning and clearing a blocked drain safely
If you suspect a clog, start by flushing the drain with warm water. Use a turkey baster or a syringe to push water through the line toward the drain pan. A flexible pipe cleaner can help dislodge small ice plugs. Dry the bucket and drain pan area thoroughly after flushing. If you can access the drain at the pan, remove visible debris from the pan to prevent future clogs. For persistent blockages, submitting a service call may be warranted—especially if you notice recurring frost or leaks.
Seasonal maintenance plan to prevent freezing
Schedule a monthly, 10–20 minute inspection during months when temperatures drop. During each check, wipe moisture from the freezer door gasket, inspect the drain line for visible ice, and ensure the drain pan is clean and dry. After each defrost cycle, verify that water drains into the pan properly by observing the drain outlet for a minute. Use insulation to protect exposed tubing, and consider replacing old foam insulation if it has become brittle. Consistency here saves you time and reduces the chance of a major overflow.
When to call a professional
Some symptoms require professional diagnosis: constant water leakage that doesn’t stop after clearing the line, frequent frost in the freezer, or an ice plug that returns within days. A service technician can verify that the defrost heater and timer are functioning, inspect the drain channel for cracks, and replace damaged drainage components. If you’re unsure about the correct wiring or feel uncomfortable working around electrical components, contact a licensed technician. How To Refrigerator recommends routine professional maintenance if you have persistent or unusual symptoms.
Quick-start checklist you can print
Use this concise guide to prevent a freezing drain line in the coming weeks. Start by inspecting the door seals; ensure there are no gaps, then locate the defrost drain line behind the freezer wall and look for visible ice. Flush the drain with warm water and push debris out with a flexible cleaner. Insulate exposed tubing and secure with tape or zip ties. After a defrost cycle, observe the drain outlet for a minute to confirm water is draining into the pan. Keep the drain pan clean and dry, and schedule a quick monthly check during winter to catch frost early. Print this list and keep it with your appliance manual.
Tools & Materials
- Flashlight(To inspect dark corners and the drain line path)
- Flexible pipe cleaner or chenille wand(For dislodging small ice and debris)
- Turkey baster or syringe(To flush warm water through the drain)
- Warm water (not boiling)(Around 110–120°F; test with wrist temperature)
- Clean rags or towels(To dry surfaces and soak up spills)
- Drain pan or tray(To catch water during flushing)
- Foam pipe insulation sleeves(Cover exposed drain tubing)
- Electrical tape or zip ties(Secure insulation and routing)
- Hair dryer on low setting(Safe thawing of ice, keep distance from tubing)
- Screwdrivers (Phillips and flathead)(To access back panel if needed)
- Heat tape (low voltage)(Only for extreme cold environments)
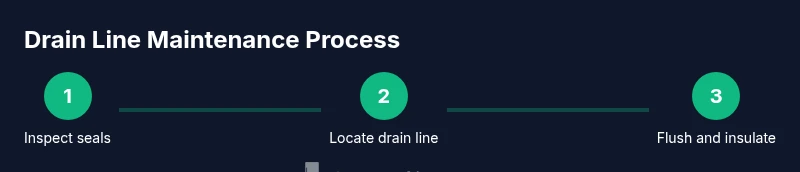
Steps
Estimated time: 30-60 minutes
- 1
Power down and locate the drain path
Unplug the refrigerator or switch off at the outlet before you begin. Open the freezer and locate the drain line behind the back panel or beneath the defrost area. Confirm you can access the drain without forcing panels. This step establishes a safe baseline so you can work confidently.
Tip: Keep a towel handy for any spills during access. - 2
Inspect the drain opening and remove visible ice
Use a flashlight to inspect the drain hole for ice or debris. If you see ice, thaw it gently with a hair dryer on a low setting, moving the dryer slowly and keeping it several inches away from the tube. Do not strike the ice; gentle heat prevents damage.
Tip: Avoid using hot heat or direct contact that could melt components. - 3
Flush the drain with warm water
Fill a turkey baster with warm water and slowly flush the drain toward the pan. Repeat a few times to clear any small ice plugs. Check the pan path for water as it exits to confirm flow.
Tip: Do not use boiling water; excessive heat can warp plastic parts. - 4
Dislodge stubborn ice with a flexible cleaner
Gently insert a flexible pipe cleaner into the drain and twist to break loose any remaining ice plugs. Remove loosened debris and re-check the drain opening.
Tip: Take your time; forcing the cleaner can damage the tube. - 5
Inspect the drain pan and path
Check the drain pan for cracks and ensure the outlet isn’t blocked. Clean any lint or mineral buildup from the pan and the area around the drain outlet.
Tip: A clean pan helps prevent re-blockage from debris. - 6
Insulate and secure the drain tubing
Slip foam insulation sleeves over exposed drain tubing. Use tape or zip ties to secure joints and prevent movement that can create kinks. Routing the tube away from cold edges helps keep it warmer.
Tip: Keep insulation intact; damaged sleeves negate the effect. - 7
Consider heat tape if needed
Install low-voltage heat tape along the section of tubing that runs near extremely cold zones. Ensure the tape is rated for appliance use and follow the manufacturer’s instructions.
Tip: Only use heat tape where recommended to avoid fire risk. - 8
Test the system and monitor
Plug the unit back in and allow the defrost cycle to run. Monitor the drain line for several cycles to confirm continuous flow. If frost or leakage recurs, document the symptoms and plan a professional check.
Tip: Keep a log of any recurring signs to help a technician diagnose quickly.
FAQ
What causes a refrigerator drain line to freeze?
Ice buildup can form from a blocked drain, excessive humidity, or a malfunctioning defrost cycle. When the line can't drain properly, residual water freezes in the tube.
Ice buildup happens when the drain is blocked or the defrost cycle fails, so water can't drain and freezes in the tube.
Can I prevent the drain line from freezing without calling a pro?
Yes. Regularly inspect seals, keep lines insulated, flush the drain periodically, and avoid placing the fridge in extremely cold spots. Basic maintenance solves many issues.
Yes. Regular checks, insulation, and periodic flushing prevent most freezing problems.
Is it safe to pour warm water into the drain line?
Yes, using warm water (not boiling) is safe to flush the drain. Do not use hot or boiling liquids and unplug the unit before disassembly.
Warm water flush is safe, but avoid boiling water and unplug before you start.
How often should I check the drain line for freezing?
Check monthly during cold months, and after any defrost cycle that seems unusual. More frequent checks reduce the risk of unexpected leaks.
Check monthly in winter and after odd defrost events.
What should I do if I still see frost after maintenance?
If frost recurs, there may be a more serious issue with the defrost heater or timer. Schedule a professional inspection to diagnose the control components.
If frost returns, a professional should diagnose the defrost system.
Can a poorly sealed door cause drain freezing?
Yes. Cracked or dirty door seals let in humid air, increasing condensate that the drain must carry away.
A bad door seal brings in moisture and increases drain load.
Watch Video
Top Takeaways
- Inspect seals and drain path monthly during cold seasons.
- Keep drain tube insulated and routed away from cold zones.
- Flush and clear debris regularly to prevent ice blocks.
- Use heat tape only if necessary and rated for appliances.
- When in doubt, call a professional to inspect defrost components.