How to Stop Refrigerator from Defrosting: A Homeowner's Guide
A homeowner-friendly guide to stop refrigerator from defrosting by diagnosing temperatures, seals, drains, and coils. Follow a step-by-step process for lasting fixes and safer frost-free operation.

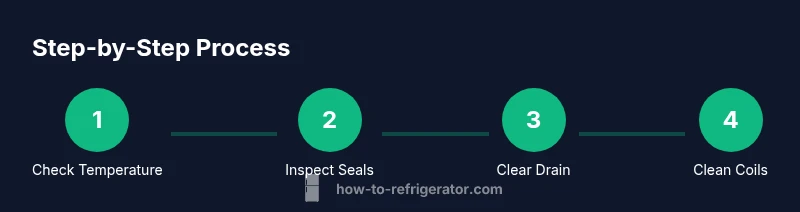
To stop refrigerator defrosting issues, start by confirming correct temperatures, inspecting door seals, and clearing the defrost drain. Check the condenser coils for cleanliness, and test the defrost timer or heater if your model uses automatic defrost. Follow the steps below for a lasting fix.
Why Defrosting Happens and Why It Matters
According to How To Refrigerator, frost buildup occurs when moisture condenses on cold surfaces and freezes, or when airflow is restricted and the defrost system falters. Frost is not just unsightly—it reduces usable storage space, disrupts air circulation, and forces the compressor to run longer, wasting energy and shortening component life. The goal of this guide is to help homeowners identify whether frost is a normal part of operation or a fault that needs repair. The phrase 'how to stop refrigerator from defrosting' is often searched when frost blankets shelves, causes uneven cooling, or freezes food. Most frost-related issues stem from airflow problems, temperature settings that are too low or too high, or a malfunctioning defrost component. This block explains the most common causes and outlines a practical approach to diagnose and fix them without prematurely replacing parts. Remember to work safely: unplug when accessing electrical components, and avoid spilling water on exposed wiring.
Check Temperature Settings and Airflow
Start by confirming recommended temperature settings and ensuring cold air can circulate freely. The ideal fresh-food compartment temperature is about 37–38°F (3–4°C) and the freezer at 0°F (-18°C). If readings drift, adjust gradually and recheck after 12–24 hours. Also inspect interior vents and shelves to ensure nothing blocks the flow of air from the evaporator to the doors. When airflow is restricted, frost can accumulate in spots while other areas remain warm. After repositioning items, give the unit time to stabilize before rechecking temperatures. This section helps answer the common question of how to stop refrigerator from defrosting by addressing airflow limitations that contribute to frost.
Inspect and Seal Doors to Prevent Moisture Ingress
A leaky door seal lets warm, humid air into the fridge, forming frost as this air meets the cold evaporator. Begin with a simple test: close the door on a thin dollar bill or piece of paper; if you can pull it out easily without the door fully sealing, the gasket needs attention. Clean the gasket with mild soap and water, then inspect for cracks, tears, or gaps. If the seal is damaged, replace it following the manufacturer’s instructions. Keep doors closed as much as possible when loading and avoid placing hot items near the door, which can drive humidity into the cabinet and promote frost growth. Regularly checking seals is a reliable way to prevent frost from reappearing and to support a longer defrost cycle life.
Defrost Drain and Drainage Pathway: Clear and Maintain
Clogs in the defrost drain are a leading cause of frost buildup and water pooling. Locate the drain line, usually behind a back panel or under the freezer, and check for ice blocks or debris. Clear the channel with a thin pipe cleaner or flexible brush, then flush with hot water to remove lingering gunk. If you notice water pooling inside the fridge, the drain may be blocked or misaligned. Periodic maintenance helps keep the path open and prevents frost from accumulating around shelves and crisper drawers. Keeping the drain clear is a practical, low-cost fix that directly reduces frost formation.
Cleaning and Maintaining Coils and Fans for Proper Air Circulation
Dust and lint on condenser coils reduce cooling efficiency and can contribute to frost formation by stressing the cooling system. Locate the coils (often on the back or beneath the unit) and carefully vacuum or brush away buildup. Do not spray water directly onto the coils; use a low-pressure approach or a damp cloth. Ensure the evaporator fan is operating when the door is closed and the compressor runs. If you hear unusual noise or suspect a blocked fan, stop use and inspect for obstructions. Regular coil maintenance improves airflow, reduces frost risk, and lowers energy use.
When Defrost System Fails: Timers, Heaters, and Professional Help
Automatic defrost systems rely on a timer and a defrost heater. If frost persists despite clean drains, seals, and coils, the defrost timer or heater may be faulty. Testing requires locating the timer and heater, then using a multimeter to check continuity. A defective defrost component can lead to continuous frost buildup or water leaks. If you’re uncomfortable with electrical testing or the part needs replacement, seek a qualified appliance technician. This section explains how to approach a professional evaluation and what information to gather to expedite service.
Tools & Materials
- Screwdriver set (Phillips and flathead)(Includes both Phillips and flathead bits)
- Multimeter(For testing defrost heater and thermostat)
- Fridge/freezer thermometer(Place at different shelves to gauge temperature)
- Towels or absorbent cloths(Contain condensation and spills)
- Bucket or shallow pan(Catch water during defrost drain check)
- Gloves(Protect hands while working)
- Pipe cleaner (optional)(Clear defrost drain channel)
Steps
Estimated time: 1-2 hours
- 1
Verify temperature settings
Open the fridge and locate the temperature control. Confirm the fresh-food compartment is set to about 37–38°F (3–4°C) and the freezer at 0°F (-18°C). If readings drift, adjust gradually and recheck after 12–24 hours. Use a separate thermometer to verify actual temperatures, not just dial settings.
Tip: Use a thermometer to confirm actual temperatures. - 2
Inspect door seals
Check that doors seal completely by closing on a folded dollar bill; if you can pull the bill out easily with resistance, the seal is weak. Clean the gasket and replace it if there are cracks or tears. Ensure doors latch securely after closing.
Tip: Replace faulty seals promptly to prevent warm air intrusion. - 3
Clear the defrost drain
Locate the defrost drain behind the bottom front grille or inside the freezer. Clear any frost or debris with a pipe cleaner, then flush with hot water to ensure a free path. Recheck the drain after running a short cycle to confirm water exits properly.
Tip: If water pools in the crisper area, the drain path is blocked and must be cleared. - 4
Clean condenser coils
Unplug the unit and locate condenser coils (usually at the back or beneath). Vacuum or brush away dust and lint to improve airflow; clogged coils force the compressor to work harder and can contribute to frost issues. Be careful around the fan and wiring.
Tip: Do not use water directly on exposed coils; static discharge risk. - 5
Test the defrost system
If you have an automatic defrost model, test the defrost timer and heater with a multimeter according to your manual. A stuck timer or a burned-out heater can cause frost buildup. If readings indicate a fault, replace the defective component following manufacturer guidelines.
Tip: Only perform electrical tests if you’re comfortable; replacing a timer or heater may be needed. - 6
Check evaporator fan and air paths
Ensure the evaporator fan runs smoothly and that vents are not blocked by food or shelves. Ice buildup on the evaporator can impede airflow and cause uneven cooling. Listen for the fan and look for frost on the evaporator coil.
Tip: If you hear the fan but don’t feel airflow, inspect for ice blockage behind the panel.
FAQ
What causes frost buildup in an automatic-defrost refrigerator?
Frost buildup in automatic-defrost fridges is usually due to a blocked defrost drain, faulty defrost heater, or poor airflow from blocked vents or dirty coils.
Frost usually comes from a blocked drain, a heater issue, or airflow problems.
Can I manually defrost my fridge to fix frost?
Manual defrost is a temporary fix. If frost recurs, the defrost system or seals may be faulty and require inspection.
Manual defrost can help, but if frost returns, the underlying system needs checking.
How do I know if the defrost timer or heater is bad?
Use a multimeter to test continuity of the defrost heater and timer. If no continuity or suspicious readings, replace the component.
Test with a multimeter; replace the faulty defrost timer or heater.
Should door seals be replaced if frost forms quickly?
Yes, worn seals let warm air in, causing frost. Replace seals and re-check door closure.
Worn door seals let warm air in; replace if needed.
How long does it take for a fridge to re-stabilize after a fix?
Expect 12-24 hours for temperatures to stabilize after major adjustments or fixes.
Temperatures usually re-stabilize within a day after fixes.
When should I call a professional?
If frost persists after checking all common causes, or if you’re uncomfortable with electrical testing, contact a qualified appliance technician.
If frost persists, or if you’re unsure, get a pro.
Can a defrost drain clog cause water pooling inside the fridge?
Yes. A blocked defrost drain can lead to water pooling on the bottom shelf or crisper bins.
A clogged drain can cause water pooling.
Is it normal for frost to occur in the freezer but not the fridge?
Some frost in the freezer is normal, but persistent frost in either compartment indicates an underlying issue.
A little frost is normal, persistent frost isn't.
Watch Video
Top Takeaways
- Set refrigerator to 37–38°F and freezer to 0°F.
- Regularly check and replace worn door seals.
- Keep defrost drains clear to prevent ice backup.
- Clean condenser coils to improve airflow and efficiency.
- If frost persists, consult a professional.