Stop Refrigerator Ice: A Homeowner’s Guide
Learn homeowner-friendly steps to stop your fridge from making ice. From defrost drains to door seals, discover safe, practical fixes and maintenance tips to curb ice buildup.

To stop your refrigerator from making ice, identify the source (ice maker, defrost drain, door seals) and follow a safe, step-by-step plan to disable or fix the issue. This homeowner-friendly guide provides checks, practical fixes, and maintenance tips.
Why ice formation happens in refrigerators
Ice in unexpected places is usually a symptom, not a single problem. In many homes, frost forms because warm room air sneaks into cold zones during frequent door openings, while a malfunctioning defrost drain allows moisture to pool and refreeze. The result is frost buildup that migrates into the freezer and, if the ice maker is on, into the ice bin. According to How To Refrigerator, ice buildup is most often connected to door usage patterns and temperature settings. Understanding your fridge’s cycle helps you pinpoint where the ice is coming from and how to stop it at the source.
Ice formation can also stem from a stuck ice-maker arm or an actively running ice-maker that mis-sequences with defrost cycles. When ice forms inside the ice-maker chute or around the freezer walls, it can jam the mechanism, cause dispense issues, or trigger frost that constrains airflow. By zoning into the likely culprits—ice maker status, defrost performance, and seals—you can address the root causes and reduce future ice production.
This section lays the groundwork for safe, homeowner-friendly diagnostics. You’ll learn to observe patterns (when ice appears, how often the door is opened, and the temperature readings) and to distinguish between a temporary icy patch and a persistent problem that requires deeper intervention. The goal is to empower you to stop ice from forming without unnecessary disassembly.
** homeowner tip:** Track how long you leave doors open and whether ice consistently appears after certain events (grocery trips, parties, or late-night fridge use). Small habit changes can dramatically cut frost formation and improve efficiency.
Common causes of ice buildup and wasted energy
Ice buildup can be caused by several overlapping issues, and many households experience more than one at once. A common scenario is an overworked defrost drain that backs up when the fridge is overfilled or when frost blocks the drain path. Another frequent culprit is a cold or misaligned door seal that allows humid room air to creep in, leading to extra frost and unwanted ice production. Temperature control problems—either a freezer that’s too cold or a thermostat that doesn’t respond well—also contribute to excessive frost. Finally, a malfunctioning ice maker can continue to produce ice even when the rest of the system isn’t designed to accept it, which paradoxically creates more frost by forcing moisture into the wrong paths.
When diagnosing, you should consider the sequence: ice maker status, defrost cycle function, air leaks, and temperature settings. If you notice a persistent layer of frost on walls or coils, you may be dealing with a defrost or airflow issue rather than a simple ice-maker setting. By systematically ruling out these causes, you’ll move toward a reliable fix rather than a temporary workaround.
Living with constant ice can waste energy and shorten your fridge’s life. It also makes normal maintenance, like cleaning and defrosting, more difficult. The fix is rarely a single part replacement; it’s often a series of small, correct steps that restore balance to the cooling loop. Keep notes of what you observe so you can track improvements after each adjustment.
How the ice-maker system functions and how this guide helps
The ice-maker system in most households consists of a water supply, an ice mold, and a control mechanism that cycles through filling, freezing, and ejection. When the system is working correctly, ice forms in the mold at a steady rate and drops into the bin without blocking airflow. Malfunctions can occur at any point: the water valve may leak or fail to fill, the mold may overfill, or the ejector arm may jam. Frost can also form around the mold if warm air leaks into the freezer or if the defrost system isn’t clearing moisture properly.
This guide walks you through a practical, safe checklist to isolate the issue. You’ll learn to: confirm whether the ice maker is actively producing ice, check the defrost drain for clogs, inspect door seals for leaks, assess the freezer temperature, and perform controlled cleaning. If a replacement part is necessary, the guide helps you determine whether a DIY fix is feasible or if professional service is warranted.
By following the steps, you’ll gain a clearer picture of how the ice-maker subsystem interacts with the freezer’s overall cooling cycle. This understanding makes it easier to select the right remedy and maintain optimal ice production without overdoing it. The goal is to restore normal ice production without creating frost elsewhere in the unit.
Quick diagnostic checklist you can perform safely
Before touching any components, unplug the refrigerator to avoid shocks or damage. Start with non-invasive checks: observe whether ice continues to form when the ice maker is off, check the freezer temperature with a reliable thermometer, and inspect the door seals for visible gaps. Look for frost buildup near the defrost drain and any moisture along the back wall where humidity collects. If you’re able, gently feel the door seals for stiffness or cracks.
If you suspect the ice maker is the problem, locate the ice-maker switch or the control panel. Turn the ice maker off and remove the ice bucket to observe whether ice production stops. A jammed ejector or a partially frozen line can cause continuous ice formation or mis-sequencing. A failed water valve can leak, creating frost along the water line and inside the freezer. Record your observations to guide subsequent steps and determine whether you should proceed with deeper checks or call a professional.
This stage is designed to empower you with actionable observations without assuming advanced tools. By documenting when and where frost appears, you establish a baseline that helps you evaluate the effectiveness of each fix as you proceed. Remember, safety first: always unplug the unit before handling any internal components.
Inspecting the defrost drain and frost-free drain path
A clogged defrost drain is a frequent source of frost and ice buildup. Inspect the path from the evaporator coil to the drain opening. If you see frost at the drain or a visible buildup of ice just inside the freezer, there’s a good chance the drain is blocked. Use warm water and a flexible pipe cleaner or a thin, non-metallic rod to carefully clear any obstruction. Avoid forcing anything through the drain; if you meet resistance, stop and try again later or opt for a professional service.
After clearing the drain, flush the line with warm water to ensure the path remains open. You may also notice a defrost heater running as part of the cycle; if it fails, moisture can refreeze along the coils and contribute to ongoing ice issues. If clearing the drain doesn’t resolve the problem, you may need to replace a faulty defrost thermostat or heater element. In all cases, recheck the drain after the system cycles to confirm the path remains clear.
Keeping the defrost drain clear is one of the most effective preventive measures against ice buildup. Regular checks prevent a slippery trap of recurring frost and help you maintain dependable ice production. For best results, integrate this check into your monthly fridge routine.
Checking door seals, gaskets, and door alignment
Door seals are the first line of defense against warm room air entering the freezer. Inspect seals for cracks, tears, or compressed areas that let humidity in. A simple test is to close a piece of paper in the door; if you can pull it out with little resistance, the seal may be compromised. If you find gaps, clean the gasket surfaces with mild soap and water and consider replacing the gasket if wear is evident.
Door alignment matters too. A misaligned door can leave a micro-gap that fuels frost formation around the seal. Check that doors close fully and sit evenly against the gasket. If you notice any sagging, adjust the hinge, replace worn magnetic strips, or reseat the door for a tighter seal.
A well-sealed door reduces humidity inflow and improves overall efficiency. It also reduces the likelihood that warm air leaks into the freezer, which is a leading cause of frost and ice buildup in many homes. Regular gasket maintenance should be part of your refrigerator care routine to keep ice at bay.
Temperature control: setting ranges and frost considerations
Many fridges are shipped with freezer temperatures set too low for some households. Ideal freezer temperatures are typically around 0°F (-18°C). If your freezer is consistently colder, it may contribute to frost formation that migrates into the Ice Maker and beyond. Use a thermometer to verify temperatures rather than relying on the built-in display alone; displays can drift over time.
If you observe frequent frost and you’ve confirmed the temperature is in a safe range, your issue may be air leaks or a misfiring defrost cycle. Slow and gradual temperature adjustments are best. After making adjustments, monitor ice production and frost levels for several days to ensure changes have the intended effect. Small changes can yield meaningful improvements without compromising food safety.
Correct temperature management reduces eviction of moisture and helps maintain consistent ice production without excessive frost. Regular checks support reliable performance and energy efficiency for the fridge over time.
Ice dispenser and water line considerations
If your ice dispenser is connected, inspect the water line for leaks or kinks. A tiny leak can cause frost to form along the line, particularly around the back of the freezer where moisture accumulates. Ensure the line is properly routed and not kinked, and inspect the supply valve for drips whenever the ice maker is active. A leaking valve can also lead to water pooling and refreezing, which contributes to ice buildup in the ice mold.
When testing, run the ice maker and watch the line for moisture or droplets. If you see constant droplets or frost along the line, the valve may be failing, even if it seems to close correctly. Debris in the valve could also prevent it from closing fully. Replacing a faulty valve often resolves recurring ice formation issues related to the ice maker assembly.
If your unit lacks an independent ice-maker shutoff, consider disabling the ice-maker feature via the control panel during maintenance to isolate the problem without removing components. This allows you to continue using the freezer without producing new ice while you perform further checks.
When ice keeps forming: frost buildup vs malfunction
Persistent ice requires a more detailed assessment to separate frost from a true malfunction. Frost that forms rapidly on evaporator coils indicates airflow or defrost issues, while frost within the ice mold points to ice-maker or valve problems. If frost persists after clearing the drain and sealing doors, a failed defrost thermostat or a stuck relay could be the culprit. If the ice maker continues to produce ice despite being turned off, the control module or wiring could be faulty and may require a professional diagnosis.
Document the symptoms: time of day, duration of ice production, and whether ice is found in the bin or around the ice mold. This information helps you or a technician isolate the root cause and determine the most effective repair strategy. While many issues are fixable with basic tools and careful testing, some problems require specialized equipment and expertise to prevent further damage.
In most standard cases, you can prevent ice issues by maintaining a clean defrost path, validating door integrity, and ensuring temperatures stay within manufacturer-recommended ranges. Regular checks can avert persistent ice problems and keep your fridge running efficiently.
Step-by-step maintenance plan to prevent future ice formation
Create a simple, recurring maintenance routine that focuses on key components: defrost drain, door seals, temperature accuracy, ice-maker operation, and water line safety. Start with monthly checks for frost around the evaporator and back wall, then verify door seals once a quarter. Clean the interior with mild soap and water and routinely inspect the ice-maker arm for jam-like obstructions. If you notice any abnormal sounds or reduced ice production, revisit the defrost cycle and water supply line.
Keep a maintenance log noting your observations and any fixes you perform. Document temperatures, ice production rates, and the status of the defrost drain post-maintenance. A consistent routine helps you spot trends early and prevents small issues from becoming bigger problems. By prioritizing preventative care, you protect your investment and guarantee reliable ice production when you want it.
Safety considerations and when to call a professional
If you notice water leaks, electrical arcing sounds, or a burning odor near the unit, unplug the refrigerator immediately and call a professional. Do not attempt repairs that involve the refrigerant system, compressor wiring, or high-voltage components unless you are trained and equipped for such work. For routine tasks—like cleaning coils, clearing a drain, or replacing a door gasket—use proper safety gear and follow manufacturer instructions. If your ice-maker is under warranty, consult the manual or brand support before replacing parts to avoid voiding coverage.
When the issue persists after you’ve completed a safe diagnostic and maintenance plan, professional service is the safest path. A trained technician can diagnose wiring problems, control board faults, and refrigerant-related issues that are not easily resolved by DIY fixes. The goal is to ensure you address safety concerns first while achieving a reliable fix that restores normal ice production without compromising cooling performance.
Quick-start homeowner checklist
- Power down and unplug before starting any checks
- Confirm whether ice maker is on and test by turning it off to observe changes
- Inspect freezer temperature and door seals; fix obvious gaps
- Clear defrost drain and test after one cycle
- Check water line for kinks or leaks and inspect valve
- Reassemble safely, plug in, and monitor ice production over a few days
- Document observations to track improvements and determine if professional help is needed
Tools & Materials
- Screwdriver set (Phillips and flathead)(To remove access panels and panels around the ice maker)
- Multimeter(Inspect electrical components and continuity)
- Flashlight(Spot frost, leaks, and hidden components behind shelves)
- Soft brush or toothbrush(Clean vents and frost in hard-to-reach areas)
- Mild soap and warm water(Interior cleaning and gasket cleaning)
- Dishrag or sponge(General cleaning and wiping down surfaces)
- Bucket or towel(Catch water during defrost drain clearing)
- Replacement defrost drain tube or heater element(Optional if the defrost system needs replacement)
- Gasket seal replacement(Optional if door seals are worn)
Steps
Estimated time: 45-90 minutes
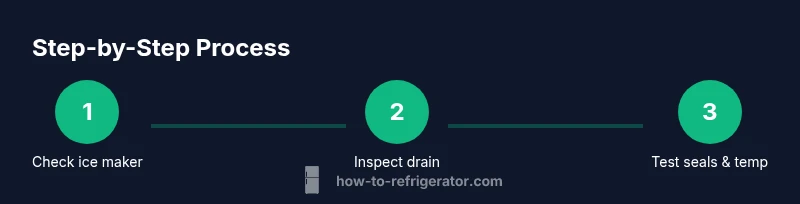
- 1
Power down and unplug the refrigerator
Safely disconnect power to avoid shocks while inspecting internal components. This step is essential before touching any wiring or ice-maker parts. If you have a backup power option, use it to run temporary tests without re-energizing the entire unit.
Tip: Always unplug at the wall outlet, not just the cord from the back of the unit. - 2
Locate the ice-maker and disable it if possible
Find the ice-maker switch or control panel and turn it off. Remove the ice bucket to visually inspect the mold and ejector arm for jams or misalignment. This helps prevent further ice production while you diagnose other causes.
Tip: If there’s no off switch, disconnect the power to the ice-maker module specifically. - 3
Check freezer temperature and door seals
Use a thermometer to verify the freezer is around 0°F (-18°C). Inspect gaskets for cracks or gaps and test door closure by inserting a simple piece of paper to see if it slides out with resistance.
Tip: Small door gaps can significantly increase moisture ingress and frost. - 4
Inspect and clear the defrost drain
Locate the defrost drain path and look for frost blockage. Use warm water and a flexible tool to clear any obstruction. Recheck the drain after the system defrosts to confirm it remains clear.
Tip: Do not force objects through the drain; if it’s stubborn, pause and retry later. - 5
Test water line and ice-maker components
Inspect the water line for kinks or leaks. Check the ice-maker valve for proper operation and ensure the line is fully seated. Replace a faulty valve if leaks or improper closure are observed.
Tip: A slow drip can cause frost along the line and within the freezer. - 6
Review the defrost cycle and seals again
If frost returns, investigate the defrost thermostat and heater element. Confirm the evaporator coil is clear and airflow is not blocked by ice elsewhere in the unit.
Tip: A faulty defrost component requires professional diagnosis if the problem persists. - 7
Reassemble, power up, and monitor
Reconnect power, turn the ice-maker back on, and observe ice production over the next several cycles. If ice continues to form, document findings and plan a follow-up check or service call.
Tip: Patience is key—defrost and airflow issues can take a cycle or two to show clear improvements.
FAQ
What causes a refrigerator to keep making ice?
Common causes include a stuck ice maker, a blocked defrost drain, door seal leaks, and overly cold temperatures. Identifying the exact cause requires checking ice-maker status, defrost pathway, door integrity, and thermostat settings.
Ice buildup usually comes from a stuck ice maker, a blocked drain, or door leaks. Check each area to identify the source.
Will turning off the ice maker stop ice production?
Yes, turning off the ice maker will stop ice production while you diagnose other potential issues. If the ice maker has an on/off switch, use it; if not, unplug the unit briefly.
Turning off the ice maker stops ice production while you inspect other causes.
How often should I defrost my freezer to prevent ice?
Most modern frost-free freezers don’t require manual defrosting, but you should monitor frost buildup and clear any frost on evaporator access as needed. Adhering to a maintenance routine helps prevent ice formation.
Most frost-free freezers don’t need manual defrost often, but regular checks prevent ice buildup.
Can a dirty gasket cause ice formation?
A dirty or worn gasket can allow humid air to enter, causing frost. Clean seals regularly and replace them if they show wear or gaps.
A worn door seal can let in humidity and cause frost formation.
What parts are most likely to fail if ice keeps forming?
Defrost timer/thermostat, ice-maker module, water valve, and door seals are common failure points. A technician can diagnose electrical faults in the control board if needed.
Common failures are defrost components, ice-maker module, water valve, or door seals.
Is it safe to use additives to stop frost?
No. Do not use chemical deicers or additives inside the freezer. Use the recommended cleaning and maintenance steps to resolve ice buildup.
Stick to recommended maintenance; avoid chemical additives inside the fridge.
Watch Video
Top Takeaways
- Identify the ice source and disable or fix as needed
- Clear defrost drain and verify airflow; this is a common fix
- Check door seals and alignment to reduce humid air ingress
- Maintain proper freezer temperature to prevent frost buildup
- Know when to call a professional for electrical or refrigerant issues