How to Make Refrigerator Door Close Automatically
Learn how to fix a refrigerator door that won’t close automatically. This step-by-step homeowner guide covers hinges, gaskets, seals, and alignment to save energy and keep food safely cold.

By the end of this guide, you will fix a refrigerator door that won’t close by inspecting alignment, gasket condition, and magnetic seals, then applying practical fixes you can perform at home. We cover safe testing, common culprits, and when to replace components. Follow these steps to restore a properly sealing door and prevent energy waste.
Why a refrigerator door fails to seal
According to How To Refrigerator, even small misalignments between the refrigerator cabinet and the door can create air leaks that allow cold air to escape and warm air to seep in. This not only wastes energy but can cause the door to fail to latch reliably. A door that doesn't close properly may result from a bent hinge, a worn gasket, a deformed door, or uneven floor support. In most homes, simple adjustments resolve the issue without replacing expensive parts. Start by confirming the door sits squarely against the cabinet and that the magnetic seal aligns with the cabinet edge. If the hinge screws are loose, the door can sag and prevent a proper seal. The How To Refrigerator team has found that gradual wear over years commonly manifests as a door that looks level but still leaks air when closed.
For homeowners, the problem often starts with a quick visual check: is the door visibly wobbly? Do you notice air drafts around the seal when you hover a hand near the edge? If so, you’re likely dealing with an alignment or gasket issue rather than a failed compressor or ice-maker problem. If you want to minimize energy waste and protect your perishables, addressing door closure is a high-leverage maintenance task. How To Refrigerator recommends starting with the simplest fixes first and escalating only when necessary.
note_removed_by_user_0
Tools & Materials
- Screwdriver set (PH2 and flat-head)(Includes Philips #2 and flat-head bits for hinge screws)
- Small carpenter’s level(Check vertical and door alignment for squareness)
- Tape measure(Gauge gaps along the door edge and frame)
- Flashlight(Inspect gasket corners and hinge areas in low light)
- Rubbing alcohol and microfiber cloth(Clean gasket surface and remove debris)
- Replacement door gasket (if worn)(Only replace if cracked, torn, or stiff)
- Door alignment shims (plastic or thin cardboard)(Use to adjust door angle if needed)
- Door closer kit (optional)(If door still won’t close after adjustments)
Steps
Estimated time: 1 hour 30 minutes
- 1
Inspect door alignment and hinges
First, visually inspect the door for level alignment and check hinge screws for looseness. If the door appears to sag or tilt, tighten screws evenly and note any misalignment that may require shims. Use the level to confirm the door is plumb on both sides. A misaligned door often causes the seal to miss the frame and won’t close properly.
Tip: Make sure the fridge is unplugged before removing any screws and avoid over-tightening screws, which can strip the hinge. - 2
Examine the gasket for wear
Close the door slowly and inspect the gasket for cracks, tears, or stiff spots. Run your finger along the gasket edge to feel for uneven sections or dirt. A worn or dirty gasket can prevent a good seal. If dirty, clean with rubbing alcohol and a cloth; if cracked, plan for replacement.
Tip: A flexible gasket should spring back and maintain contact with the cabinet edge when pressed. - 3
Clean and lubricate hinge pivots
With the fridge unplugged, clean the pivot points with rubbing alcohol to remove grime. If hinges feel stiff, apply a small amount of silicone-based lubricant to the pivot area (avoid oil-based lubricants that attract dust). This reduces friction and helps the door close more smoothly.
Tip: Wipe away any excess lubricant to avoid attracting dust into the hinge. - 4
Check door alignment with shims
If the door sits off-square after tightening, place thin shims behind the hinge or adjust the hinge mounting screws to bring the door into proper alignment. Re-check with the level from top to bottom and along both sides to ensure even gaps.
Tip: Start with small shims and test the door after each adjustment to avoid over-correcting. - 5
Assess gasket seating and surface
Make sure the gasket seats evenly along the entire edge. Clean any debris from the groove and ensure the gasket sits flush. If the gasket edge is lifting at corners, this indicates wear or deformation requiring replacement.
Tip: Avoid using solvents that can degrade the gasket material. - 6
Test the door by closing and checking air leaks
Close the door firmly but not slam it, and place a piece of tissue near the seal to observe for air leakage. If air escapes consistently at any point, re-check alignment or gasket seating before proceeding to replacement.
Tip: Iterative testing helps pinpoint exact leak locations. - 7
Replace worn gasket if needed
If the gasket is cracked, torn, or very stiff, remove the old gasket per the manufacturer’s instructions and install a compatible replacement. Ensure the gasket is securely seated around the entire door edge and seals properly against the frame.
Tip: Always use the exact model gasket recommended for your fridge brand. - 8
Consider installing a door closer (optional)
If all else fails, a retrofitted door closer kit can help maintain consistent closure force. This is a more advanced step and may require professional installation if you’re uncomfortable with hardware modifications.
Tip: Only install a closer kit if you’re confident in mounting hardware and sealing integrity.
FAQ
What is the first sign that a fridge door won’t close properly?
Common early signs include visible misalignment, a draft along the door edge, or a squeak when closing. These indicate alignment or gasket issues rather than a failed compressor. Addressing the seal or hinges often resolves the problem.
Look for misalignment or air leakage along the door edge; that usually means you need to check the hinges or gasket first.
Can a dirty gasket cause the door not to seal?
Yes. Dirt or debris can prevent the gasket from seating properly, and a worn gasket will not seal well even if the door closes fully. Clean or replace as needed.
A dirty or worn gasket can stop the door from sealing, so clean it or replace if needed.
Is it safe to adjust hinges or replace gaskets yourself?
Yes, with care. Unplug the fridge before starting, use the right tools, and follow the appliance’s manual. If you feel uncertain, hire a professional.
You can do it yourself if you unplug first and follow the manual, but don’t hesitate to call a pro if unsure.
When should I replace the door gasket?
Replace if the gasket is cracked, torn, or no longer flexible. A replacement gasket is the most reliable fix for a persistent seal problem.
If the gasket is cracked or stiff, replace it for a proper seal.
Do I need to unplug the fridge before starting repairs?
Yes. For any disassembly or gasket work, unplug the unit to prevent electrical shock and damage.
Always unplug the fridge before starting repairs.
What if the door still won’t close after fixes?
If problems persist, you may have a bent door or frame issue, or a faulty magnetic seal that requires professional assessment.
If the door still won’t close after fixes, a professional check is the next best step.
Watch Video
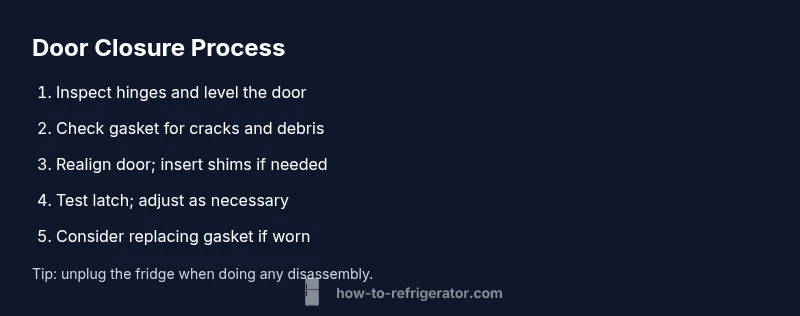
Top Takeaways
- Inspect hinges and level the door first.
- Clean and test the gasket before replacement.
- Use small adjustments and test often to avoid overcorrection.
- Replace worn gaskets to restore a reliable seal.
- Regular maintenance prevents future closure issues.