Repair Refrigerator Door: A Homeowner’s Step-by-Step Guide
Learn how to diagnose and fix common refrigerator door issues—hinges, gaskets, and alignment—with practical, safe steps. This How To Refrigerator guide covers tools, troubleshooting, and maintenance to keep your fridge sealing tight.

By following this guide, you will diagnose and repair a common refrigerator door issue—adjusting hinges, replacing a worn gasket, or realigning the door to restore a proper seal. It covers safety precautions, essential tools, and step-by-step actions so you can fix the problem yourself and prevent recurring door leaks. You’ll know when to seek professional help.
Why Refrigerator Doors Fail and Why Fixing Them Matters
Door performance matters for energy efficiency, food safety, and user convenience. A refrigerator that won’t seal invites warm air in and cold air out, forcing the compressor to run longer and raising electricity use. The How To Refrigerator team sees door issues as a signal that something in the seal, hinge, or alignment is compromised. In most homes, simple adjustments or seal maintenance resolve the problem. A properly repaired door not only keeps foods fresher but can extend the life of the appliance. Regular attention also helps you catch developing problems before they become expensive repairs. In short, fixing a troublesome door improves efficiency, reduces frost buildup, and saves money over time. Start with a calm, methodical assessment rather than guessing. If any step feels unsafe or requires removing the refrigerator from the wall, pause and seek professional help—your safety comes first, and working around energized appliances can cause shocks or damage.
Common Symptoms and What They Indicate
Common symptoms point to different root causes. A door that won’t shut fully or leaves a visible gap often means the gasket is worn or misaligned. Condensation or frost buildup along the door frame can indicate a fridge is pulling warm air in, or the door is not sealing evenly. A sagging door that looks lower on one side may reflect loose or warped hinges. If the door makes a loud thud when closing, you may have loose mounting screws. In some homes, a sticky door that’s hard to close suggests debris in the hinge or an irritated latch. The How To Refrigerator team notes that many issues originate from wear on door seals and hinges due to regular use or accidental bumps. By identifying the symptom, you guide the repair path—realigning the door, tightening screws, or replacing a gasket. Addressing the symptom promptly helps maintain temperature consistency and reduces energy waste.
Quick Diagnostic Checklist
- Close the door slowly and observe how it lines up with the cabinet edges.
- Inspect the door gasket for cracks, tears or stiffness by sliding a finger along its surface.
- Check the top and bottom hinges for looseness or sagging; note any misalignment.
- Confirm the door sits plumb using a small level or a straight edge held against the door frame.
- Listen for air leaks around the gasket when you gently press the door shut.
- Look for frost or condensation along the door frame, which signals a seal problem or misalignment. By walking through this checklist, you’ll know which area to address first—hinges, alignment, or gasket.
Tools and Safety Precautions
Before you start, unplug the refrigerator to avoid electrical shock and to prevent starting the compressor during work. Clear the area around the fridge and lay down a protective mat or old towel to catch any spills. Wear safety glasses if you’ll be handling sharp screws or removing panels. Have a basic toolkit ready: screwdrivers (Phillips and flat-head), an adjustable wrench, a level, and replacement parts if needed. If you encounter stubborn screws or a bent door frame, proceed with caution and consider professional help. How To Refrigerator recommends keeping a small camera or smartphone handy to document screw positions before removal, which makes reassembly easier and reduces the risk of incorrect placement.
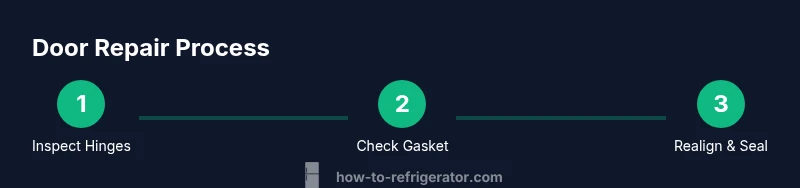
Step-by-Step Diagnostic: Inspect Hinges, Door Gasket, and Alignment
- Power down and prep: unplug the fridge, remove items from the door shelves, and clear space for work. 2) Inspect hinges for looseness or wear: look for bent posts, stripped screws, or sagging doors. 3) Check door alignment: ensure the door sits square against the cabinet and the gap around all edges is even. 4) Examine the gasket: feel for cracks or stiffness; run a light along the seal to spot tears. 5) If hinges show looseness, tighten screws in a cross pattern to evenly distribute load. 6) If the gasket is damaged, plan for replacement. 7) Re-seal and test by closing door firmly and observing whether it seals cleanly. If the door remains misaligned after adjustments, you may need to reset hinge positions or call a technician. It helps to take photos at each stage to guide reassembly and ensure proper alignment.
Step-by-Step Repair: Realign Door and Tighten Hinges
- Remove the top hinge screws only enough to relieve tension; keep track of the screw positions. 2) Adjust the door so it sits evenly against the cabinet frame; use a level to verify; insert shims if necessary to correct tilt. 3) Tighten hinge screws in a cross pattern to distribute load and prevent new misalignment. 4) Recheck the door for consistent gaps, then close and reopen to confirm it seats squarely. 5) If the door still drifts, repeat alignment, paying close attention to both upper and lower hinge positions. 6) After final alignment, tighten all screws fully and test the seal by pressing along the gasket. Pro tip: keep a small ruler to check the gap height at the top corners for uniformity.
Step-by-Step Repair: Gasket and Door Seal Replacement
- Remove the existing gasket by loosening the retaining screws or gently pulling it free from the channel. 2) Clean the gasket channel with a clean cloth and mild detergent to remove dirt and residue that could hinder a proper seal. 3) Place the new gasket into the channel, starting at a corner and working along the edge to ensure it sits flush. 4) Reinsert screws or retainer clips and tighten evenly to avoid twists in the gasket. 5) Close the door and check for a uniform seal around all four edges; adjust as needed. 6) Run a simple test by closing the door on a piece of paper; if the paper slides out with little resistance, the seal is adequate. 7) Rewarm the area and monitor energy use for the next 24 hours, ensuring no drafts at the door.
When to Replace the Door or Ice Maker Components
If the door is warped, hinges are bent beyond simple tightening, or the frame is severely damaged, patching may not yield reliable results. In such cases, replacing the door or related components (like the damper or mounting brackets) might be more cost-effective in the long run. Ice maker components that interact with door access may also influence door performance, so consider evaluating these parts if the door still doesn’t seal after gasket replacement. If you’re unsure, consult a professional technician who can assess structural damage and advise on replacements rather than temporary fixes. In all cases, prioritizing a proper seal will improve efficiency and reduce energy costs.
Maintenance Habits to Prevent Future Issues
Establish a routine inspection every 3–6 months to check hinges, gaskets, and door alignment. Wipe seals clean to prevent debris buildup that can impede sealing. Avoid slamming the door and ensure shelves are loaded evenly to prevent weight-induced misalignment. Keep a small bottle of silicone-based gasket conditioner on hand for rubber seals if the manufacturer approves it. Finally, ensure the door seal is fully seated after any cleaning or rearrangement to prevent micro leaks that undermine efficiency. Regular maintenance reduces the likelihood of major repairs and keeps your fridge operating efficiently.
Troubleshooting Quick Wins and Common Pitfalls
Quick wins include tightening loose screws, cleaning the gasket, and realigning the door with a level. Common pitfalls to avoid are overtightening screws (which can crack hinges or warp the door) and using a damaged gasket that fails to seal. Always unplug before starting work, label screws, and confirm the door seals cleanly across all edges after any adjustment. If you encounter persistent leaks after attempting these steps, consider replacing the gasket or consulting a professional for a more thorough inspection.
Tools & Materials
- Phillips-head screwdriver(For hinge screws on both top and bottom hinges)
- Flat-head screwdriver(For channel screws or prying loose gasket edges)
- Adjustable wrench(If hinge nuts or bolts require tightening)
- Level(To check door alignment precisely)
- New door gasket(Only if the existing gasket is cracked or stiff)
- Towel or absorbent mat(Protects floor and catches spills)
- Mild dish soap(For cleaning gasket channels and surfaces)
- Camera or smartphone(Document screw positions before removal)
Steps
Estimated time: 60-90 minutes
- 1
Power down and prep
Unplug the refrigerator and clear a workspace. Move items away from the door and lay down a towel to catch spills. This ensures safety and prevents accidental damage as you inspect hinges and seals.
Tip: Take a quick photo of screw positions before loosening anything. - 2
Inspect hinges for wear
Check for loose screws, bent posts, or sagging doors. If screws are stripped, replace them with appropriately sized ones and avoid over-tightening.
Tip: Tighten screws in a cross pattern to distribute load evenly. - 3
Check door alignment
Place a level along the top edge to confirm the door sits square. If gaps are uneven, you may need to shim the hinge or adjust mounting positions.
Tip: Small shims at the hinge can correct tilt without full door removal. - 4
Test the gasket
Inspect the gasket for cracks or stiffness; run your finger along the surface to assess pliability. A damaged gasket should be replaced.
Tip: Clean the gasket channel to ensure a smooth seal after replacement. - 5
Realign or tighten hinges
Loosen, adjust, and re-tighten hinge screws to achieve square alignment. Recheck with the level and door gap.
Tip: Avoid overtightening; it can warp the door or strip holes. - 6
Replace gasket if needed
If the gasket is cracked or torn, remove the old gasket and install the new one, ensuring a snug fit around the entire door perimeter.
Tip: Start at a corner and work along the edge to avoid kinks. - 7
Final seal test
Close the door firmly and observe the seal all the way around. Ensure there is even contact without leaks and monitor for any drafts.
Tip: A paper test can help confirm a proper seal: the paper should resist sliding out with moderate pressure.
FAQ
Can I fix a refrigerator door without removing the door from the cabinet?
Many issues can be addressed without removing the door, including hinge tightening, alignment, and gasket checks. Removing the door is only needed for major repairs or warped frames.
Most fixes can be done with the door in place, but severe damage may require removal.
What should I do if the door still doesn’t seal after tightening hinges?
If tightening hinges doesn’t help, inspect the gasket for wear or tears and consider replacement. Reassess door alignment to ensure a uniform seal.
Check the gasket and alignment if tightening fails.
Is it safe to unplug a refrigerator to work on the door?
Yes. Unplug the unit to prevent shocks and keep the compressor from running unexpectedly while you work.
Unplug before starting for safety.
How long does a gasket replacement typically take?
Gasket replacement usually takes about 15–30 minutes if you have the part ready and follow the steps carefully.
Expect about half an hour.
When should I call a professional?
If the door is warped, hinges are damaged beyond simple tightening, or there’s visible frame damage, consult a professional to prevent further harm.
Call a pro for warped frames or major damage.
Can a misaligned door lead to energy waste?
Yes. A poor seal can allow cold air to escape and warm air to enter, increasing energy use.
A bad seal can raise energy bills.
Watch Video
Top Takeaways
- Inspect hinges and gasket first.
- Align the door before replacing seals.
- Test the seal after adjustments to confirm effectiveness.
- Regular maintenance prevents costly repairs.