How to adjust refrigerator temperature control digital – A homeowner’s guide
Learn to safely and accurately adjust your fridge’s digital temperature control. This step-by-step guide covers testing, recommended ranges, sensor checks, and maintenance to keep foods fresh and energy-efficient. Practical, expert guidance from How To Refrigerator.

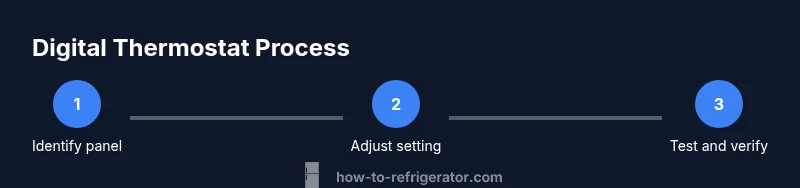
To answer how to adjust refrigerator temperature control digital, locate the control panel, power the unit, and use the + and - buttons to set the target temperature. Allow 24 hours for stabilization and verify with a thermometer. If the display shows an error, consult the manual or call a technician. Start with the manufacturer-recommended range and avoid drastic changes.
Understanding digital temperature control in modern refrigerators
Digital temperature controls in today's refrigerators replace knob settings with electronic displays and sensor-driven targets. The control panel reads temperatures from internal sensors and adjusts the cooling cycle to maintain a stable environment for perishables. If you're searching for how to adjust refrigerator temperature control digital, this guide will walk you through safe, tested steps. Understanding how these sensors work makes it easier to adjust the thermostat accurately, especially when dealing with fluctuating room temperatures or frequent door openings. The How To Refrigerator team emphasizes patience: small adjustments followed by rest periods produce reliable results, not overnight miracles. By recognizing that digital controls respond differently from mechanical dials, homeowners can avoid overshooting and wasting energy. This guide uses practical steps and real-world examples to help you optimize your fridge's performance while protecting food safety.
According to How To Refrigerator, digital thermostat adjustments benefit from a methodical approach. When you understand the logic behind sensor readings, you’ll make targeted changes instead of random fiddling. Expect incremental results and confirm with real measurements rather than relying solely on the display. This mindset reduces energy waste and lowers the risk of frozen foods or spoiled produce.
note2nullsBtnName2nullsTools2null},
bodyBlocks[1]
How digital sensors influence cooling and reading the display
Digital sensors measure air temperature near stored items and relay data to the control board. The display shows the target temperature and may indicate mode (normal, vacation, or quick chill). Not all models show the same units (F or C), so verify you know which unit your unit uses. Because sensors can drift or become affected by door openings, it's essential to verify the thermostat setting with an accurate thermometer. Inconsistent readings are often the result of blocked vents, obstructed airflow, or a malfunctioning sensor. How To Refrigerator analysis shows that even small sensor discrepancies can lead to a noticeable difference in food safety and energy use. If your display cycles or changes by itself, it may be time to calibrate or service the control board.
note2nullsBtnName2nullsTools2null},
bodyBlocks[2]
Safety and power-down guidelines before adjustments
Safety comes first when working with temperature controls. Before touching any internal components, unplug the refrigerator and ensure the area is dry. Do not attempt electrical repairs unless you are trained. If your model requires removing a panel, use the appropriate screwdriver and keep track of screws in a labeled container. After working on the interior, let the unit remain unplugged for a few minutes to dissipate any residual charge. Reconnect power only after you have completed the inspection and reassembled any removed parts. These precautions help prevent electric shock and component damage. The How To Refrigerator team stresses following the manufacturer’s instructions for your specific model and avoiding shortcuts that could compromise food safety or warranty terms.
note2nullsBtnName2nullsTools2null},
bodyBlocks[3]
Setting target ranges and stabilization guidance
Most household refrigeration guidelines advocate keeping the fridge in a temperature window that prevents bacterial growth while maintaining energy efficiency. For many homes, this means a safe zone where the air in the fridge is cool enough to slow microbial growth but not so cold that liquids freeze or produce dehydrates. When adjusting digital controls, make small changes—usually one degree at a time—and then wait to observe the effect over 12–24 hours. Use a reliable fridge thermometer placed in the middle shelf away from vents to confirm actual temperature. If you notice frequent cycling or temperature drift, check door seals, interior airflow, and the location of the thermometer sensors. According to How To Refrigerator analysis, even minor calibration tweaks can improve consistency and reduce energy use over time. Always document your adjustments for future reference and to help troubleshoot if temperatures drift again.
note2nullsBtnName2nullsTools2null},
bodyBlocks[4]
Common problems and troubleshooting steps
Digital temperature controls simplify operation but can present new issues. If the display shows an error, consult your manual for codes and recommended resets. Common culprits include dirty sensors, blocked vents, or a loose control panel connection. Start with basic checks: ensure vents are unobstructed, clean the condenser coils if reachable, and verify the door seals form a tight gasket. If the temperature fails to stabilize after a correction, recheck the setting, allow 24 hours, and test again with the thermometer. When anomalies persist, consider professional service or a thermostat replacement. The How To Refrigerator team notes that many problems are resolved by reseating connectors or calibrating the sensor within the panel. Be mindful of warranty terms if you suspect a faulty control board.
note2nullsBtnName2nullsTools2null
Tools & Materials
- Phillips screwdriver(for removing screws on the control panel or inner access cover)
- Flat-head screwdriver(optional if panel screws are recessed or stuck)
- Fridge thermometer with probe(place in the center shelf away from vents to measure actual temperature)
- Notebook and pen(log initial settings and subsequent adjustments)
- Masking tape or labels(label wires or screws when removing components)
- Owner’s manual (digital copy acceptable)(model-specific instructions or codes)
Steps
Estimated time: 60-90 minutes for setup and adjustment; 24 hours for full stabilization.
- 1
Unplug the refrigerator
Disconnect power to safely access the control panel and internal components. Do not touch metal parts while the unit is plugged in. If you have a double-wall outlet, ensure the other connected devices are de-energized so you don’t overload the circuit.
Tip: Use dry hands and keep a small space clear for tools. - 2
Open the front panel or interior access cover
Carefully locate and open the cover that exposes the digital control panel. Some models hide the panel behind a decorative door; others mount it on the front, inside, or on the ceiling. Keep track of all screws and place them in a labeled container.
Tip: Label each screw with its original location to ease reassembly. - 3
Remove the access screws to expose the thermostat
Use the screwdriver to remove the screws securing the control cover. Gently lift the cover to reveal the digital controls, sensors, and wiring. Do not touch any wiring unless you are certain it’s disconnected.
Tip: If you see loose wires, take a photo before unplugging any connector. - 4
Identify the temperature setting control and its range
Find the digital input area (often labeled with +/−, arrows, or a numerical display). Note the current setting and the units (C or F). Knowing the range helps prevent overshooting during adjustment.
Tip: Document the current setting before making changes. - 5
Adjust the temperature setting by a small amount
Make a small change (usually one notch or one degree). Digital controls can respond slowly, so avoid multiple large changes at once. Observe the display after adjusting.
Tip: Avoid jumping more than one degree at a time. - 6
Close the panel and reattach screws
Secure the control cover back in place and reinsert any wiring you may have disconnected. Ensure all connectors are snug and screws are tightened to prevent panel movement.
Tip: Double-check that no tools are left inside the cabinet. - 7
Plug the refrigerator back in and power it up
Reconnect the power source and verify the display lights up. Ensure the unit starts cooling and there are no unusual sounds.
Tip: If the screen remains blank, recheck connections or consult the manual. - 8
Wait for stabilization and monitor with a thermometer
Allow 12–24 hours for the new setting to stabilize. Check the thermometer reading at the center shelf, away from vents.
Tip: Limit door openings to maintain a stable temperature. - 9
Evaluate and adjust again if needed
If the thermometer readings remain outside the target range, make another small adjustment and repeat the stabilization period. Keep a log of changes.
Tip: Small refinements yield reliable results over time.
FAQ
What is the ideal temperature range for a standard refrigerator with a digital thermostat?
Most guidelines suggest keeping the fridge around 1–4°C (34–39°F). Use a thermometer to confirm your unit stays within this range and adjust gradually as needed.
Aim for about 1 to 4 degrees Celsius and verify with a thermometer.
My digital display shows an error code. What should I do?
Refer to your user manual for the exact code meaning. If codes persist after a reset, contact the manufacturer or a qualified technician.
Check the manual for the error code and consider professional help if it won’t clear.
How long does it take for a new setting to take effect?
Digital controls typically stabilize within 12–24 hours. Check with a thermometer after this period before making further adjustments.
Usually takes about a day to settle; verify with a thermometer.
Can calibration affect energy use?
Yes. Proper calibration helps maintain safe temperatures without excess cooling, reducing energy use.
Calibrating correctly can save energy and keep food safe.
When should I replace a faulty digital thermostat?
If repeated adjustments fail to achieve the target temperature or your model shows persistent errors, consider replacement or professional service.
If it won’t hold temperature, replacements or service may be needed.
Is it safe to modify the thermostat myself on all models?
Some models allow basic adjustments, but others require professional service. Always consult the manual and consider warranty terms before proceeding.
Check the manual; if in doubt, call a professional.
Watch Video
Top Takeaways
- Start with a small adjustment and verify with a thermometer.
- Use a fridge thermometer to measure actual temperature.
- Allow 12–24 hours for changes to stabilize before further tweaks.
- Keep doors closed as much as possible during adjustment and testing.
- Document each change to simplify future calibrations.