How to Adjust Whirlpool Refrigerator Temperature
A homeowner's guide to setting the right fridge temperature on Whirlpool units. Learn where to find controls, how to choose a safe range, how to verify readings with a thermometer, and tips for stable cooling and energy efficiency.

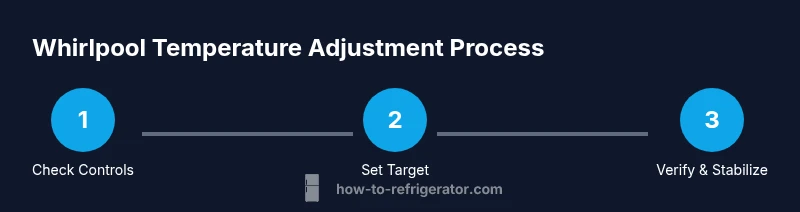
If you’re looking for how to adjust refrigerator temperature whirlpool, locate the temperature control on the fridge (digital panel or dial), set to the mid-range, and wait 24 hours for stabilization. Verify with a fridge thermometer, aiming for about 37°F (3°C) in the main compartment. How To Refrigerator notes that model variation means always check your manual for model-specific ranges.
Why Temperature Control Matters for Whirlpool Refrigerators
If you’re looking for how to adjust refrigerator temperature whirlpool, this guide helps homeowners balance safety, cost, and freshness. The right fridge temperature reduces the risk of bacterial growth while preventing ice buildup and excessive energy use. In practice, small changes can yield reliable results, especially when you verify temperatures with a dedicated fridge thermometer. The How To Refrigerator team emphasizes following model-specific ranges and using real readings rather than guessing. Consistency is the goal: a stable temperature protects perishable foods, preserves texture and flavor, and extends the life of the appliance.
How Whirlpool Temperature Systems Work
Whirlpool refrigerators often separate temperature control for the fridge and the freezer, with a sensor-based system in newer models and a dial in older ones. The goal is to keep the perishable zone within a narrow band while ensuring the freezer maintains reliable ice production and frozen texture. Understanding this separation helps explain why turning the fridge knob up or down can affect freezer performance, and vice versa. Your maintenance plan should account for door openings, load, and how the thermostat interacts with the condenser and fan.
Locate and Read the Temperature Settings on Your Whirlpool Model
Whirlpool configurations vary by model. Some units feature a digital display mounted on the door or interior wall, while others use a small dial near the top edge of the interior. Start by reviewing the user manual for the exact temperature ranges and the recommended set points for your model. If your unit uses Fahrenheit, you can convert to Celsius if desired. For accuracy, place a thermometer in the middle of the fridge away from the door and vents during testing, and avoid relying solely on the display readings.
Safe Target Ranges and How to Set Them
Most guidelines for safe refrigeration describe a temperature range that slows bacterial growth and preserves foods. A mid-range setting on many Whirlpool models provides a balance of reliability and energy efficiency. If your unit has a separate freezer control, make sure both compartments are configured to compatible levels that support overall cooling harmony. After adjusting, attempt to minimize door openings and verify that gaskets seal properly since leaks are a common cause of temperature drift.
Common Pitfalls and Troubleshooting Tips
Even with the right setting, several factors can throw off readings. A poorly sealed door, blocked vents, or overfilled shelves impede airflow and create warm spots. Frost buildup or condensation around gaskets can indicate moisture intrusion or a failing defrost timer. If temperatures don’t stabilize after a full day, recheck door seals, rearrange items for better airflow, and inspect the condenser coils for dust or debris. If problems persist, consult service options for a model-specific diagnosis.
How to Verify Temperature with a Thermometer and Fine-Tune
Place a fridge thermometer in the middle shelf away from the door and wait at least 24 hours before taking a reading. Record the temperature and adjust in small increments (one degree at a time) if readings are too high or too low. For models with digital displays, monitor trends over a 24-hour period and then re-adjust if needed. Verify temperatures in multiple locations to ensure even cooling, since hotspots near vents can mislead single-point readings.
Tools & Materials
- Fridge thermometer(Place on a middle shelf away from vents for accurate readings.)
- Whirlpool model manual or online guide(Model-specific ranges vary; use the manual to confirm target temps.)
- Soft cloth(Use to wipe condensation and keep gaskets clean during testing.)
- Notebook or digital log(Record readings and adjustments for monitoring.)
Steps
Estimated time: 24-48 hours
- 1
Identify the temperature controls
Open the fridge and locate the temperature control panel. If you have a dial, note its position; if you have a digital display, find the fridge setting. Consult the manual for model-specific locations. The goal is to know exactly which control adjusts the fridge temperature (not only the freezer).
Tip: If the location isn’t obvious, check the interior ceiling panel or the right side wall for a vent and control lamp. - 2
Choose a safe target temperature
Decide on a mid-range target based on your manual. For most households, it’s a comfortable balance that keeps foods safe and reduces energy use. If you’re unsure, start at the manufacturer’s recommended mid-point and adjust gradually.
Tip: Always prefer gradual adjustments—one notch or one degree at a time—to avoid overshoot. - 3
Adjust the fridge and set the freezer if applicable
If your unit has separate fridge and freezer controls, adjust the fridge first to the mid-range, then adjust the freezer to maintain balance. Do not over-tighten one compartment at the expense of the other.
Tip: Keep a 1–2 degree buffer between compartments to avoid compressor strain. - 4
Wait for stabilization
After changing settings, avoid opening doors excessively. Allow 24 hours for the temperature to stabilize and readings to settle. Use a fridge thermometer to confirm the actual temperatures.
Tip: During the waiting period, note any door-open spikes and reload habits that might skew readings. - 5
Test and fine-tune with readings
Take multiple readings in different spots after stabilization. If readings are off, adjust in one-degree increments and recheck after 6–12 hours. Don’t make large jumps.
Tip: Record dates, times, and readings to spot trends over several days. - 6
Document and implement a maintenance plan
Keep a simple log of settings and thermometer readings. Schedule periodic checks and verify door seals, vent alignment, and coil cleanliness to prevent future drift.
Tip: Set a quarterly reminder to inspect gaskets and coils for dust buildup.
FAQ
What is the recommended refrigerator temperature for Whirlpool models?
Whirlpool models are typically best at a mid-range setting; always consult the user manual for your specific model to confirm the exact range. Use a thermometer to verify readings.
Most Whirlpool fridges do best at a mid-range temperature; check your manual for the exact range and verify with a thermometer.
Why is food not cold enough after I adjust the temperature?
Check door seals, airflow, and vent openings. Avoid overfilling and ensure the fridge isn’t in direct sunlight or near a heat source. If issues persist, a service check may be needed.
Check seals and airflow; avoid overfilling. If still not cooling, you may need service.
Can I adjust temperature without emptying the fridge?
Yes. You can change the setting without removing all items. Just avoid blocking vents and use a thermometer to confirm readings.
Yes, you can adjust without emptying; just don’t block vents and verify with a thermometer.
How long should I wait after changing the setting?
Wait at least 24 hours for full stabilization, then recheck with a thermometer and adjust further if needed.
Give it a day to settle, then recheck.
What if my Whirlpool has only a freezer control?
If only the freezer has a control, adjust it to its recommended range while keeping the fridge at a mid-range level, then verify both with a thermometer.
If only a freezer control exists, adjust accordingly and test with a thermometer.
Watch Video
Top Takeaways
- Identify the correct control for your model and set mid-range.
- Allow 24 hours for temperature stabilization after changes.
- Verify with a dedicated fridge thermometer for accuracy.
- Document readings to maintain consistent cooling over time.