How to Adjust Refrigerator Temperature Control
Learn how to adjust your refrigerator temperature control safely and accurately. This guide covers dial and digital controls, how to verify temps with a thermometer, and practical steps to keep food fresh while using energy efficiently.

You can adjust your refrigerator temperature control to improve cooling if your food is warming, shelves are foggy, or temperatures seem uneven. Most models use a dial or digital setting inside the fresh-food compartment. Use a thermometer to verify actual temps before and after changes. This guide explains safe steps and recommended ranges.
What the Temperature Control Does
Your refrigerator's temperature control is the thermostat that sets how cold the interior becomes. In most models, the control compares the actual temperature inside the compartments to the set point. If the temperature rises above the set point, the compressor engages; if it drops below, the compressor turns off. Dial controls usually use a numbered scale, while digital controls offer discrete levels or numeric targets. Knowing which type you have will help you translate what you read on the dial into a safe temperature. According to How To Refrigerator, starting with a basic understanding of how your control works helps prevent over-tightening settings that can freeze items or waste energy. This simple awareness is the foundation for accurate adjustments and reliable results.
Understanding Temperature Ranges for Refrigerators
Most standards for fresh-food storage place the ideal fridge temperature in the mid-30s Fahrenheit (around 3–5°C) to keep perishables at their best without freezing. The freezer is typically set at 0°F (-18°C). Temperature can vary slightly by model, door configuration, and how often you open the door. When you adjust, small changes can yield noticeable differences within 12–24 hours. To protect food safety, never rely on a single thermometer reading; take several readings at different internal locations. The FDA emphasizes keeping perishable foods below 40°F to avoid the temperature danger zone, while the USDA notes that proper refrigeration supports food safety and quality. For energy efficiency and reliability, aim for a stable setting rather than constant rapid changes. How To Refrigerator analysis shows that gradual adjustments and monitoring lead to the most consistent results.
Tools and Preconditions Before You Start
Before touching any control, gather a few essentials to ensure a safe, effective adjustment. A thermometer designed for fridge/freezer zones helps verify actual temps rather than relying on the dial alone. Have the processor’s manual nearby because some models require model-specific steps or have peculiar dial mappings. A notebook or digital note is handy for recording starting temps, target ranges, and the dates of changes. If you have a frost-free or smart refrigerator, review any on-screen guidance for recommended ranges. With the right preparation, you’ll avoid overshooting the target and reduce the risk of food spoilage during the adjustment window.
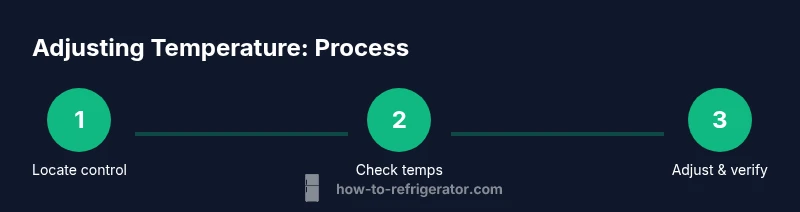
Step-by-Step Quick Reference for Most Models
This section provides a concise, model-agnostic approach to adjust temperatures using common fridge configurations. If your unit uses a dial, translate the current position into expected temperatures; if digital, look at the numeric target. Always verify with a thermometer after each adjustment. The Tweaks below assume a typical two-compartment refrigerator with a separate freezer and fresh-food area. If your model has a single dial for both sections, follow the manufacturer’s mapping for split settings. The goal is to reach a stable, safe temperature range with minimal swings between readings. Remember to re-check after at least 12 hours and to document every change so you can backtrack if needed.
Troubleshooting Common Issues After Adjusting Temperature
If you notice lingering warm spots, condensation, or uneven cooling after an adjustment, don’t panic. Common issues include door seal leaks, improper air flow due to overpacking, or blocked vents between the fridge and freezer compartments. Check for blocked air channels, clean coils if accessible, and ensure the door seals are intact and gasket-free of tears. If the exterior environment is hot or the fridge is placed near a heat source, you may see temporary temperature fluctuations. Re-check temps after another 12–24 hours, and revert to your previous setting if readings worsen.
Maintenance Tips to Keep Temperatures Stable
Stable temperatures demand regular maintenance. Clean the condenser coils (usually at the back or beneath the unit) every 6–12 months to ensure efficient operation. Make sure the door seals seal firmly when closed and avoid overfilling the shelves, which can impede airflow. Keep the fridge away from direct sunlight and heat vents. Regularly verify thermometer readings and calibrate if your model supports calibration checks. Consistent cleaning and sensible loading help prevent temperature drift over time.
Safety Considerations When Adjusting Temperature
Always unplug the fridge if you are inspecting or cleaning the interior or components that affect temperature control. Use proper lighting to avoid mis-reading the dial or digital display in low-light conditions. If the thermostat or sensor appears damaged, stop and contact a professional—adjusting a faulty sensor can cause dangerous temperature fluctuations. Never set a temperature too low in an attempt to compensate for warm spots; this wastes energy and can cause food to freeze or spoil.
Documenting Changes and Verifying Results
Create a simple log of starting temperatures, target settings, and any adjustments you make. Record the exact time you check temperatures and the ambient room temperature, since heat exchange with the environment can influence readings. Re-check temperatures after 12–24 hours for each adjustment and adjust again if necessary in small increments. A well-kept log helps you maintain a stable range over weeks and provides a helpful reference if you need to call for service later.
Tools & Materials
- Thermometer (fridge/freezer)(Digital or analog; place in central shelf away from doors)
- Owner's manual for your refrigerator model(Contains model-specific dial mappings and sensor locations)
- Clean cloth(For wiping condensation or spills near the control panel)
- Notebook and pen(Record baseline temps and subsequent changes)
Steps
Estimated time: 45-90 minutes total, plus 12-24 hours wait between adjustments
- 1
Locate the temperature control
Find whether your unit uses a dial, a digital panel, or a touchscreen. Read the model’s mapping to understand what each setting represents. If the manual isn’t handy, look for a label near the dial or on the inside wall.
Tip: If the control is behind a crisper drawer, carefully remove it to access the panel. - 2
Check current temperatures with a thermometer
Place the thermometer in the center of the fresh-food compartment and another in the freezer. Wait 5–10 minutes for a stable reading, then note both temperatures. This establishes your baseline before making changes.
Tip: Take multiple readings at different times of day to account for door openings. - 3
Make a small adjustment
If the fresh-food area is above 40°F, move the dial or level up by one increment; if the freezer isn’t at 0°F, adjust toward colder by one step. Avoid large changes in one go.
Tip: Record the exact setting you used so you can revert if needed. - 4
Wait and recheck
Allow 12–24 hours for the temperatures to stabilize after any adjustment. Read both compartments again with the thermometer and compare to the baseline.
Tip: Keep the door closed as much as possible during the waiting period. - 5
Adjust the other compartment if necessary
If the fresh-food tray is within range but the freezer reads above 0°F, fine-tune only the freezer setting by one notch and recheck after 12–24 hours.
Tip: Small, gradual changes reduce the risk of overcooling or frost buildup. - 6
Document changes
Log each change, the reading times, and ambient room temperature. This helps you track performance and supports future troubleshooting.
Tip: Keep a running chart on a calendar or a notes app for easy reference. - 7
Test with typical loads
Place items that reflect your normal usage (leftovers, dairy, beverages) and see if cooling remains consistent over 24–48 hours.
Tip: Avoid stacking items in a way that blocks air vents. - 8
Decide on a final setting
Based on readings and real-world performance, set the dial to a stable point within the recommended range and maintain it. If issues persist, consider professional service.
Tip: If you suspect sensor or thermostat failure, don’t rely on trial and error—call a technician.
FAQ
Why isn’t my fridge cooling after adjusting the dial?
A non-responsive dial can indicate a faulty thermostat, sensor, or control board. If there’s no change after several adjustments and waiting periods, consult a technician. Do not force settings beyond the model’s recommended range.
If the dial doesn’t seem to affect temperature, the thermostat or control board may be faulty; wait after adjustments and call a technician if readings don’t change.
What is the ideal refrigerator temperature?
For most households, aim for 37–40°F (3–4°C) in the fresh-food compartment and 0°F (-18°C) in the freezer. Use a thermometer to verify, since readings can vary by model and placement.
Aim for about 37 to 40 degrees in the fridge and 0 in the freezer; verify with a thermometer.
Can temperature adjustments affect energy use?
Yes. Colder settings generally increase energy use. Keeping temperatures near the recommended ranges balances safety, food quality, and efficiency. Avoid chasing absolute cold by oversized adjustments.
Lower temps use more energy; stay near recommended settings for safety and efficiency.
What should I do if the fridge is not cool enough after adjustment?
Check door seals for leaks, ensure vents aren’t blocked, and verify coils are clean. If the issue persists, it may require service for a faulty thermostat or sensor.
If temps stay high, check seals, vents, and coils; persistent issues may need a pro.
Is it safe to adjust the temperature while the fridge is running?
Yes, most adjustments can be made while the unit is powered. However, avoid opening the door frequently during the adjustment window to prevent temperature fluctuations.
You can adjust while it runs; just limit door openings during testing.
Watch Video
Top Takeaways
- Test temperatures with a thermometer before adjusting
- Make small, incremental changes
- Wait 12–24 hours between adjustments
- Maintain a simple log of settings and readings
- Aim for fridge 37–40°F and freezer 0°F for safety